Become a premium member to remove ads
.jpeg.1055a681937c1194da5f042f551cfeb4.jpeg)
.jpeg.a32e8623e880061de71a1bab2cd45ad1.jpeg)
MILKANDOREOS
-
Posts
82 -
Joined
-
Last visited
-
Days Won
4
3 Followers
.thumb.jpg.a7753e134d2b5760e071e1faf1f5d593.jpg)


About MILKANDOREOS

-
Rank
Sergeant
Mood

- Currently Feeling Drunk
-
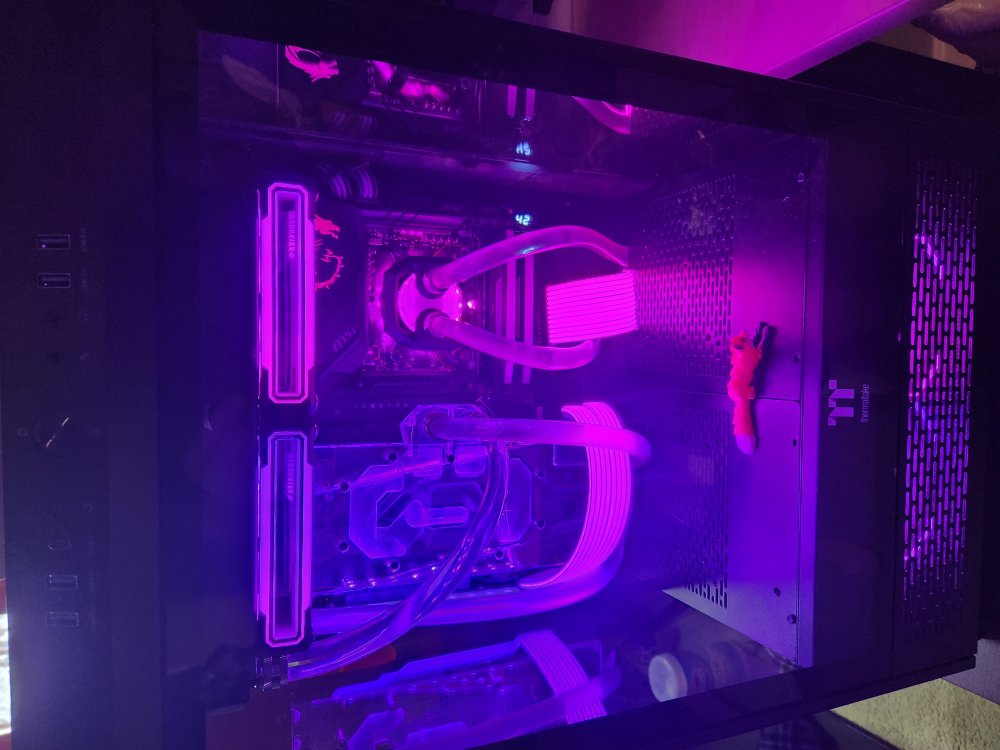
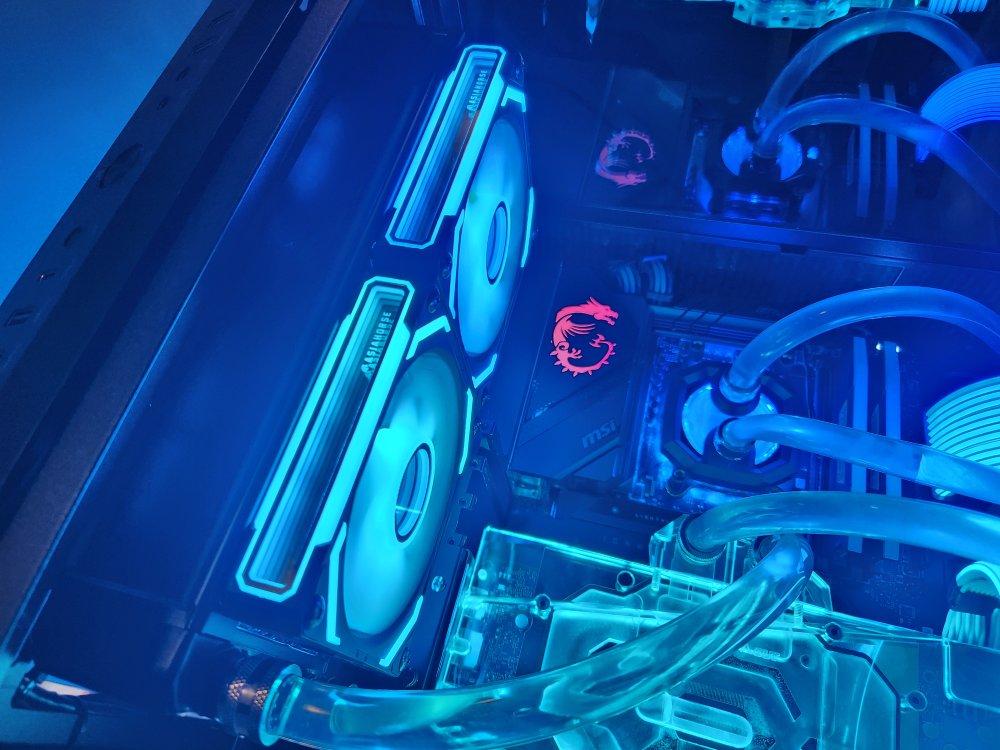
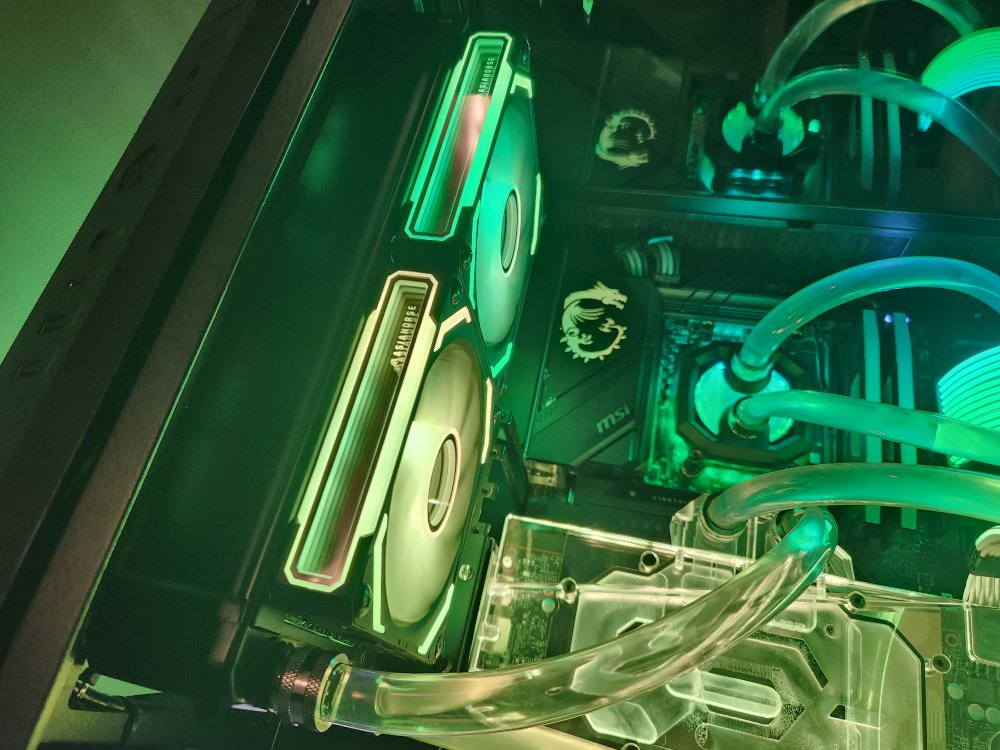
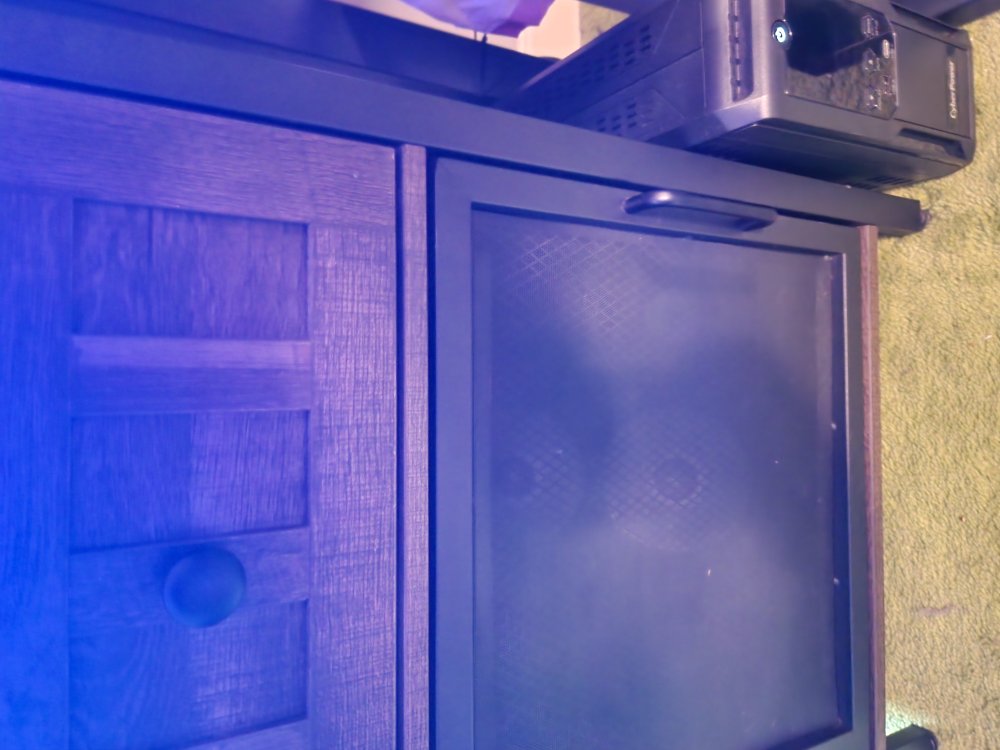
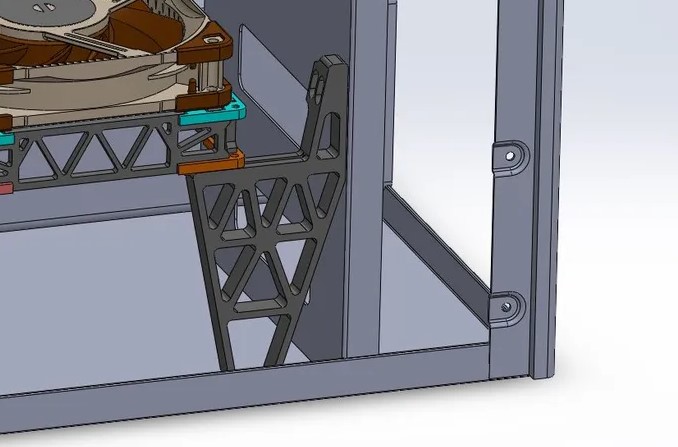
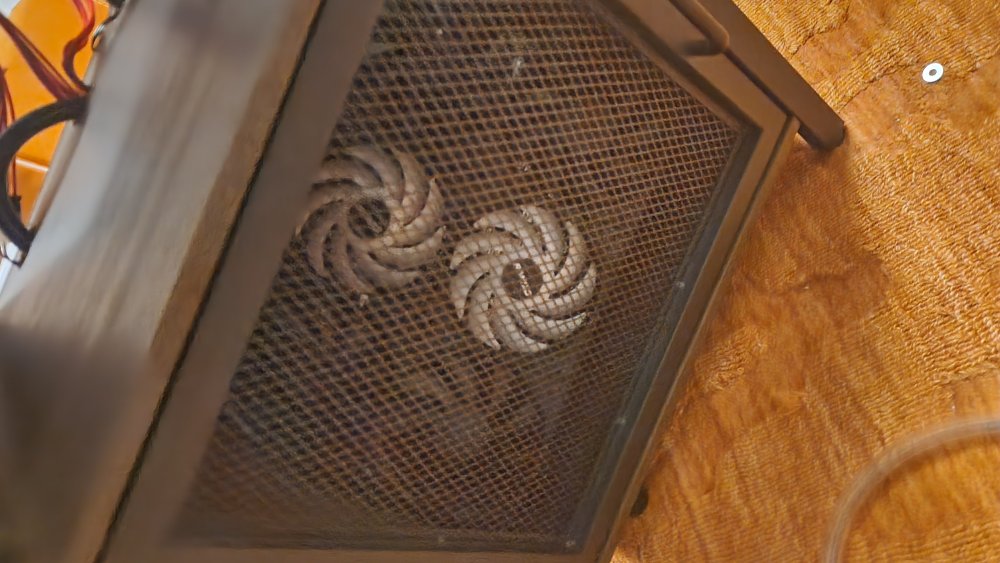
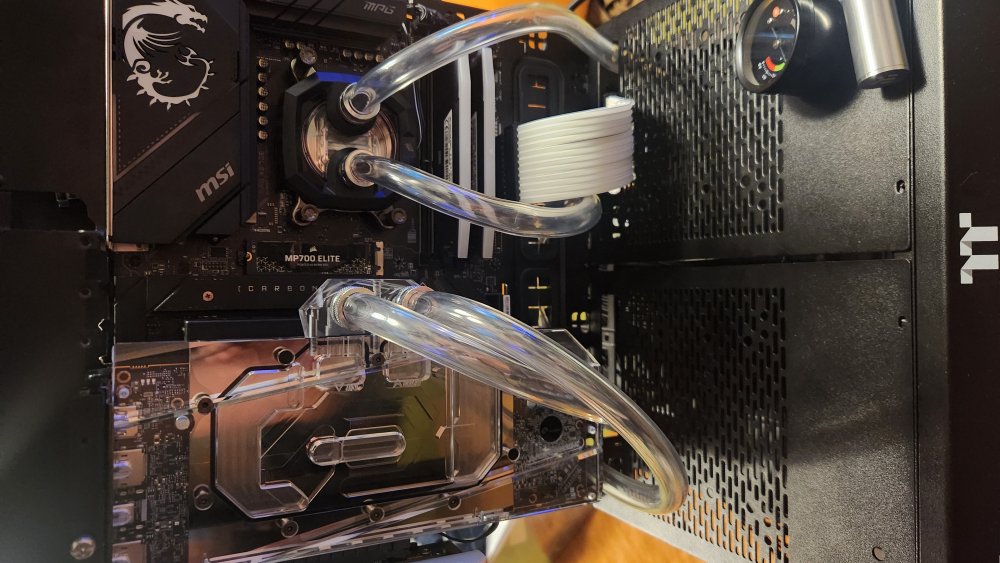
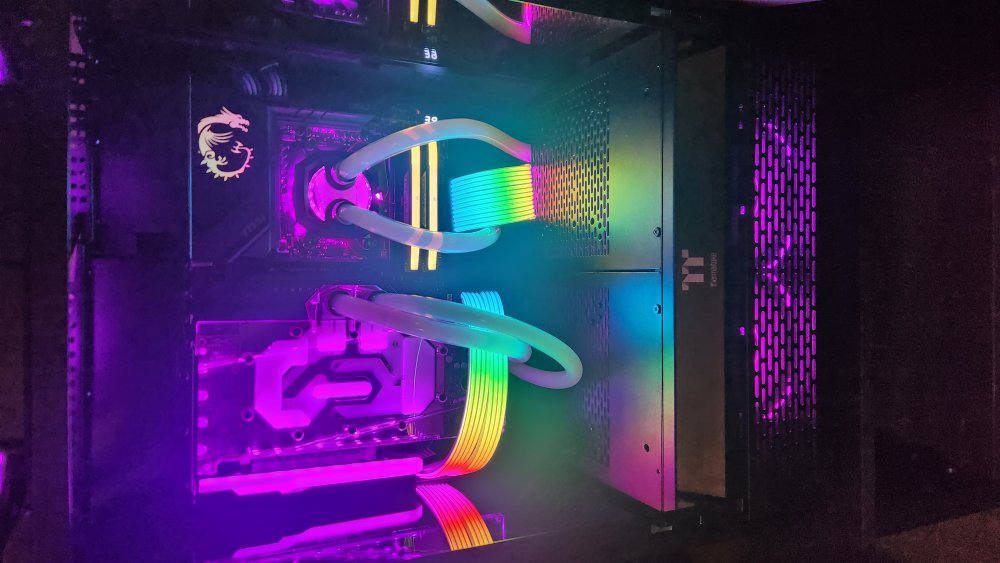
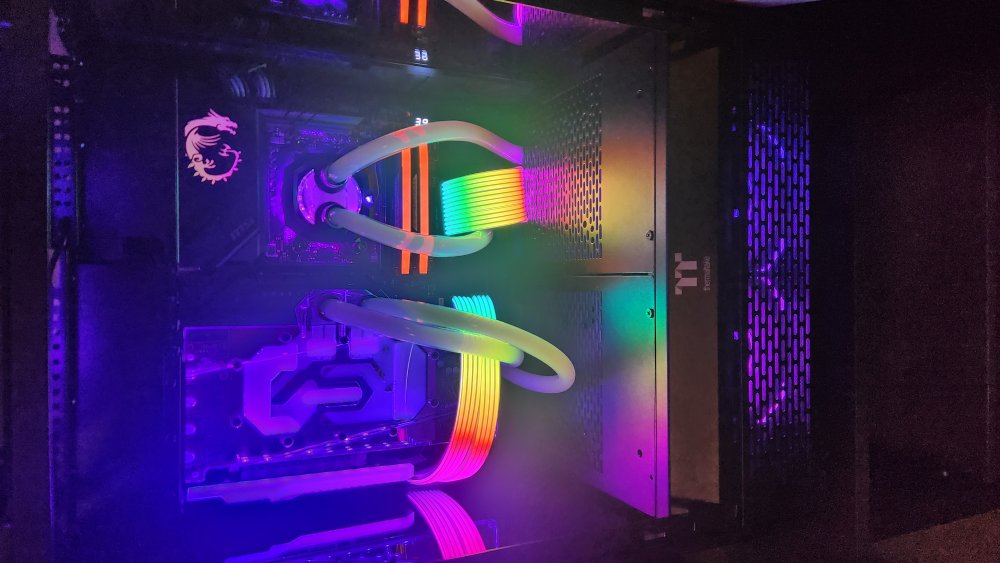
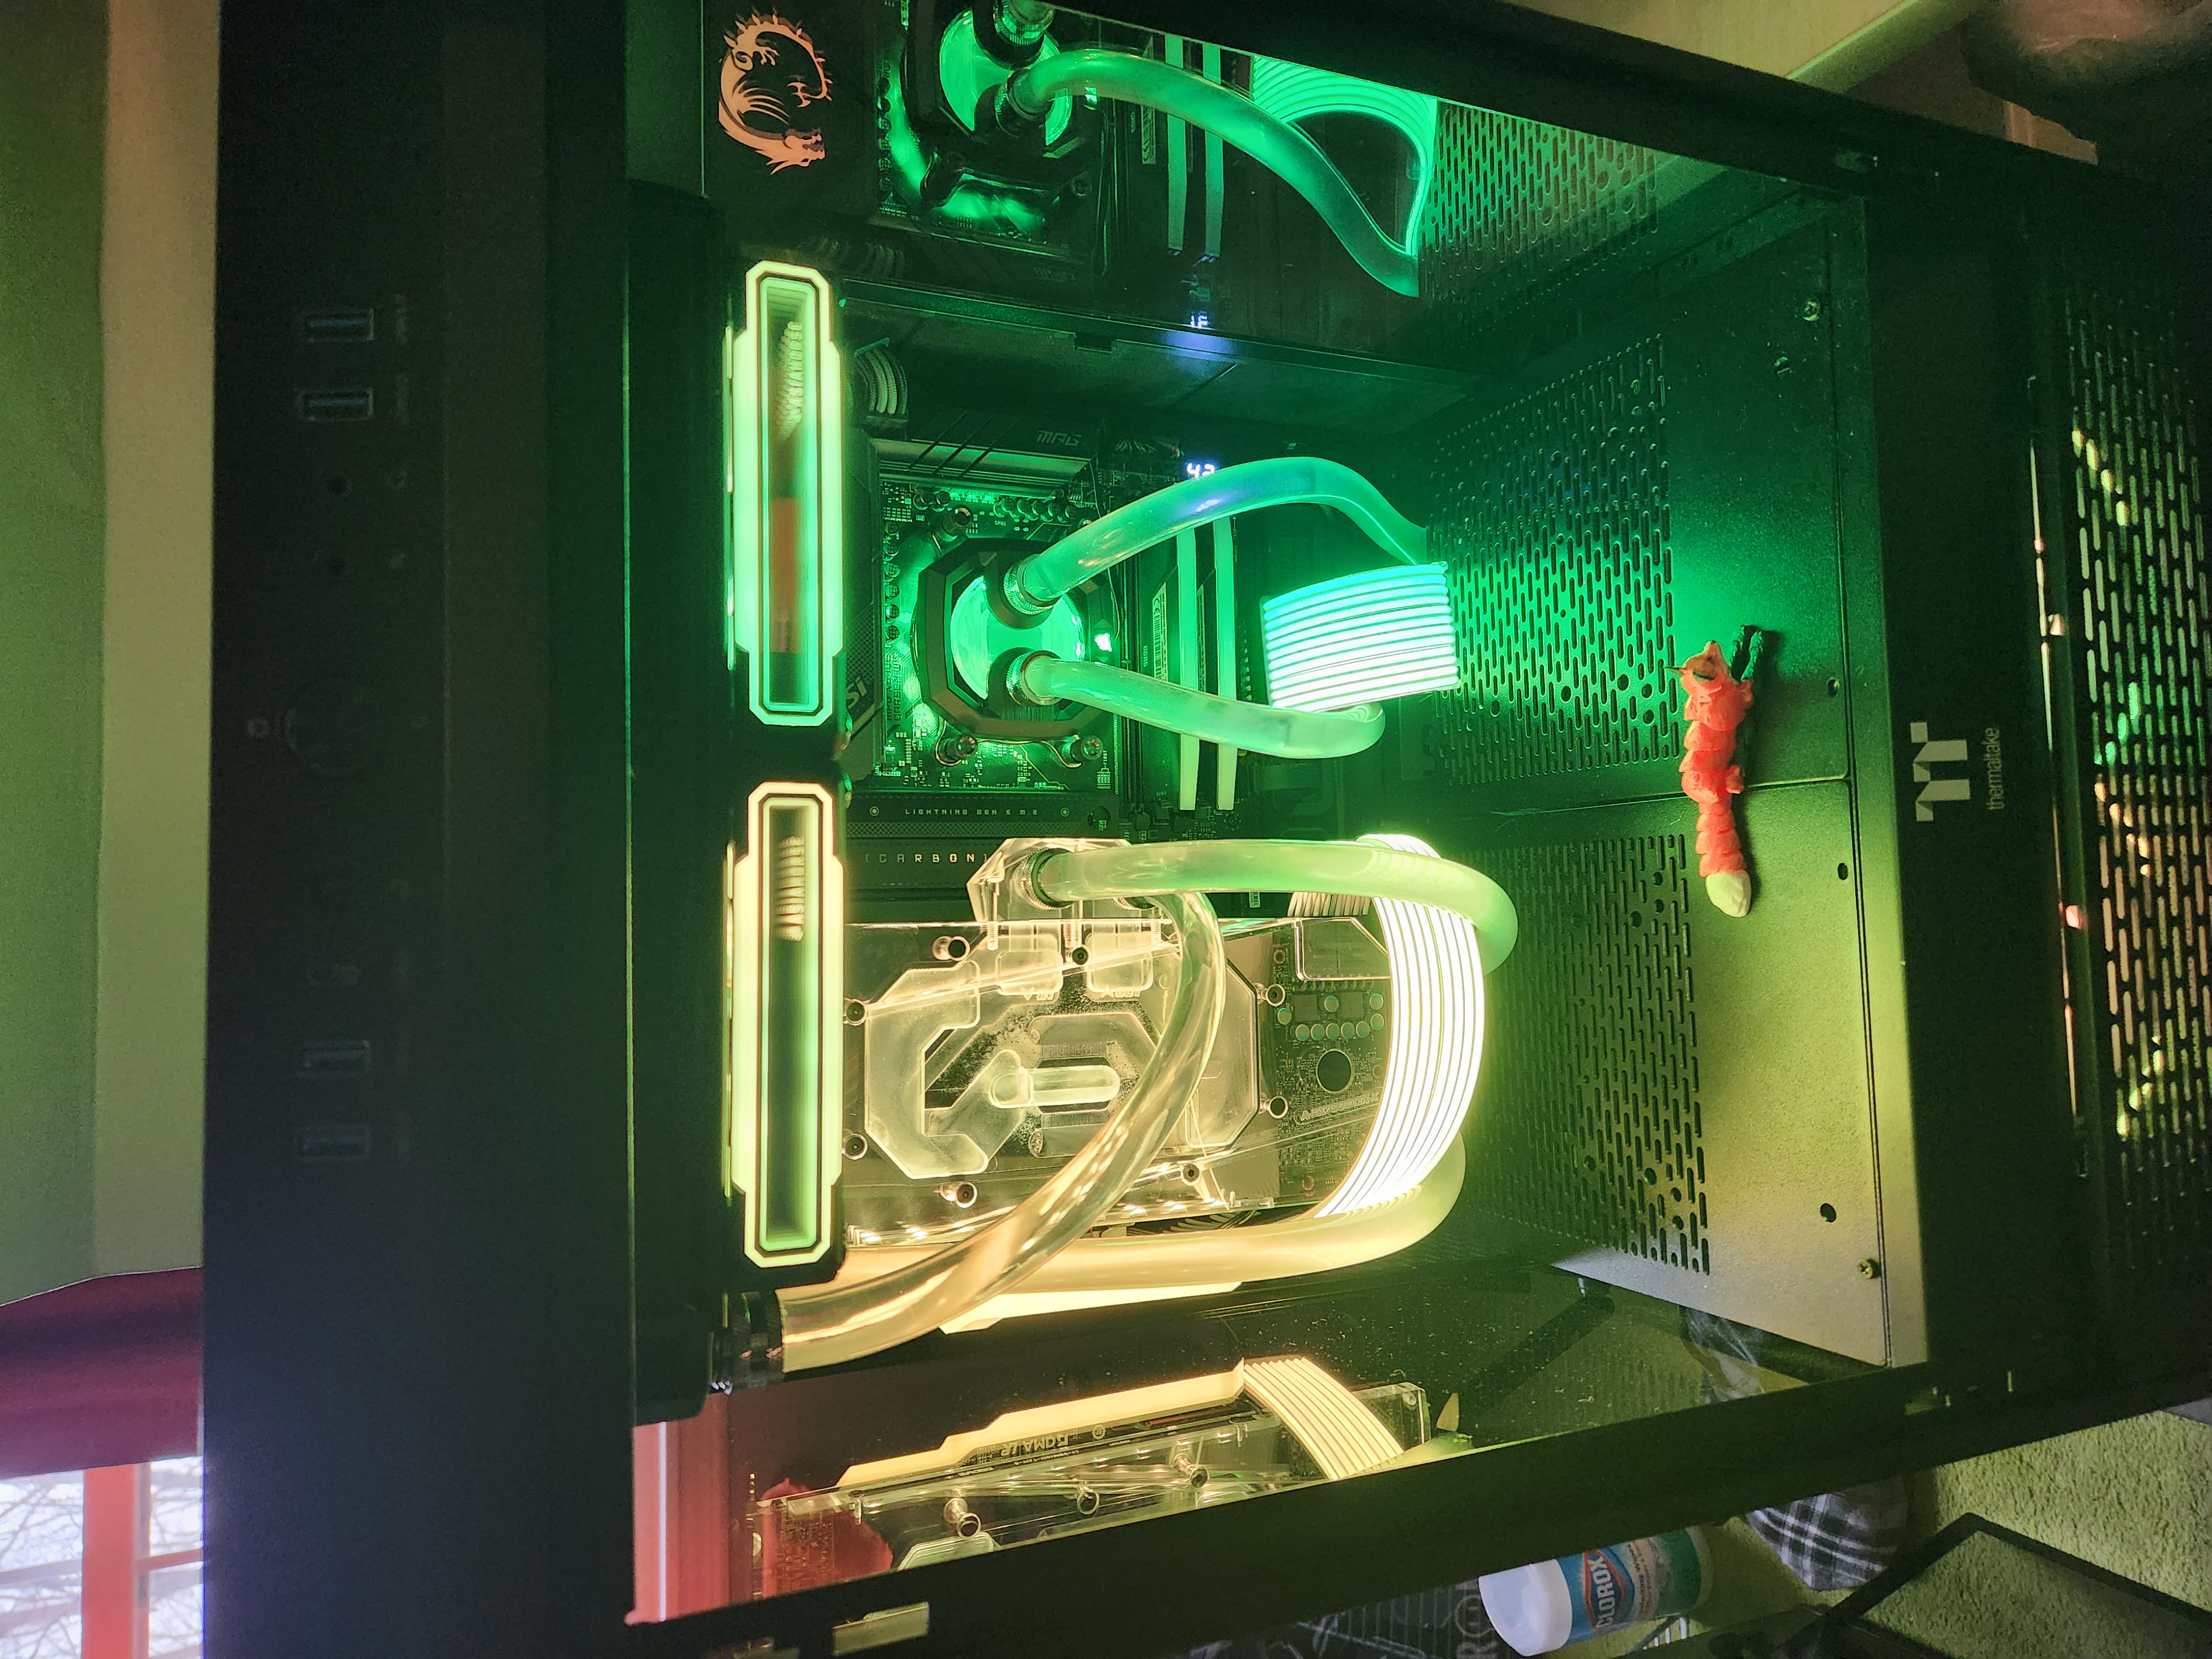
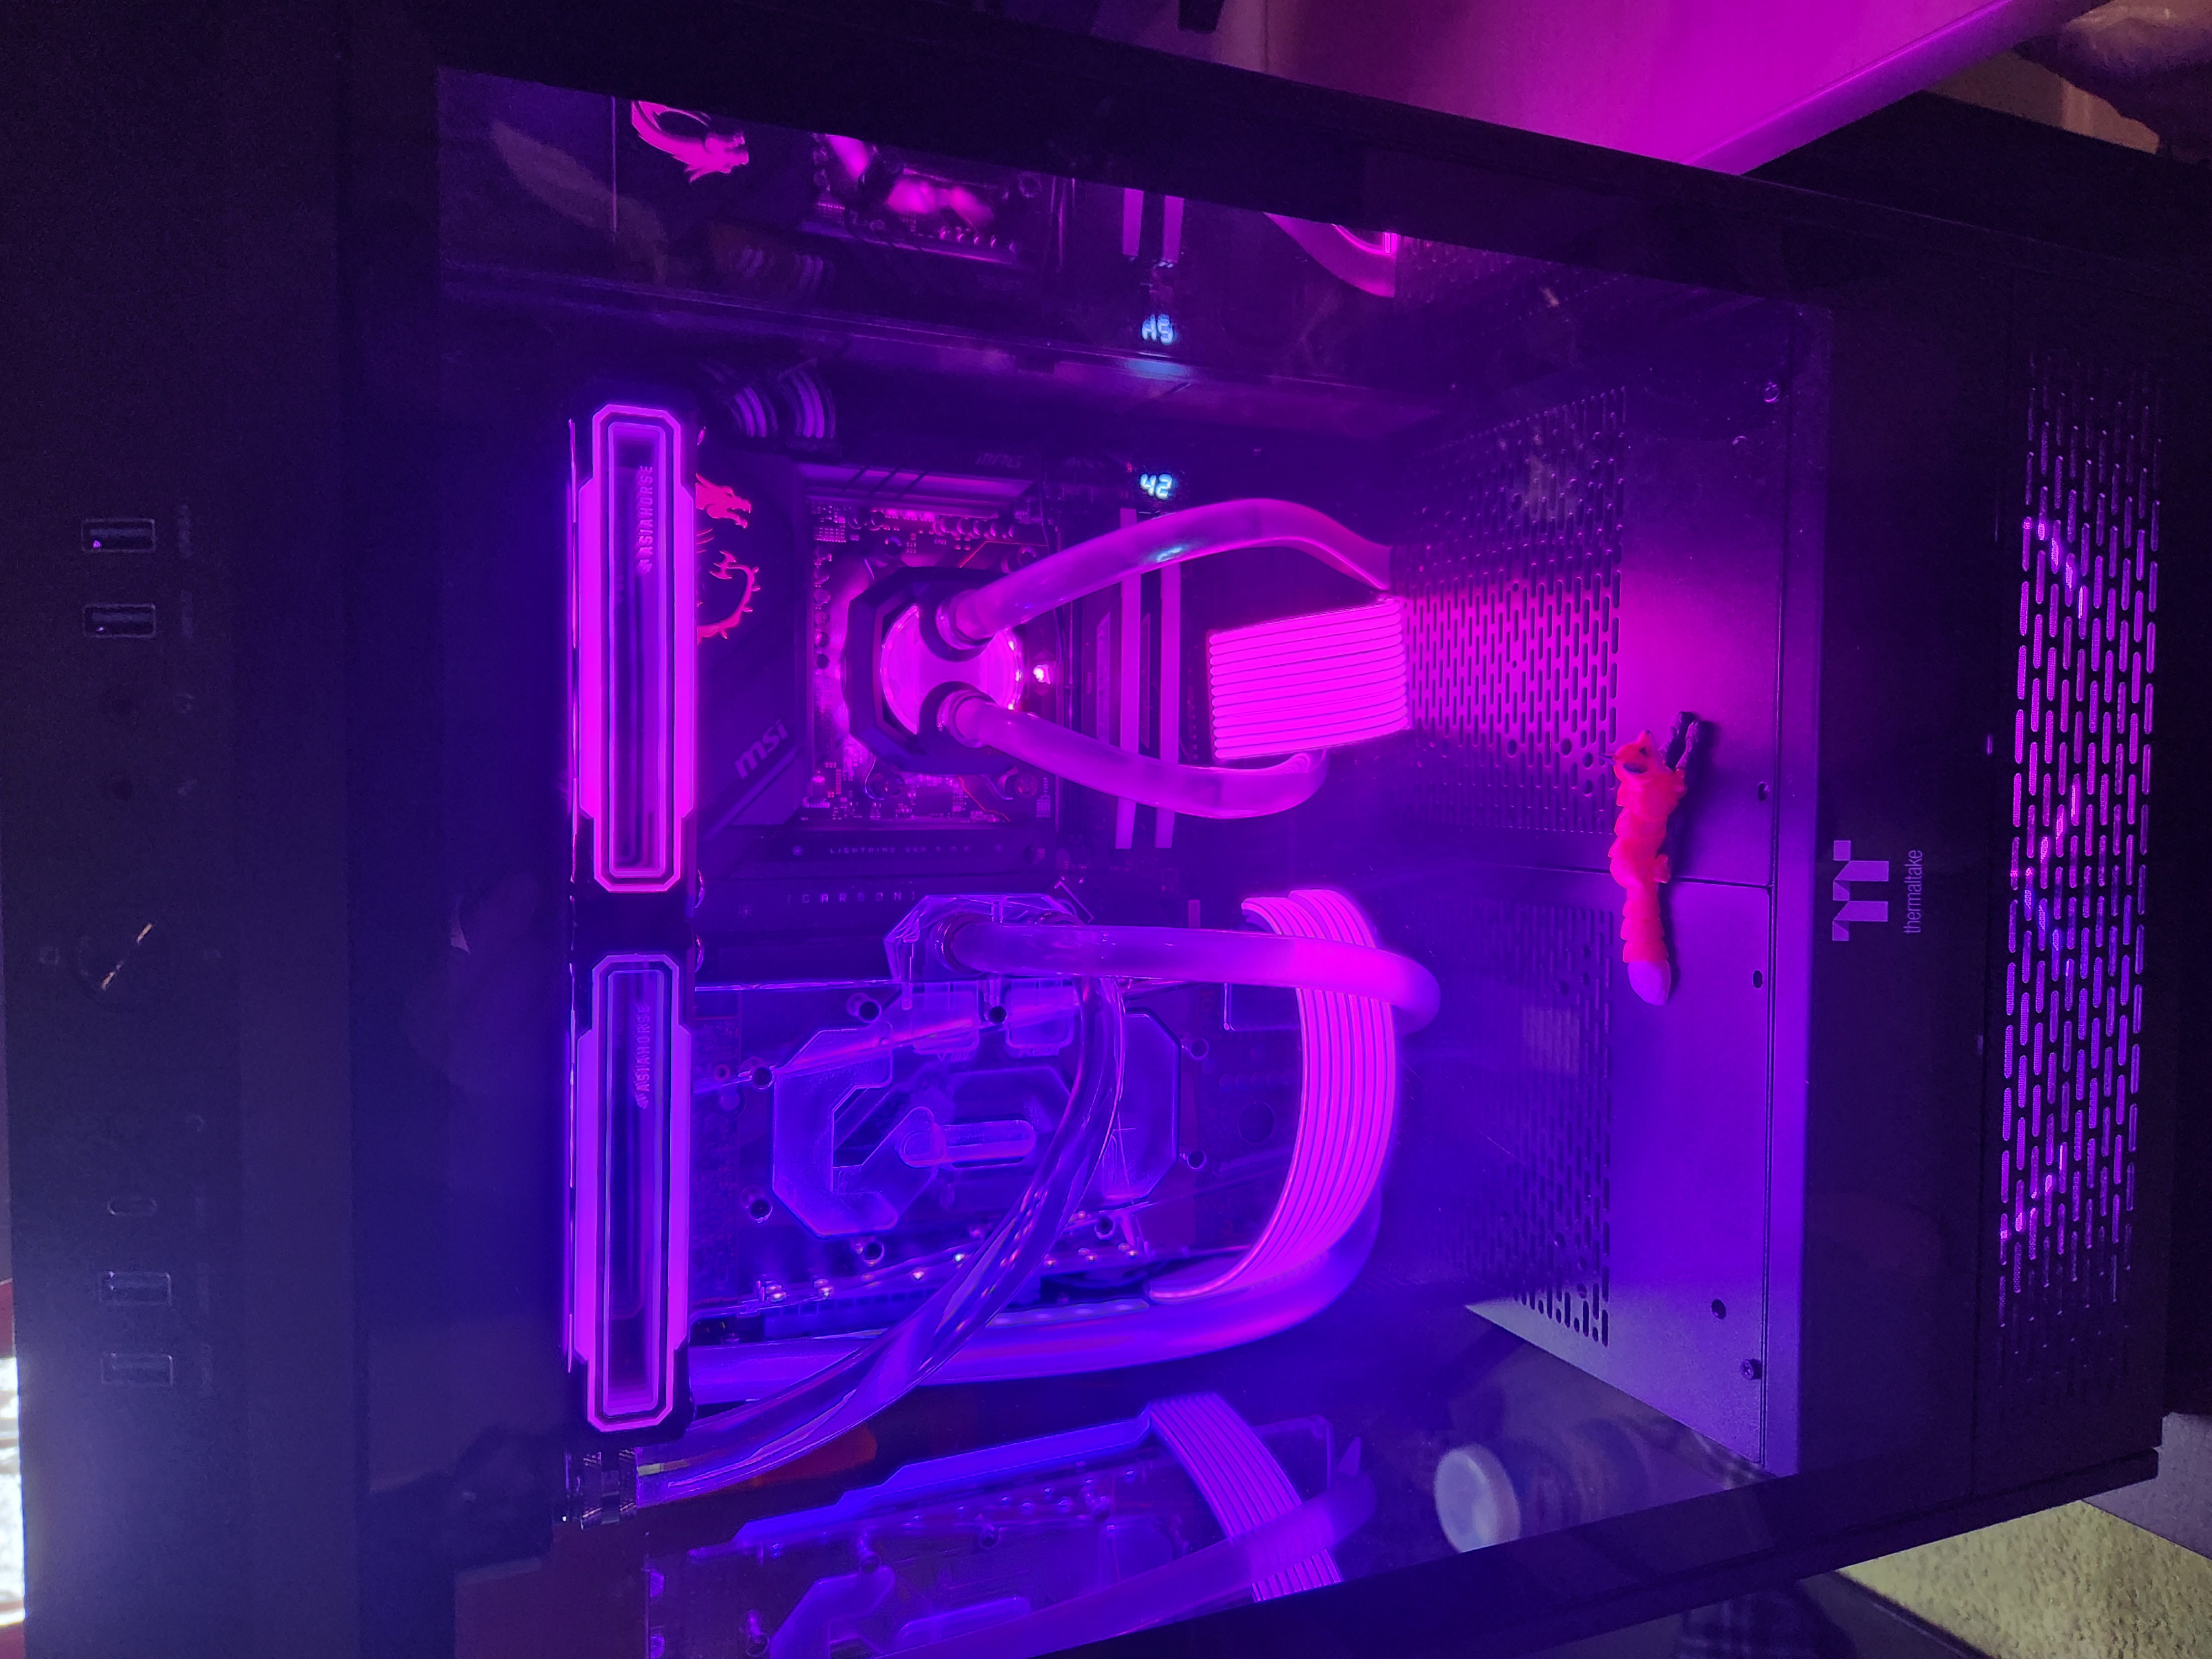
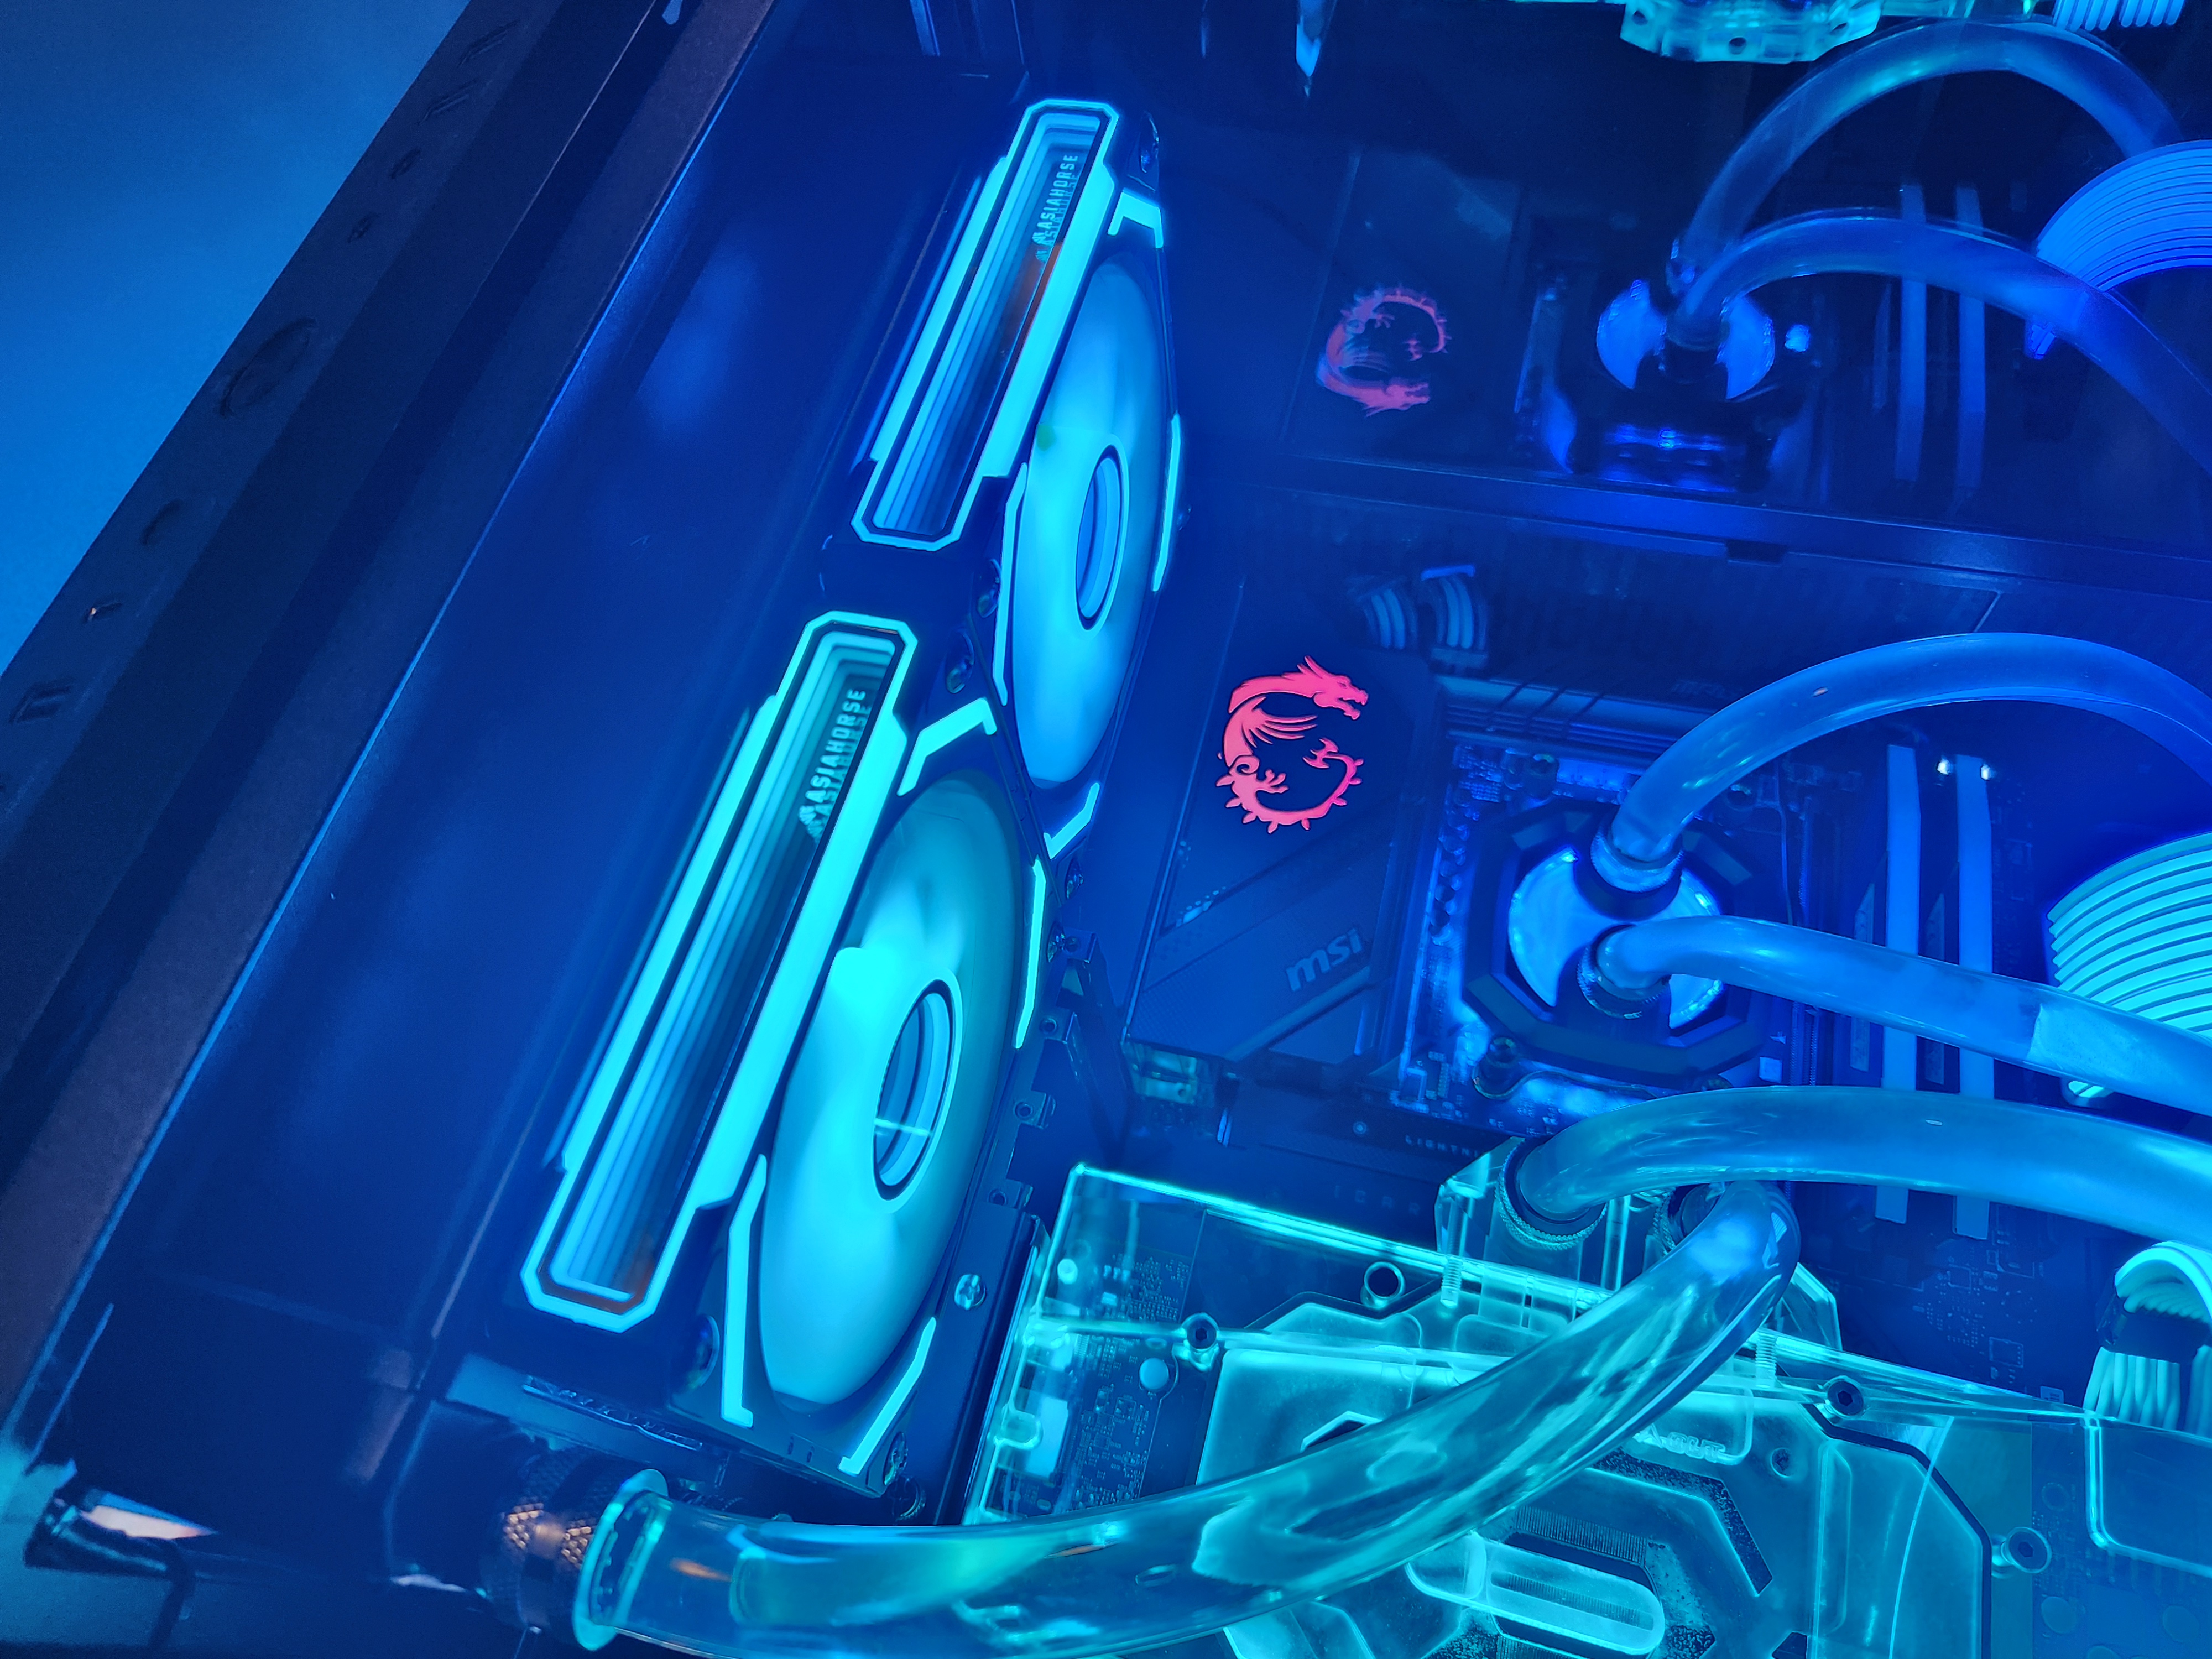
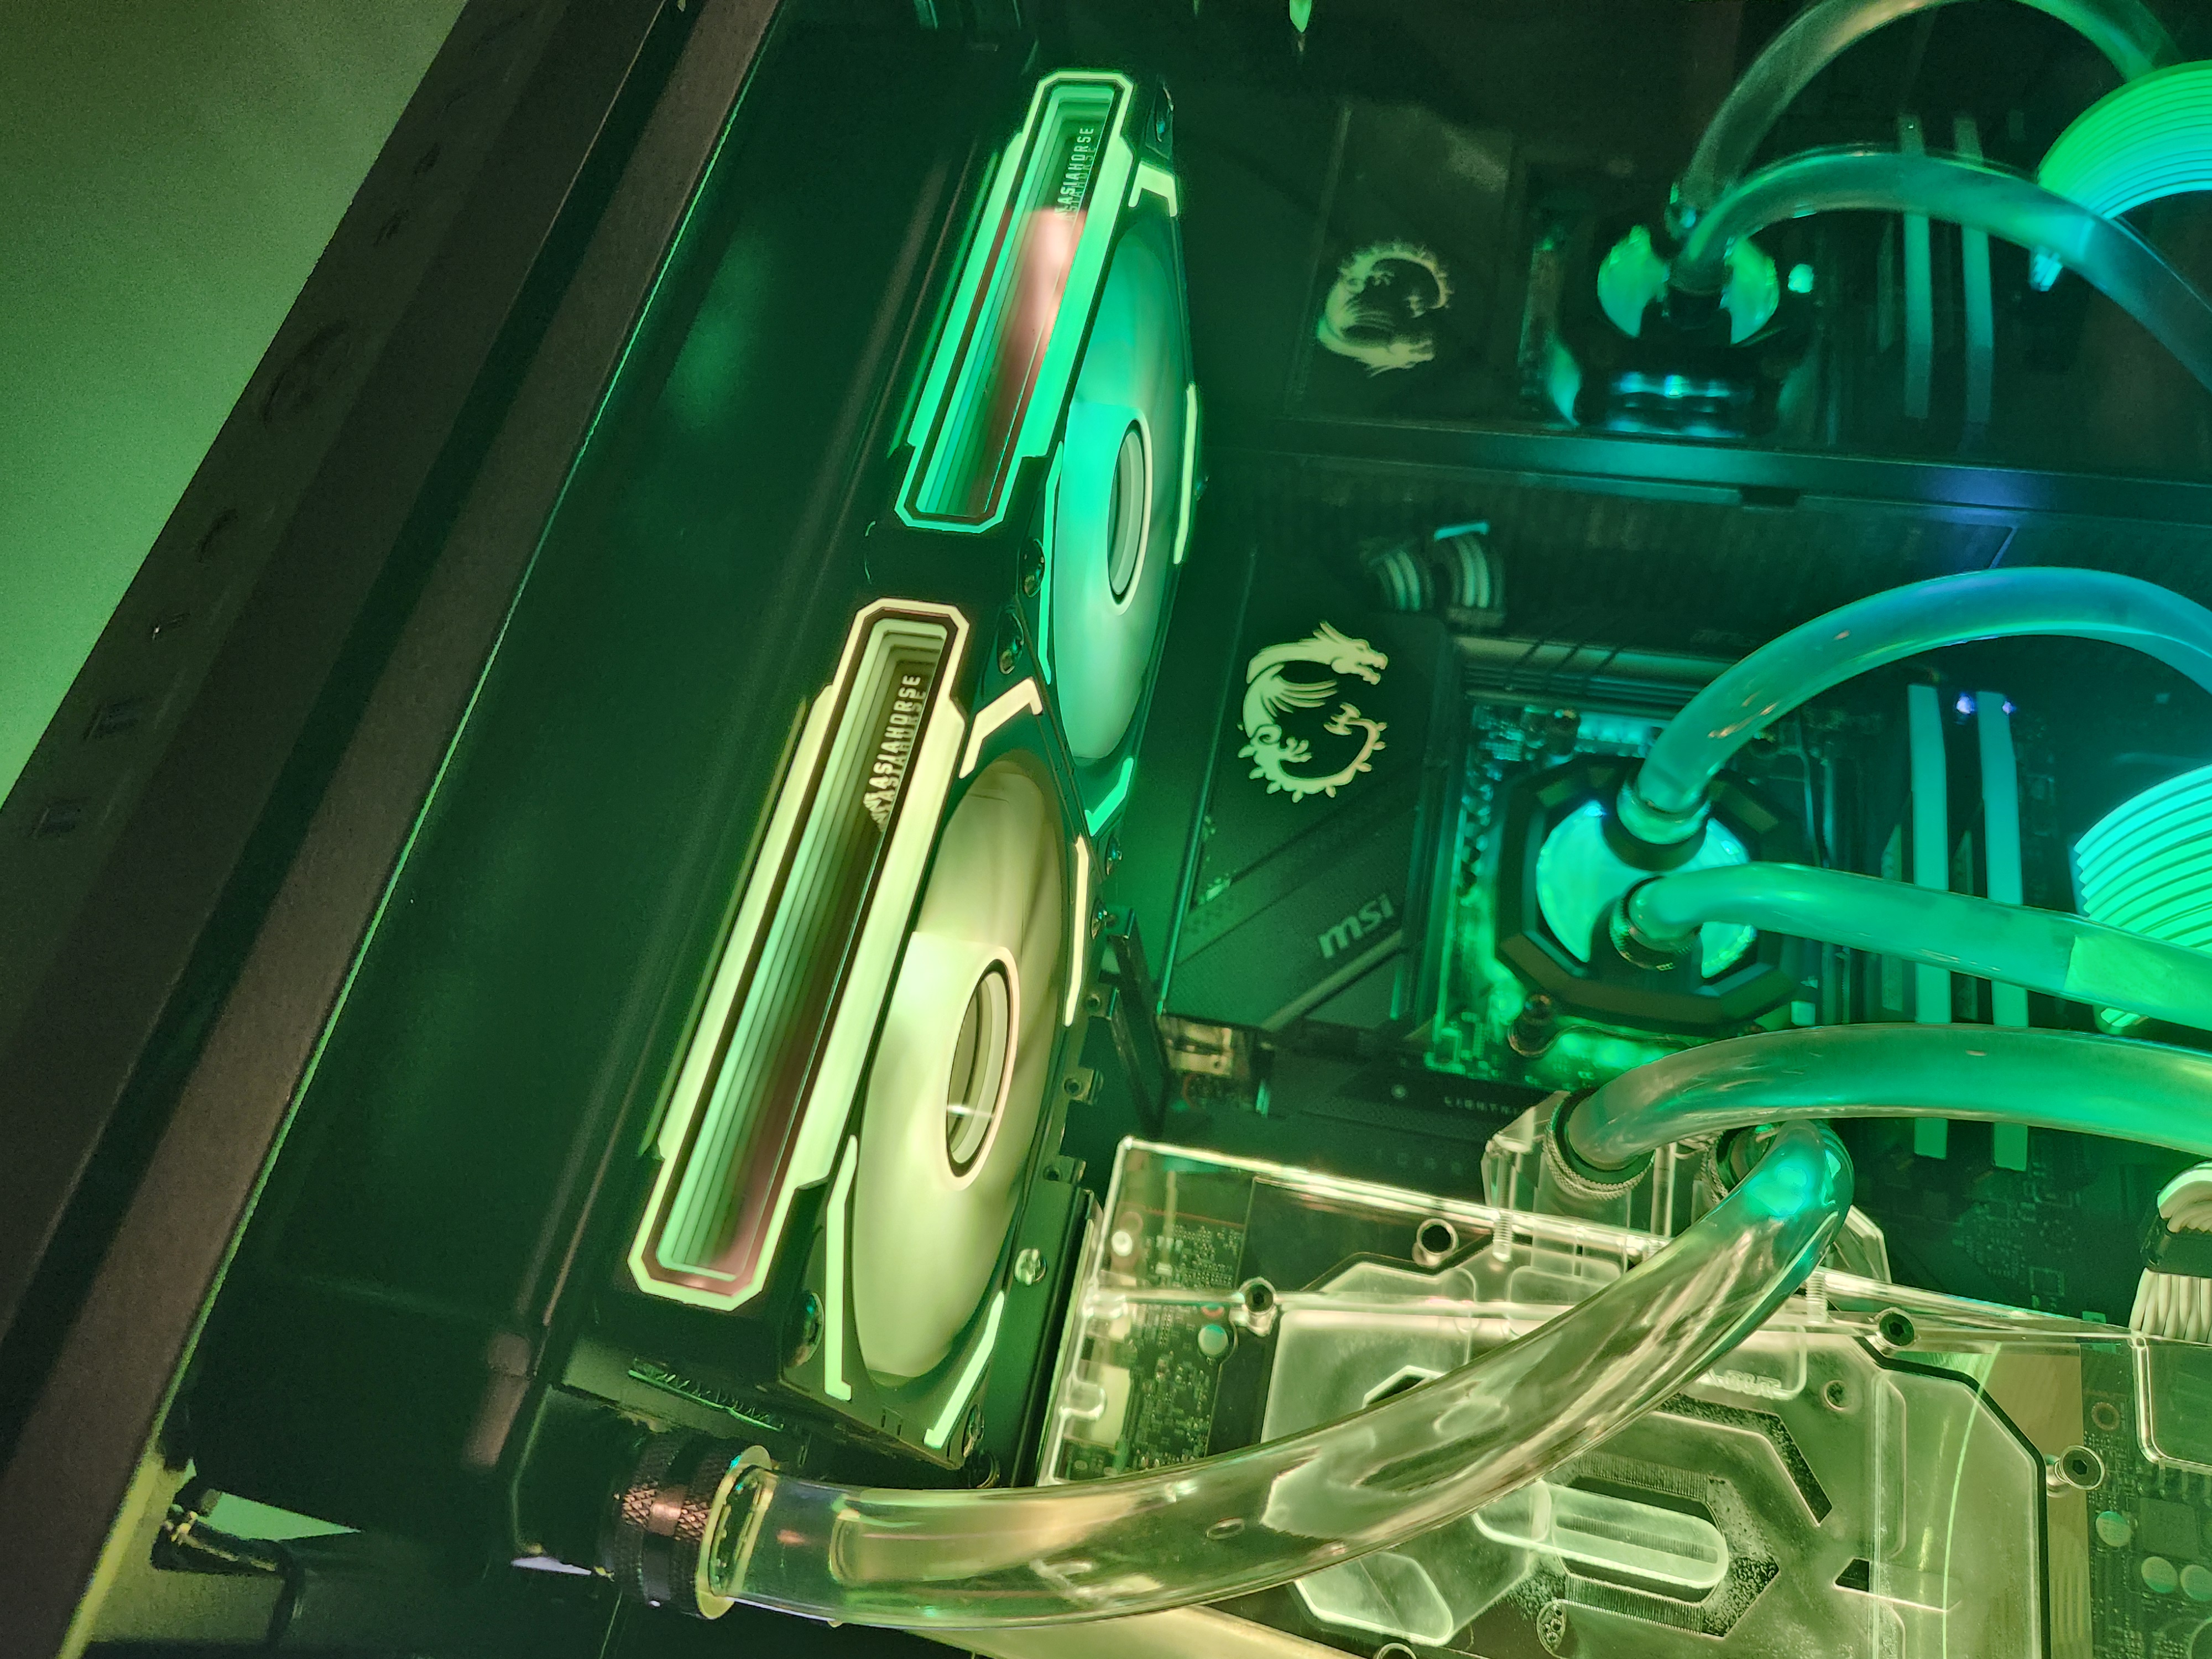
Hello everyone! New update to the tower 5k project. Like I promised in the last post, the 240mm radiator has been added. I also added another 2 Cosmiq fans. These are forward, where the ones on top are reverse, which is generally ill advised as it can decrease the fan lifespan. Alas it's form over function in this case. it appears the noise problem I was having is now gone with a point higher in the loop, and now there are no bubbles found in the GPU or CPU waterblocks. Quite simple fluid mechanics, since air is lighter than water, it will naturally find itself above the water. This is why pumps should NEVER be at the top of the loop. If air is introduced to the pump too much, then it will run dry and straight up break. Other upd ates include cable management improvements and installation of the UPS from my second SFX PC, as well programming singalrgb properly (fuck you icue). I also had to switch the liquid, from the P1000 liquid to distilled water (that part is IMPORTANT) that has been treated with Primochill's treatment. This treatment helps stop the water from corroding the metal (one of the reasons you have to use the same type of metal, no mixing of copper and aluminum (called galvanic corrosion)) Though since I had to add a new tube, you can see where the P1000 stained the softline tubing, which sucks but oh well, it's motivation to do the thing I meant to do- hardline tubing! Here she is with the new radiator and fans! you can kinda see the tube going from the gpu to the radiator is different, to be precise it's clearer since the others are stained. Included is a 3d printed fox, courtesy of my gf. Better look at the radiator. Quick peek at an upgrade I did- hard to tell but there is a dust filter on the entire intake area. It's magnetically attached. Here is the complete setup! Three 1440p screens and a 1080p screen. Surprisingly useful to have so many screens. --------------------------------------------------------------------------------------------------------------------------------------------------------------------------------------------------------------------------- Now, another peek into the future! The current plans after I get my job is to prioritize a 9070XT, especially with ramageddon. It may not go into the system off the bat, as waterblocks are still coming out, But I would love the upgrade. From there the plan is the quatro and fake RAM so all my slots are populated. But in the meantime, I have started actual meaningful work on the hardline tubing, since I figure this is the best time to work on it, before I start working again. It has always been the plan to have the basement with softline and the main compartment with hardline. A major question for some time was structural stability. That is where a great quote comes in- "Good engineers copy, great engineers steal". https://www.printables.com/model/1148872-thermaltake-tower-500-intake-fan-tray/files In this system they have some serious hardware, but I am most interested in the 3d model of the tower and their mounting method. I found this to be a genius idea I should of had months ago, but oh well. One of my big concerns is that the current metal basement plates have small hooks that they use to slide into place, which obviously won't work with PLA or acryllic. So I shall steal the idea and improve on it for my needs, to make sure the basement is properly held up. She's just being started but each of those planes represents a fitment placement roughly, I will most likely need to do many versions. I may include fans towards the front so fresh air is pulled into the main compartment. I need to get my ender 3 working, which terrifies me. I also realized I would have a lot of problems if I used hardline tubes for the 240mm radiator, and since the softline and hardline tubing have similar diameters, I will use softline for that straight area, but pulled tight so it looks straight. Should make maintenance easy. Sorry for how scattered this post is, I am trying to fix my sleep schedule and am quite tired right now.

.thumb.jpg.3f8e785527e30569e36720ebd08b419f.jpg)
.thumb.jpg.87f66b2a78a98bb52c0200377214350a.jpg)
-
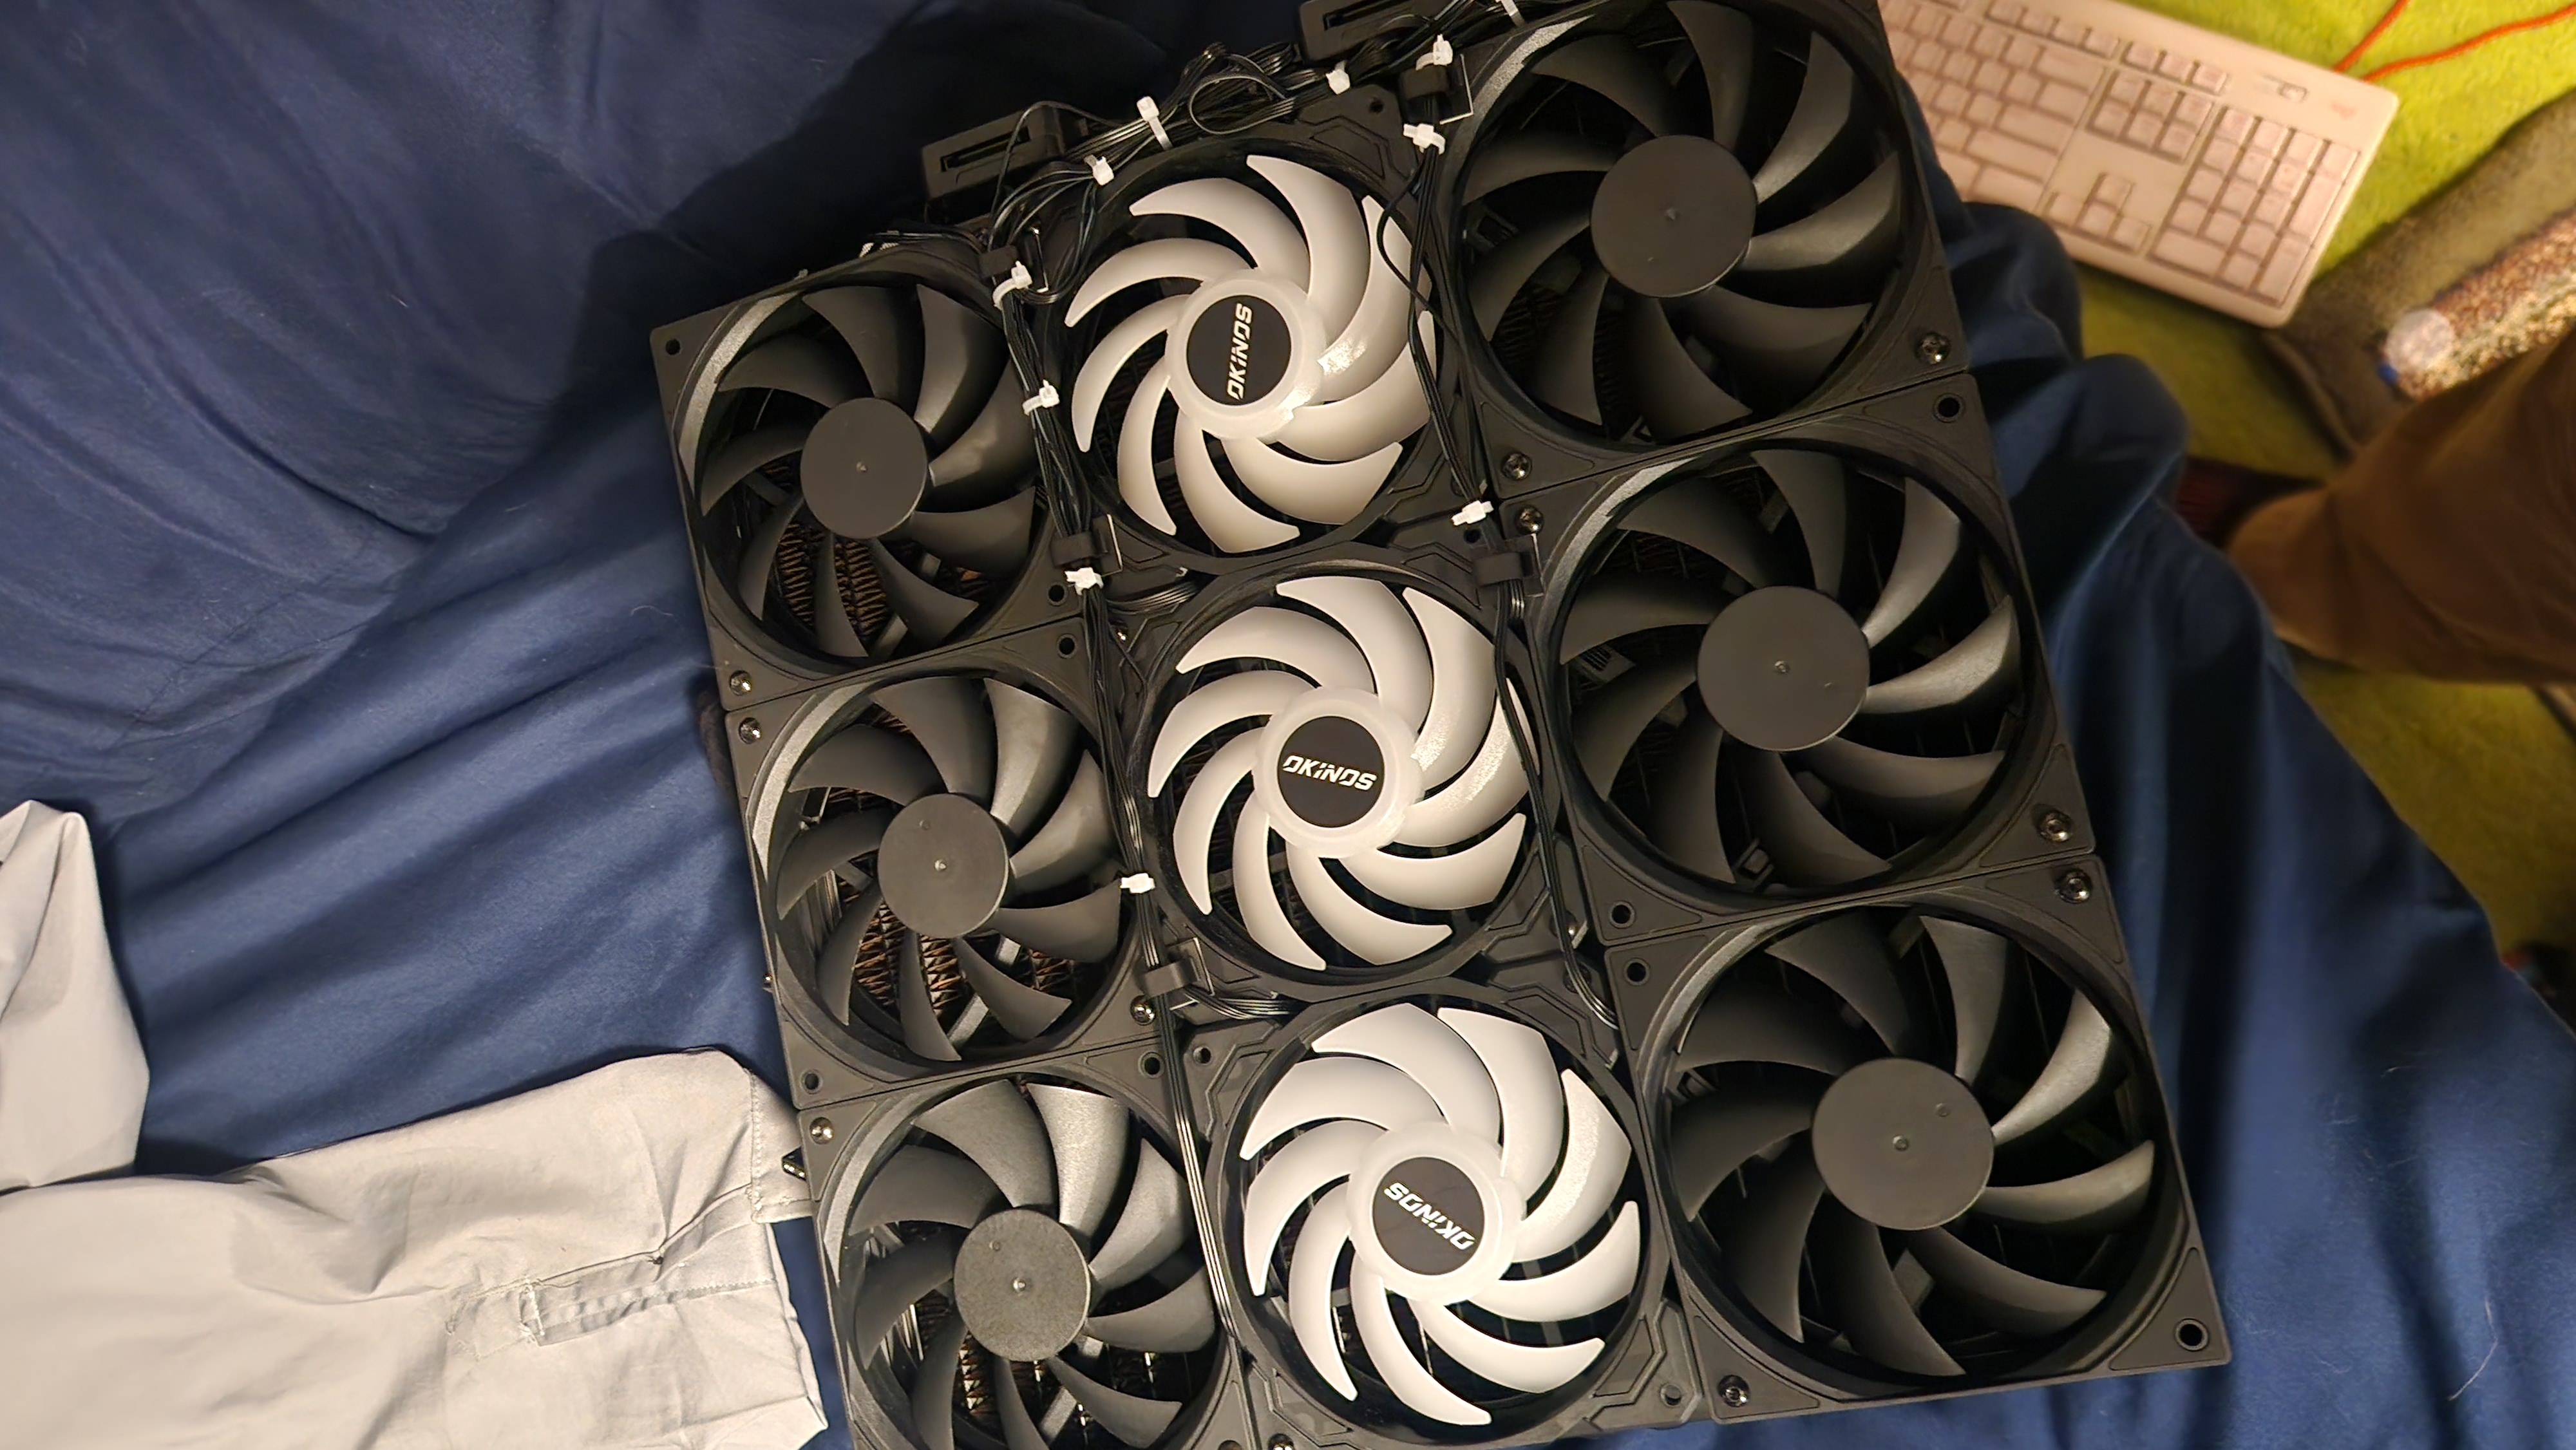
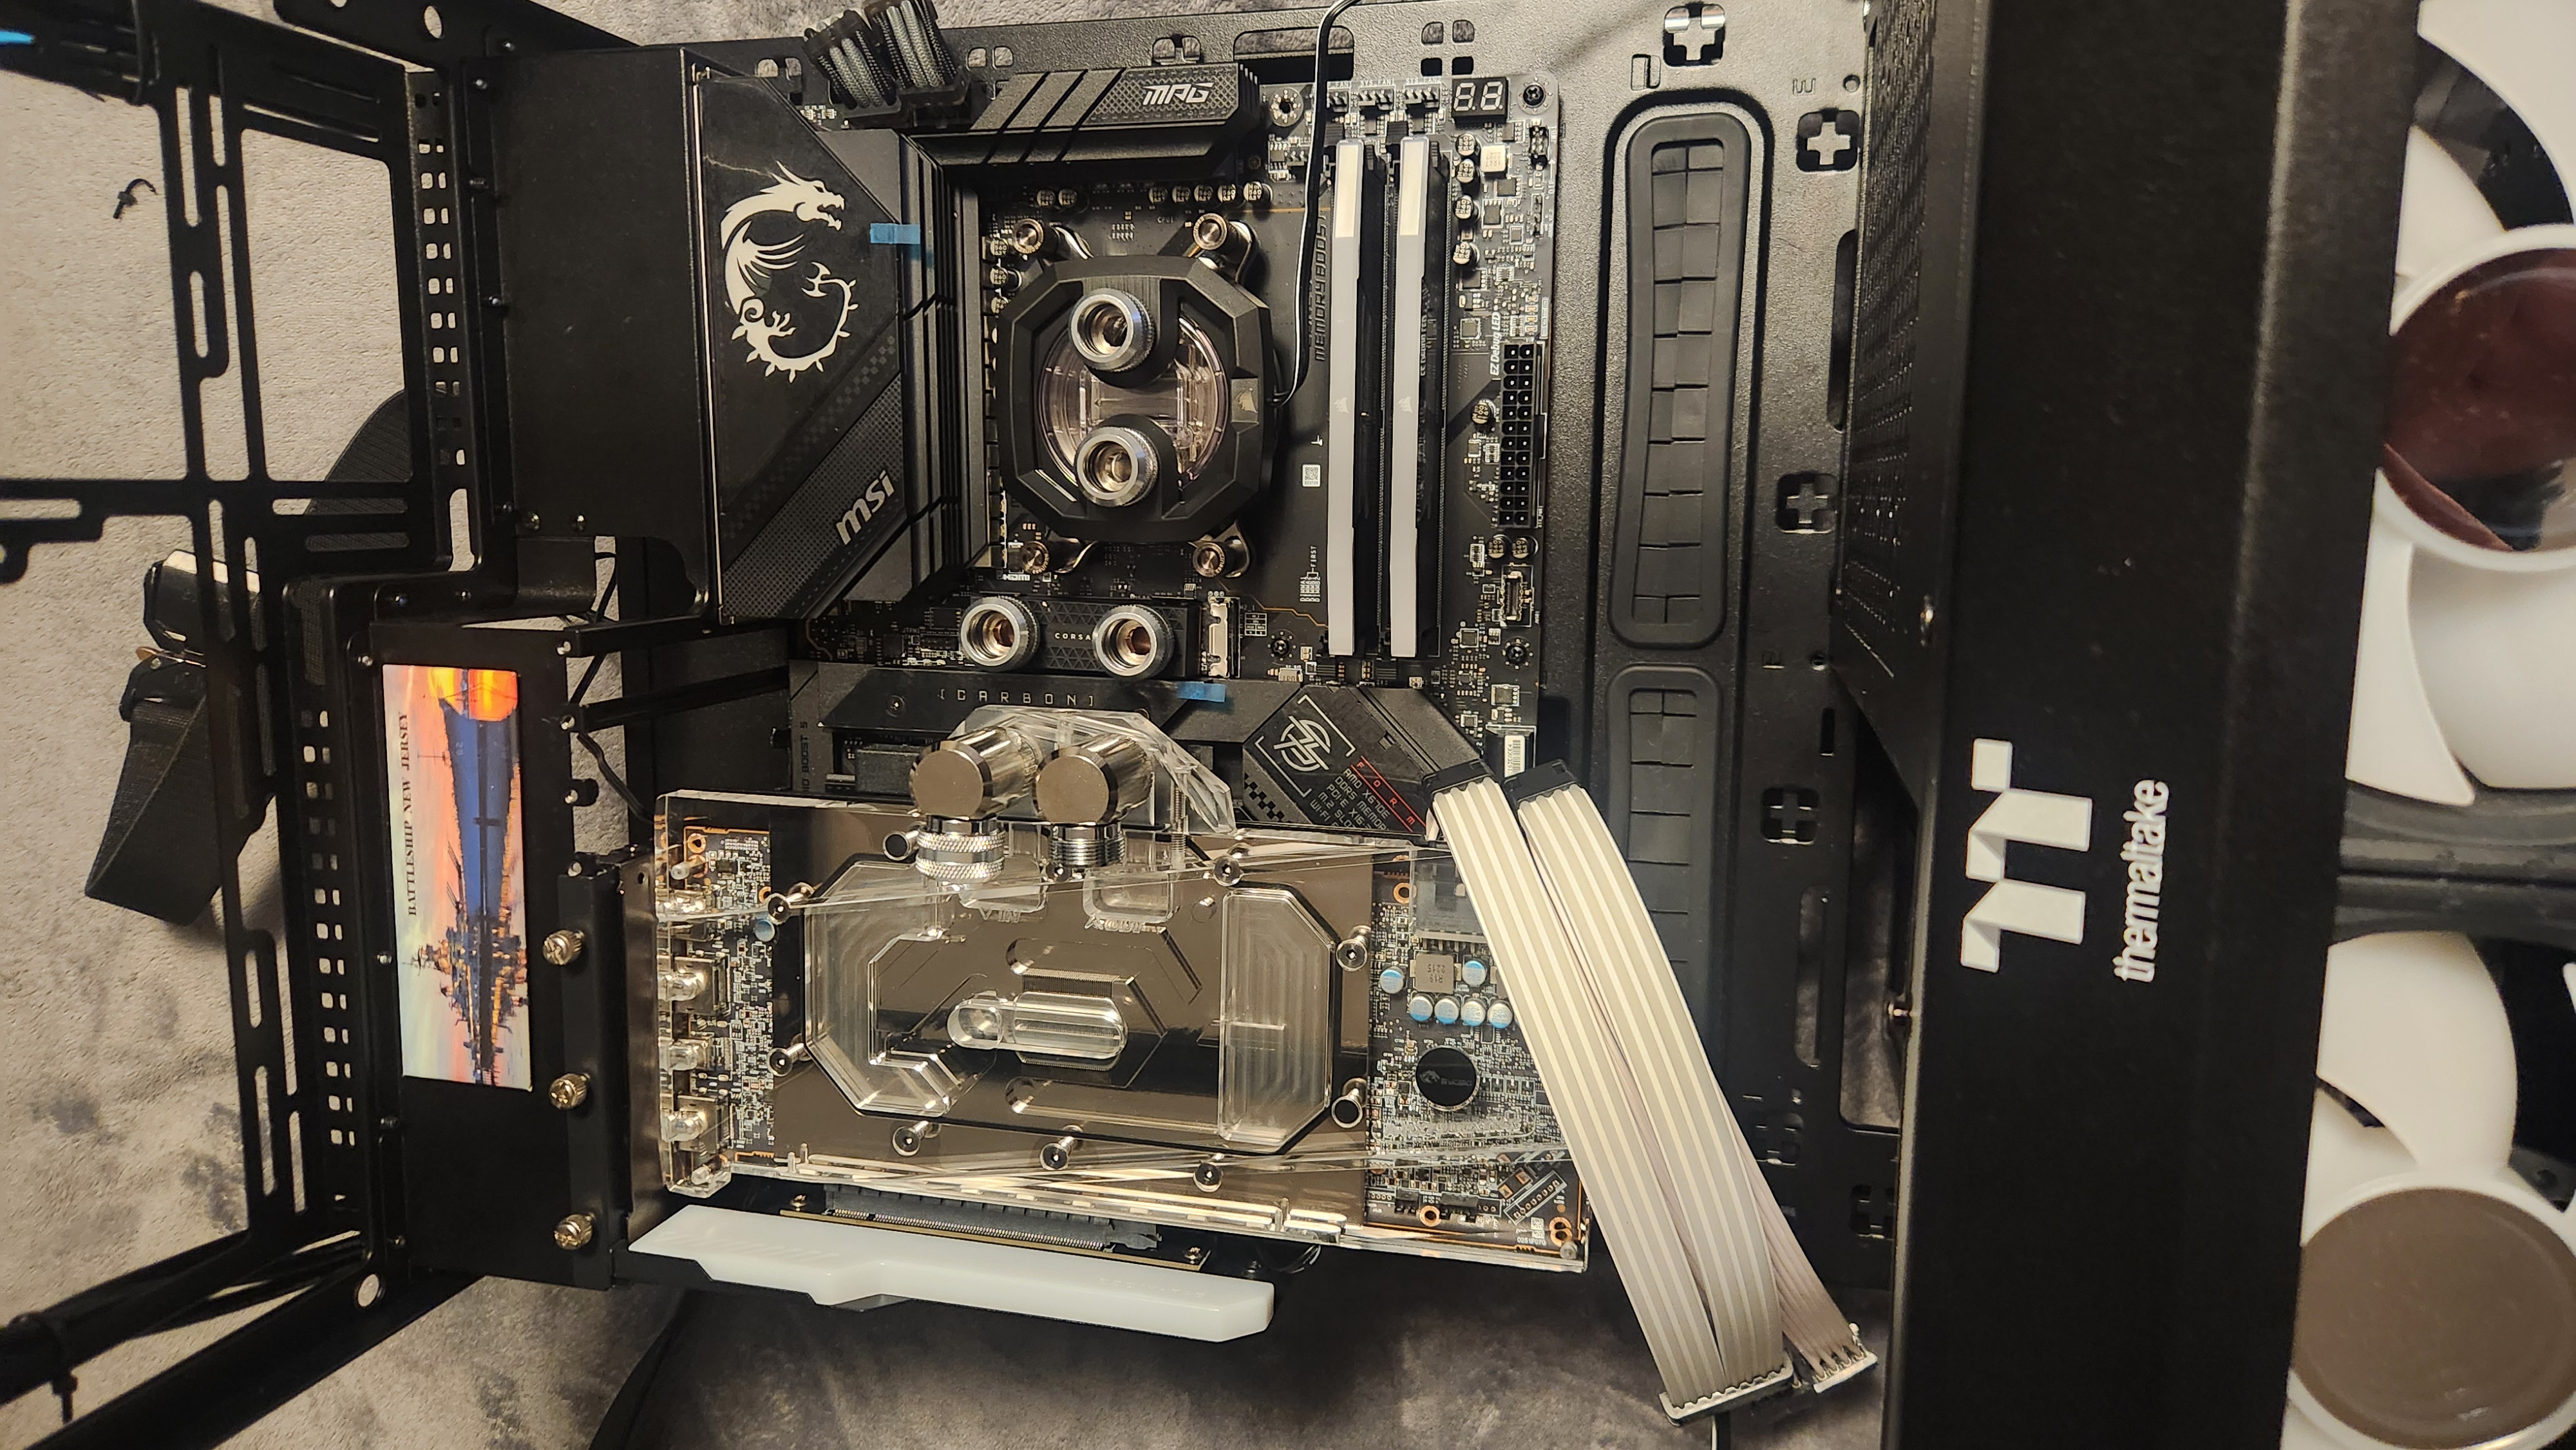
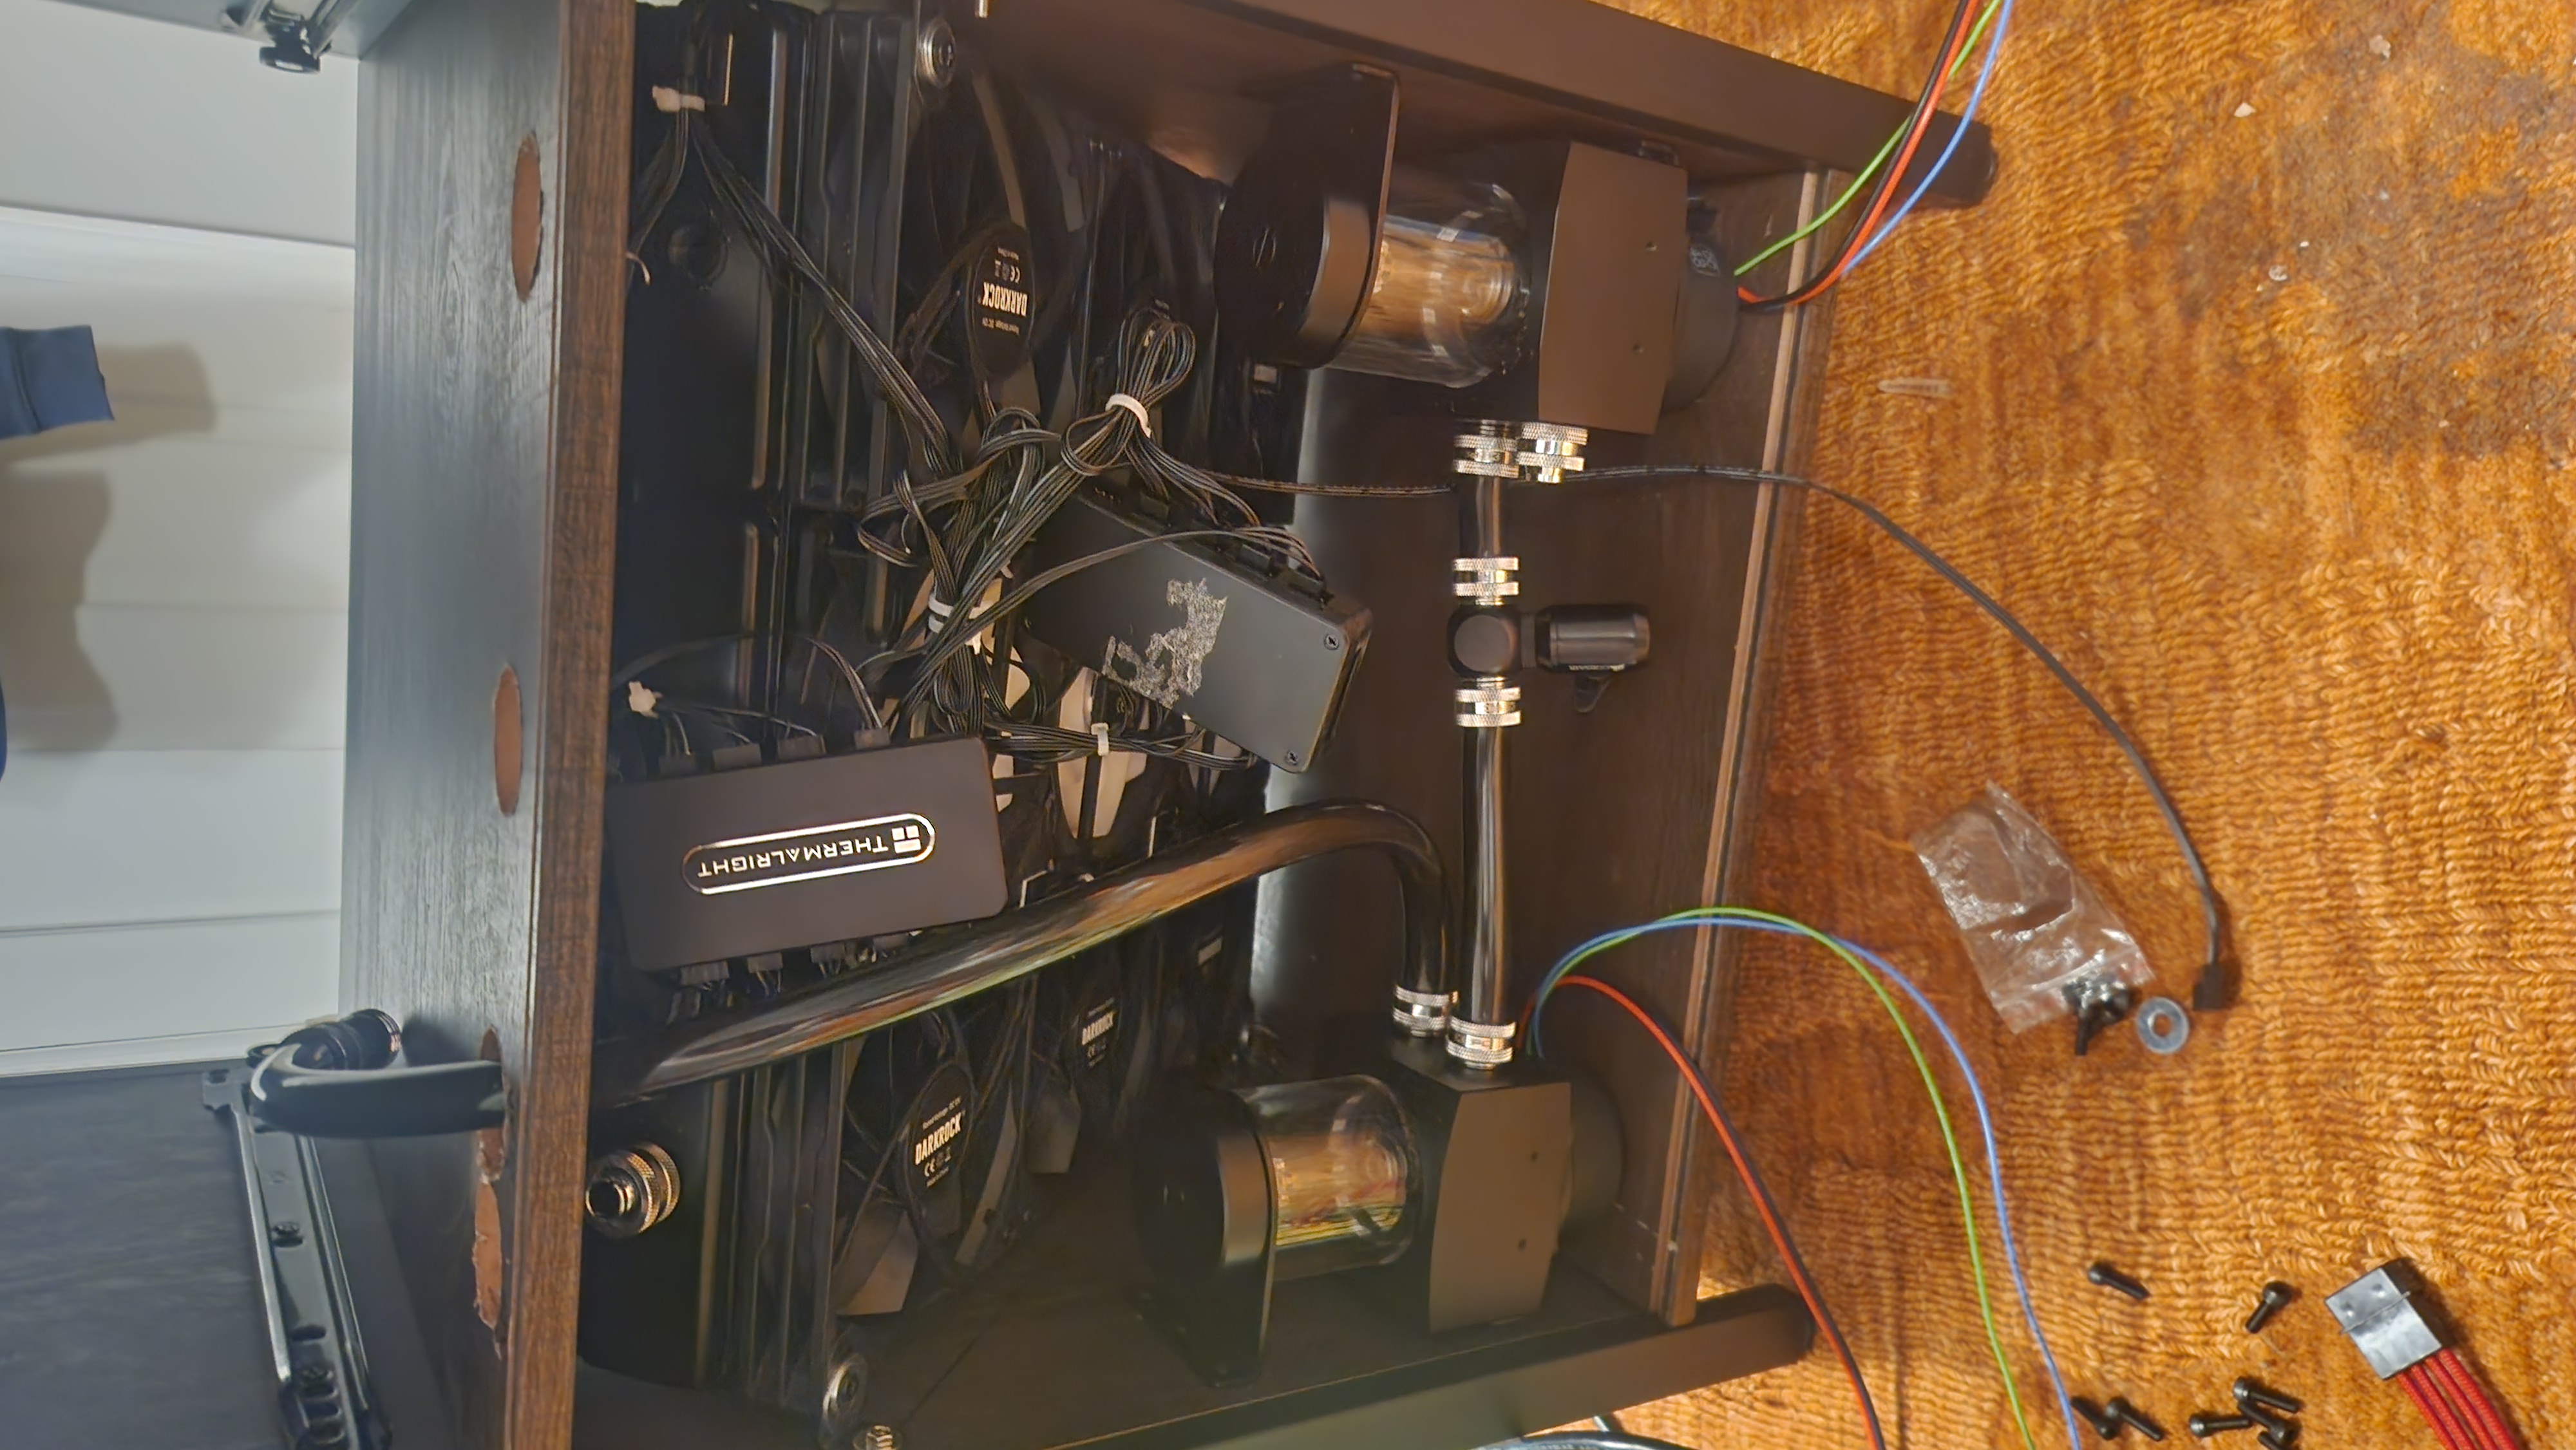
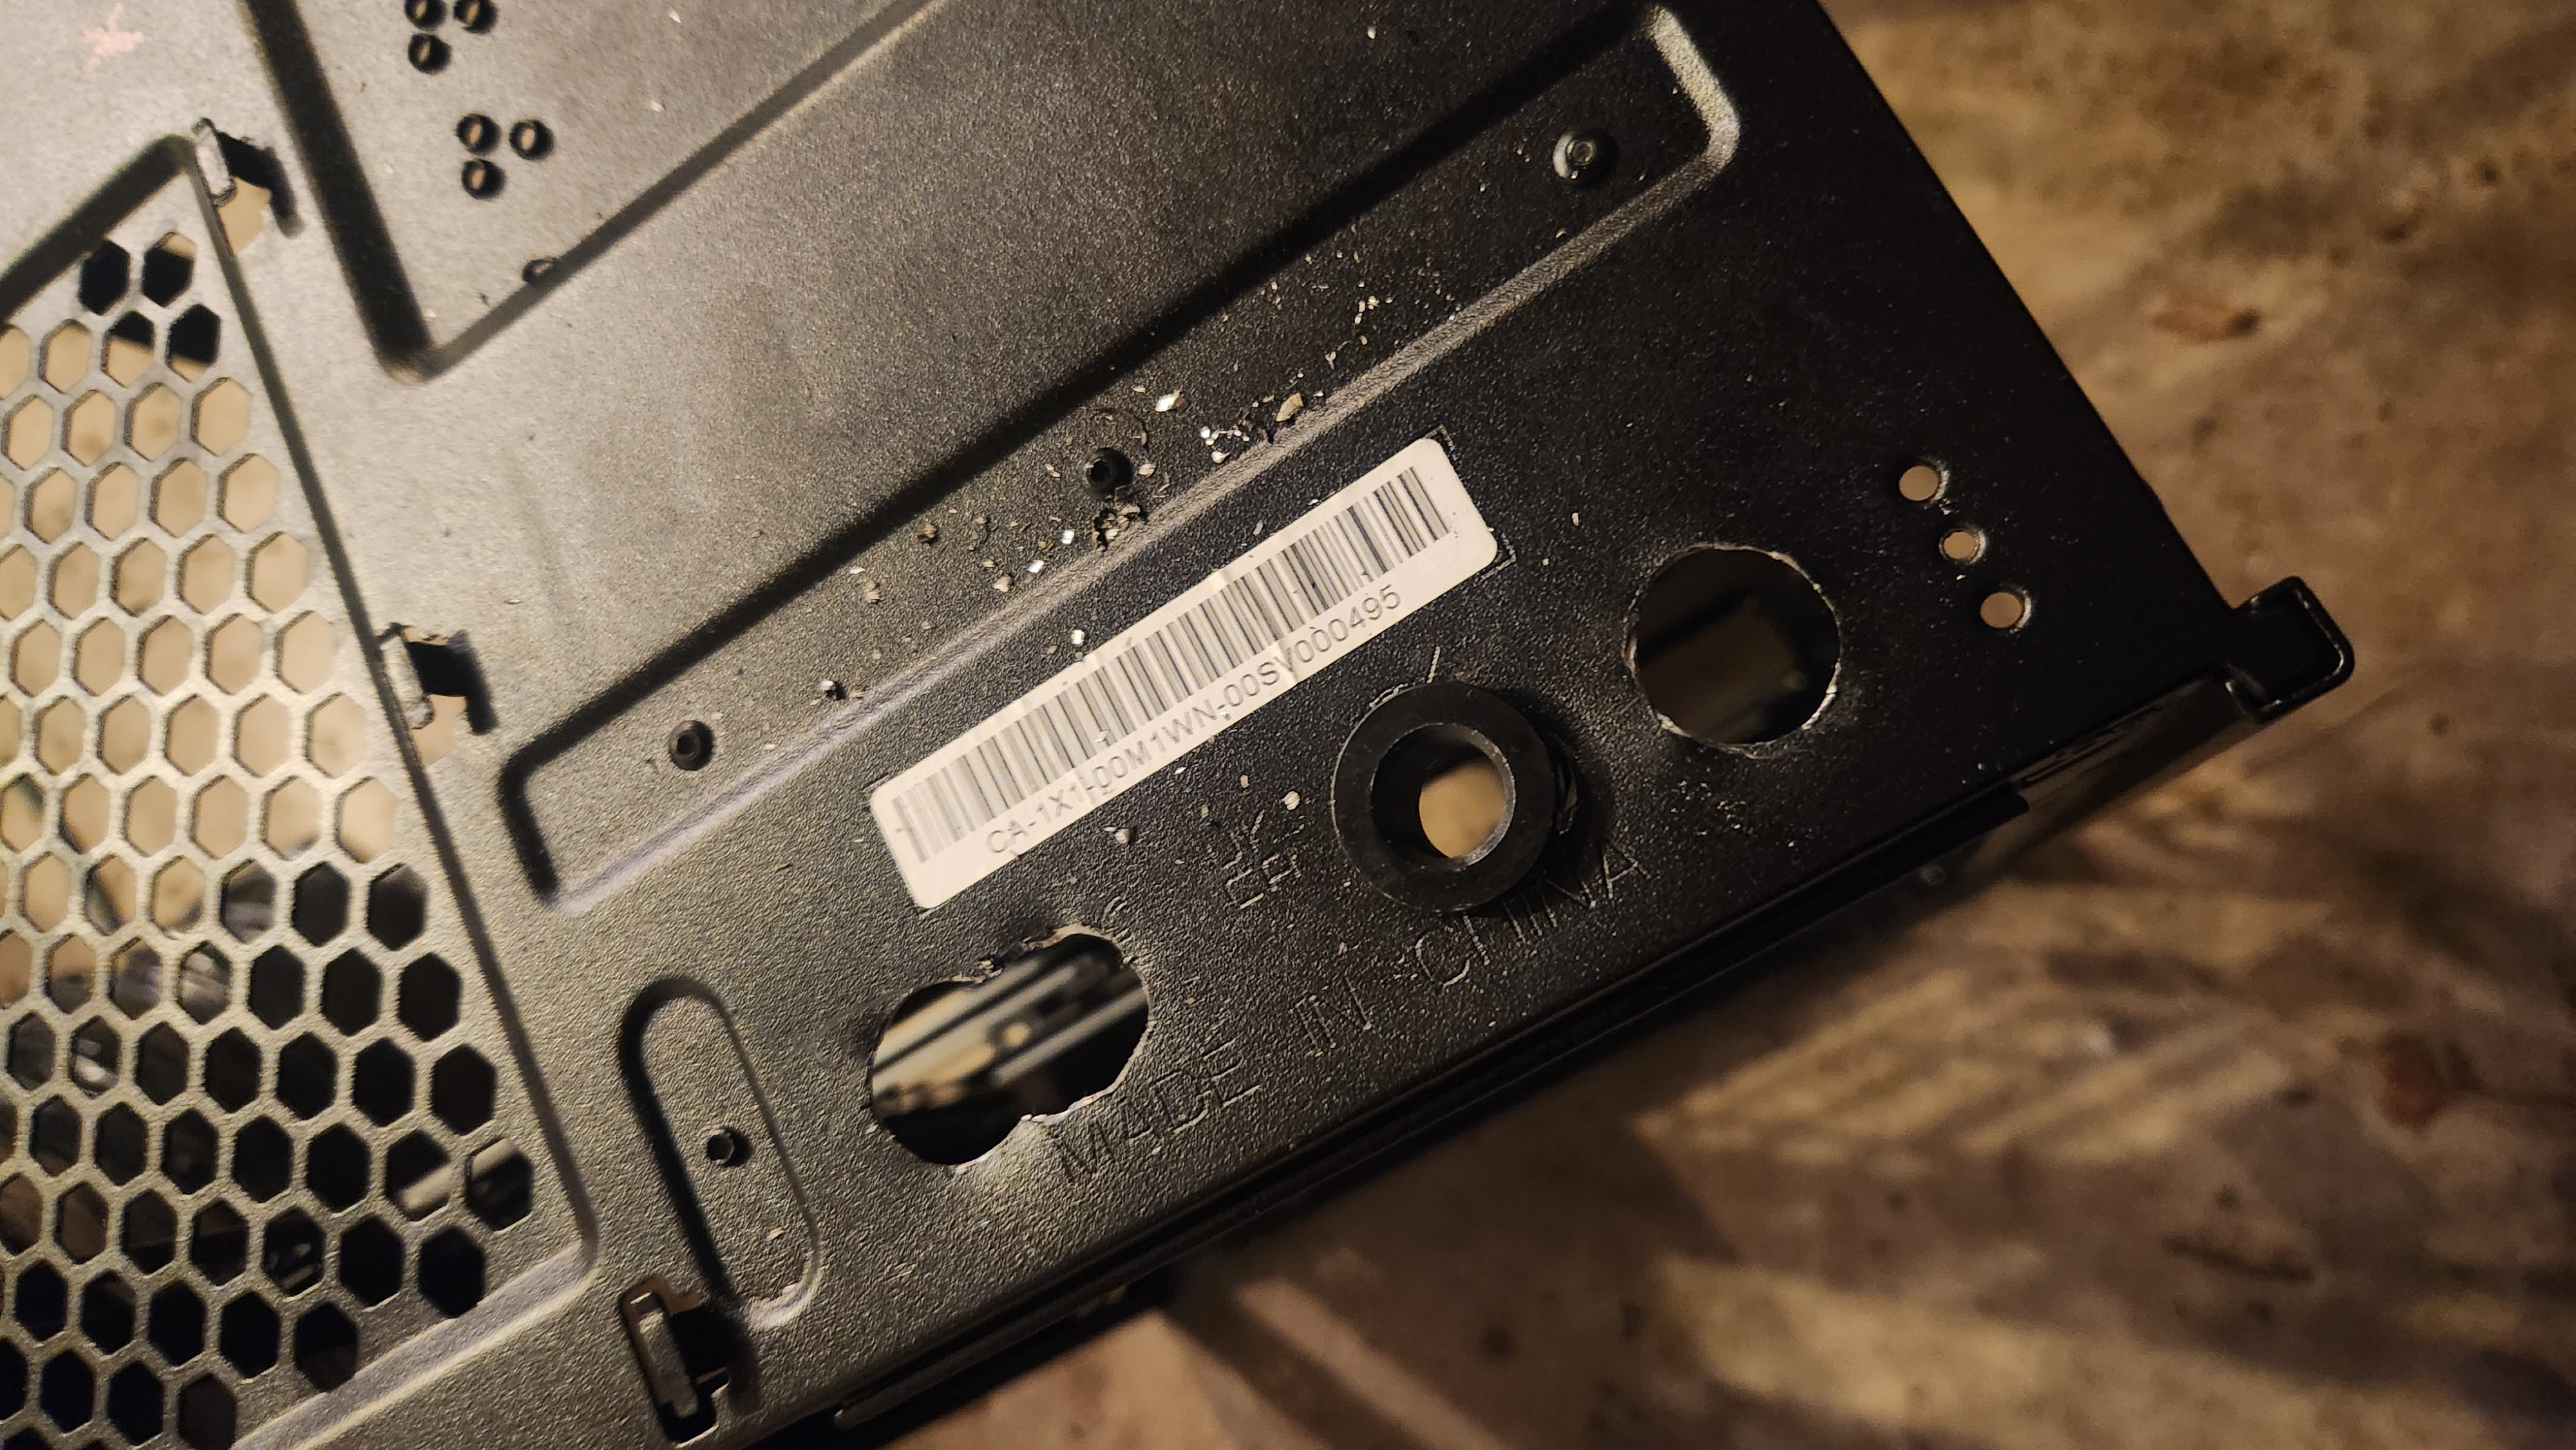
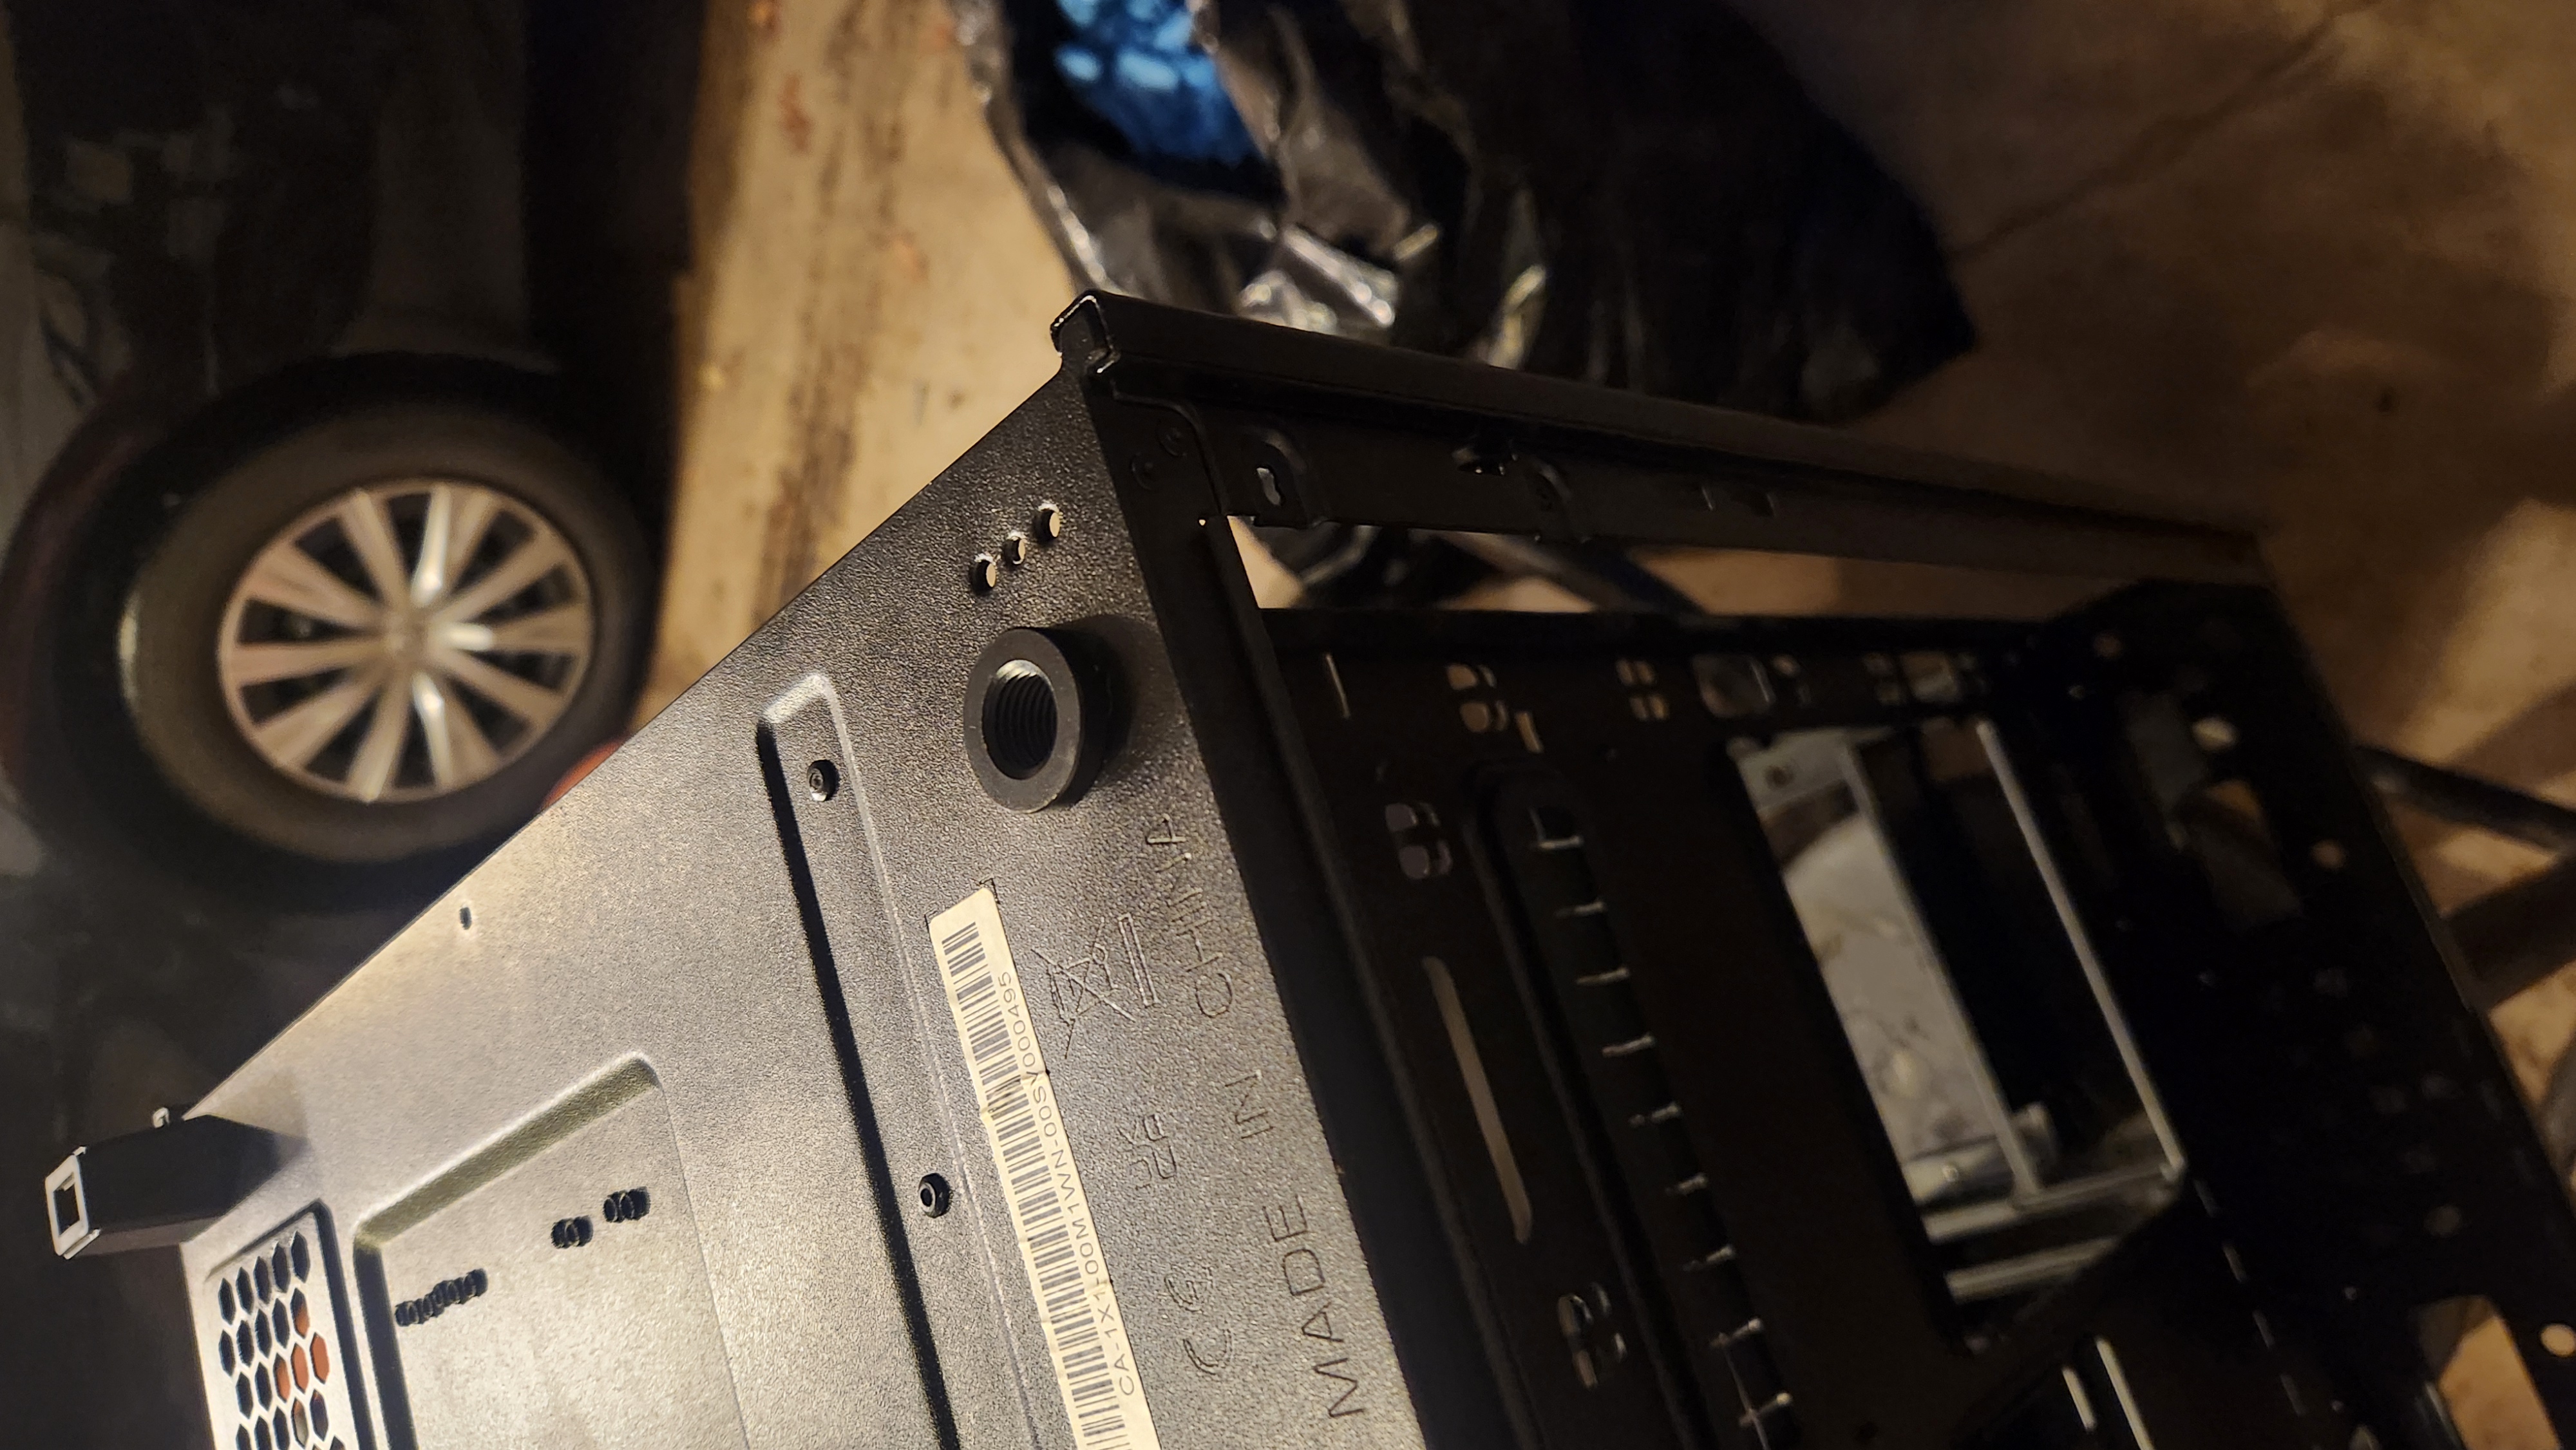
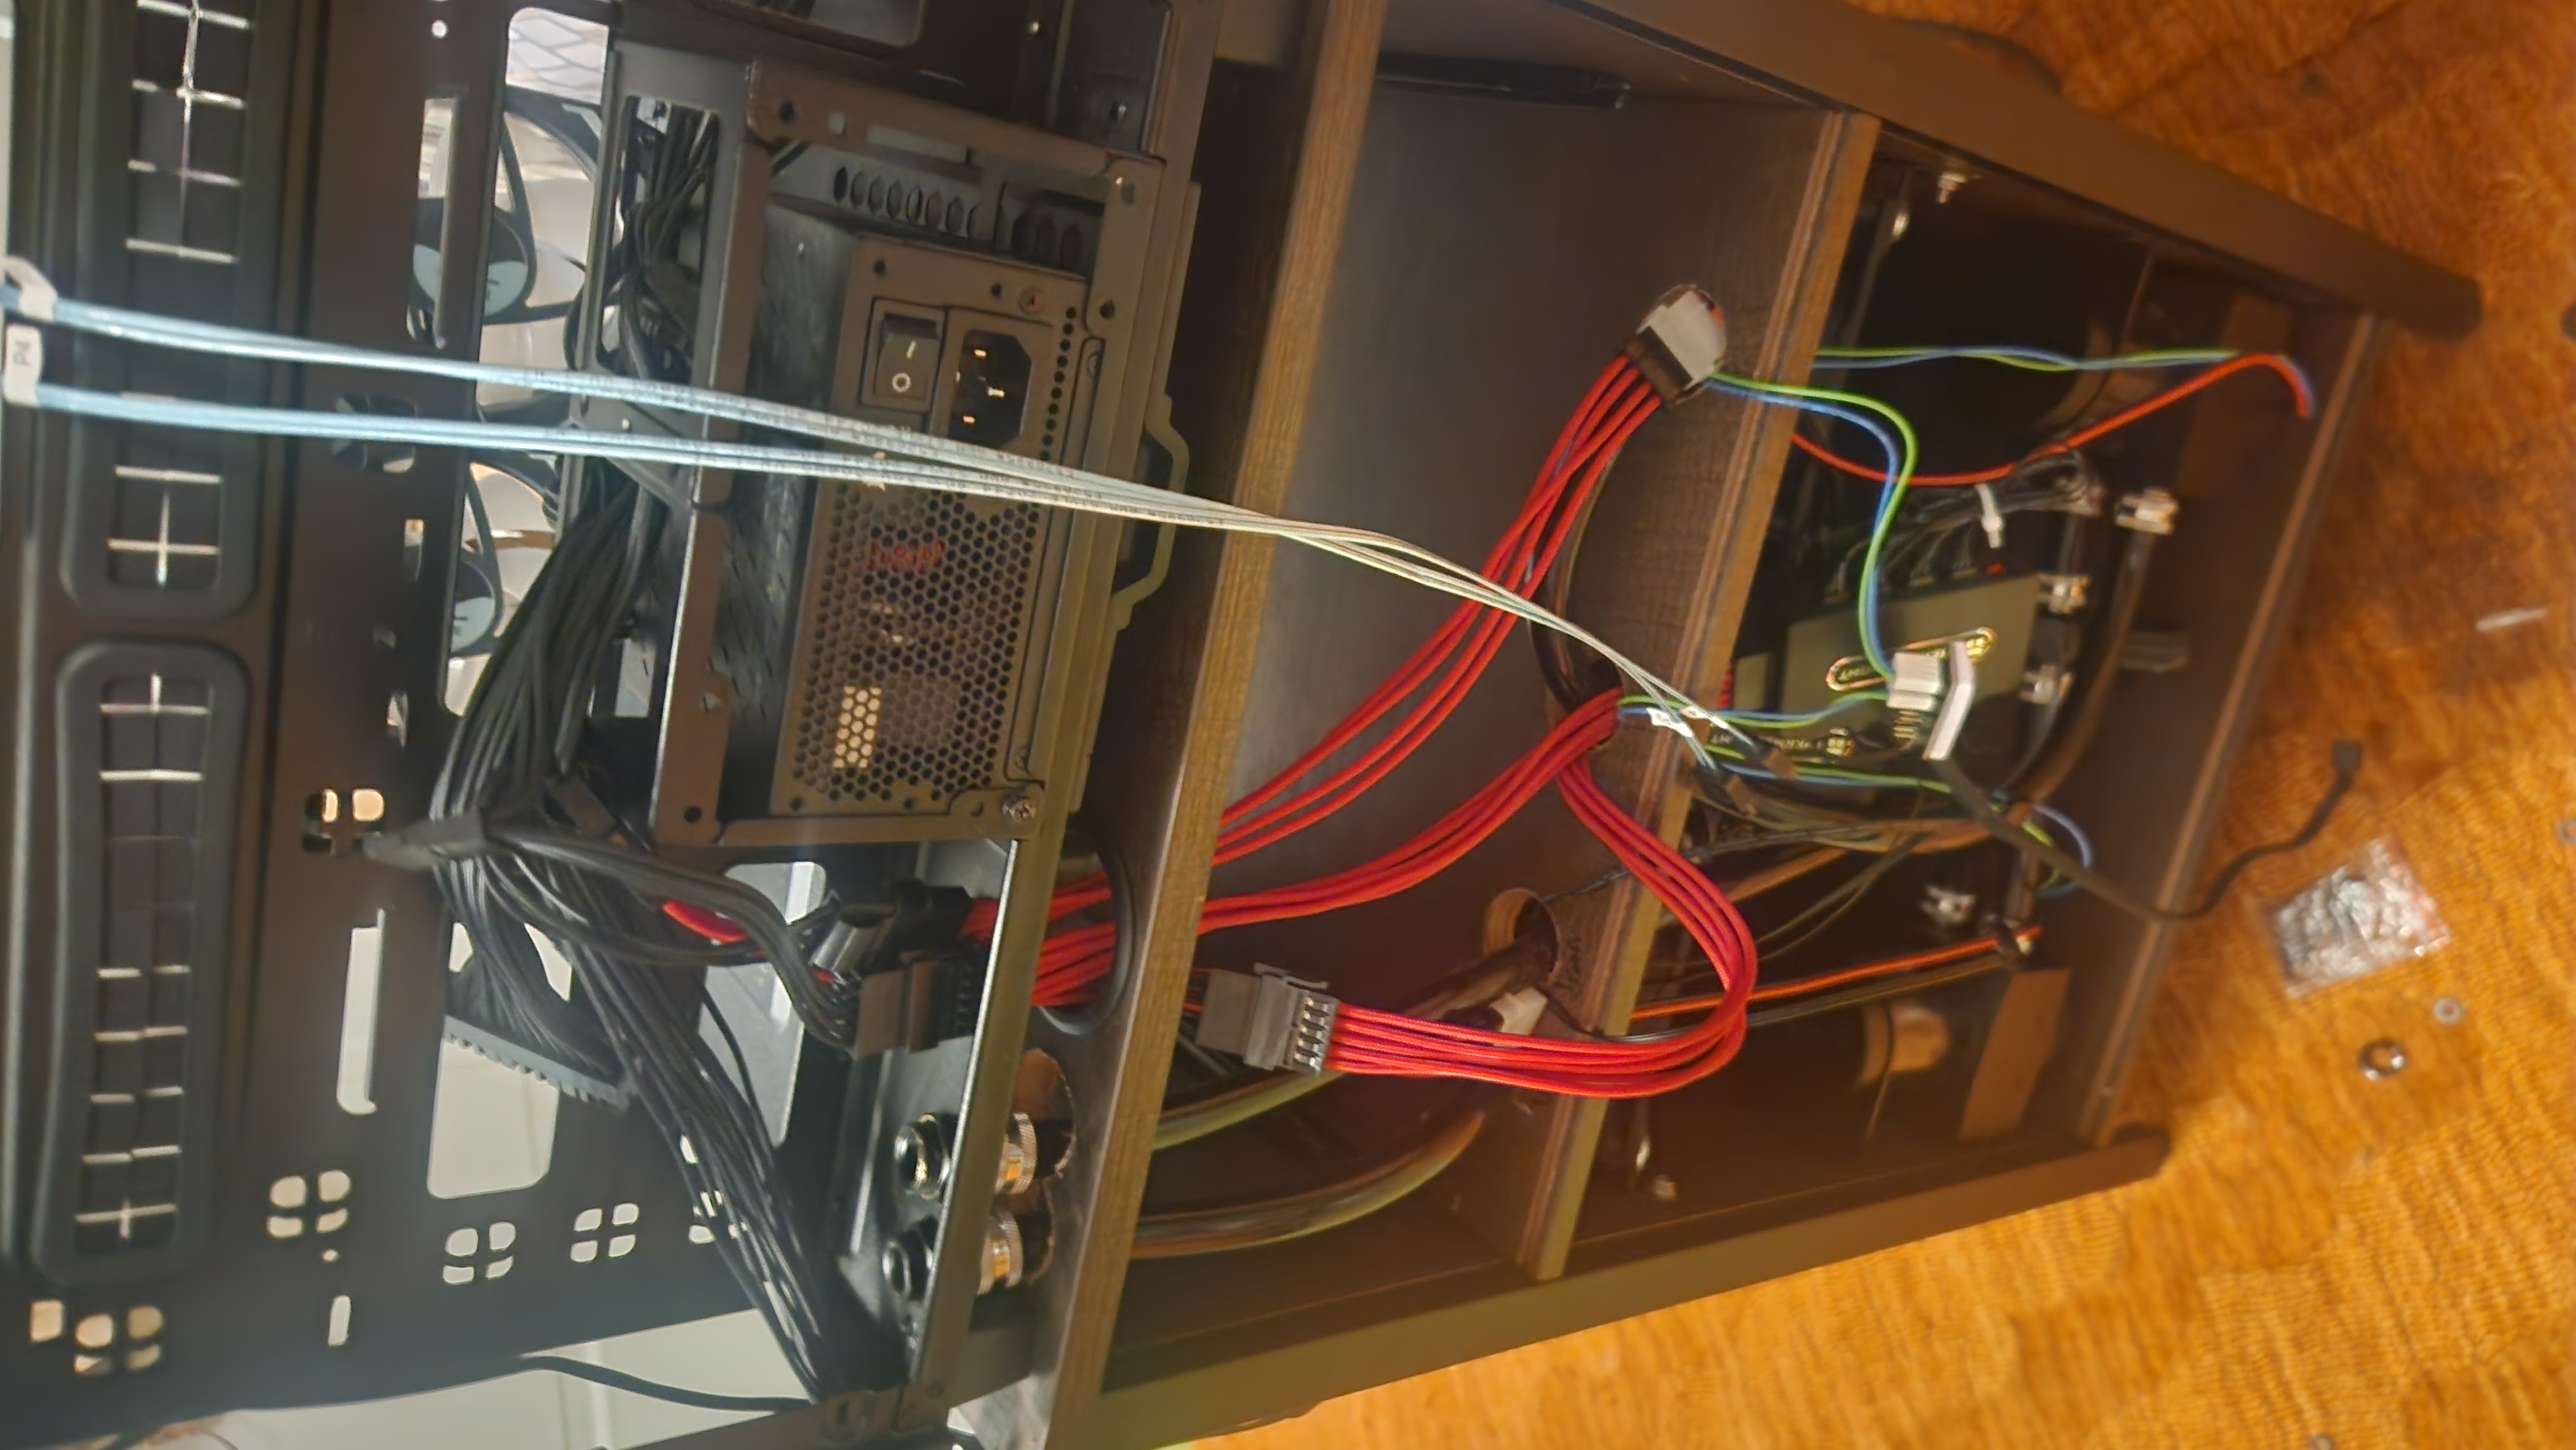
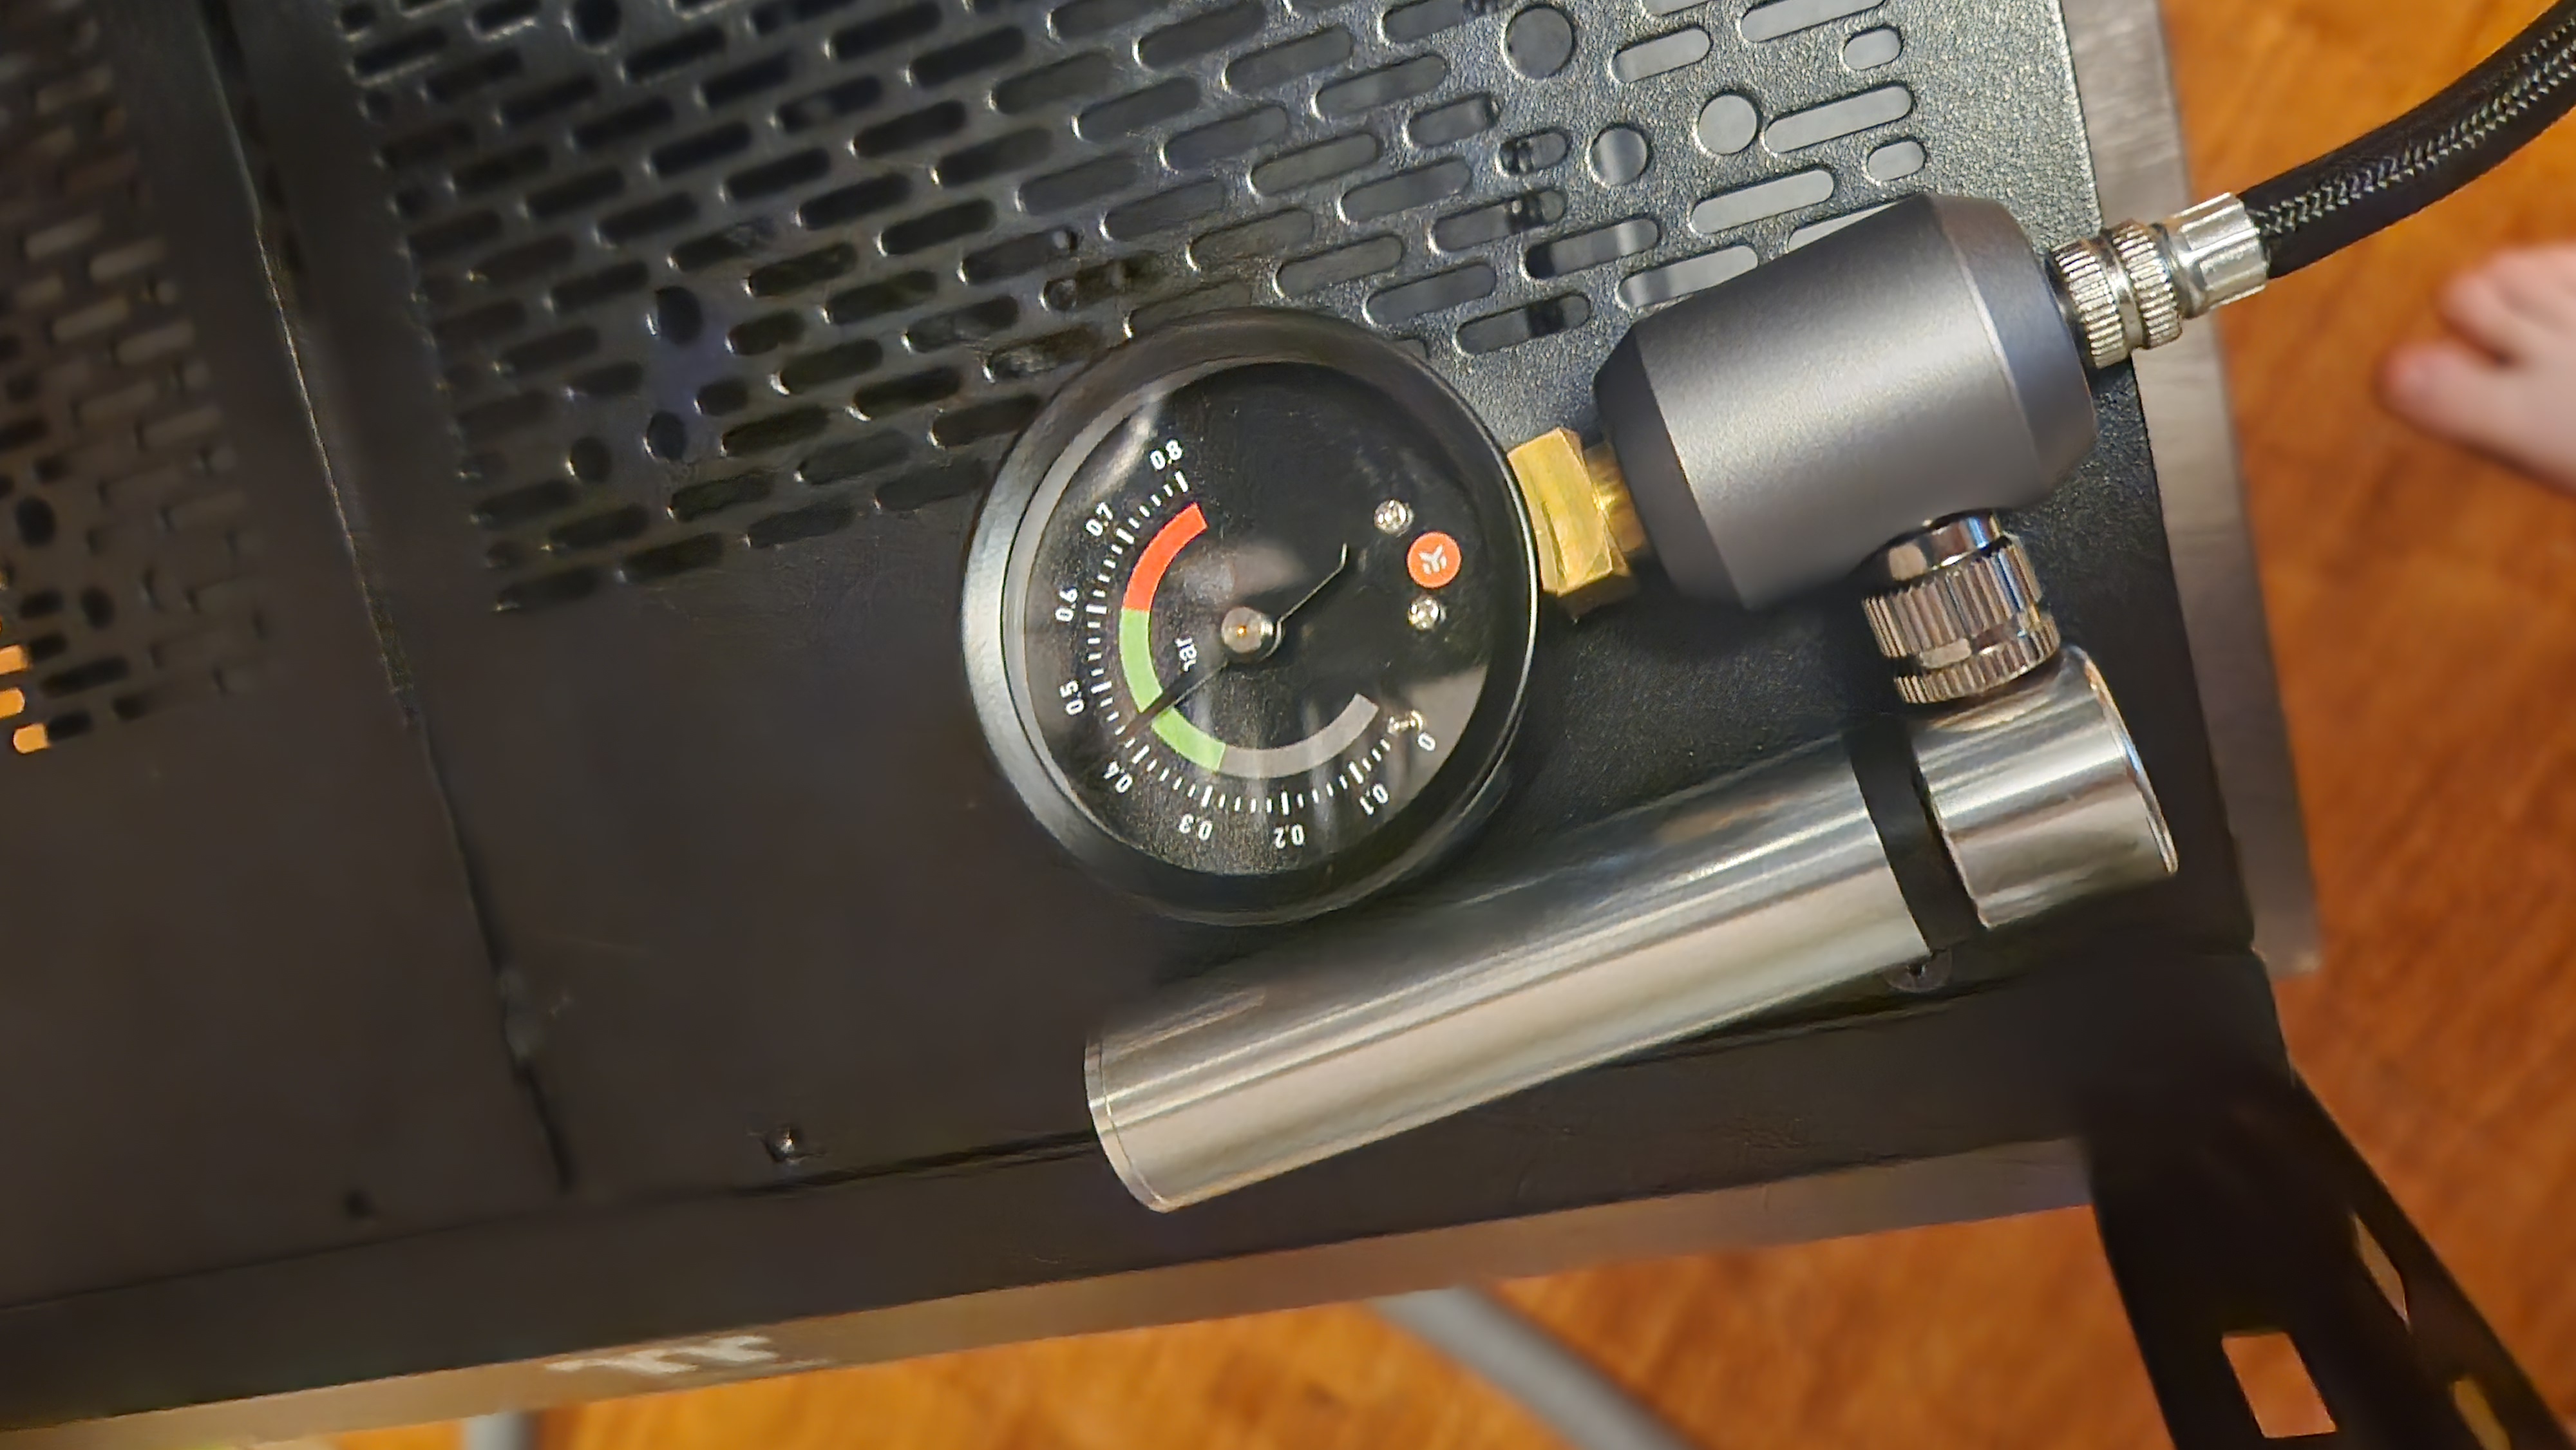
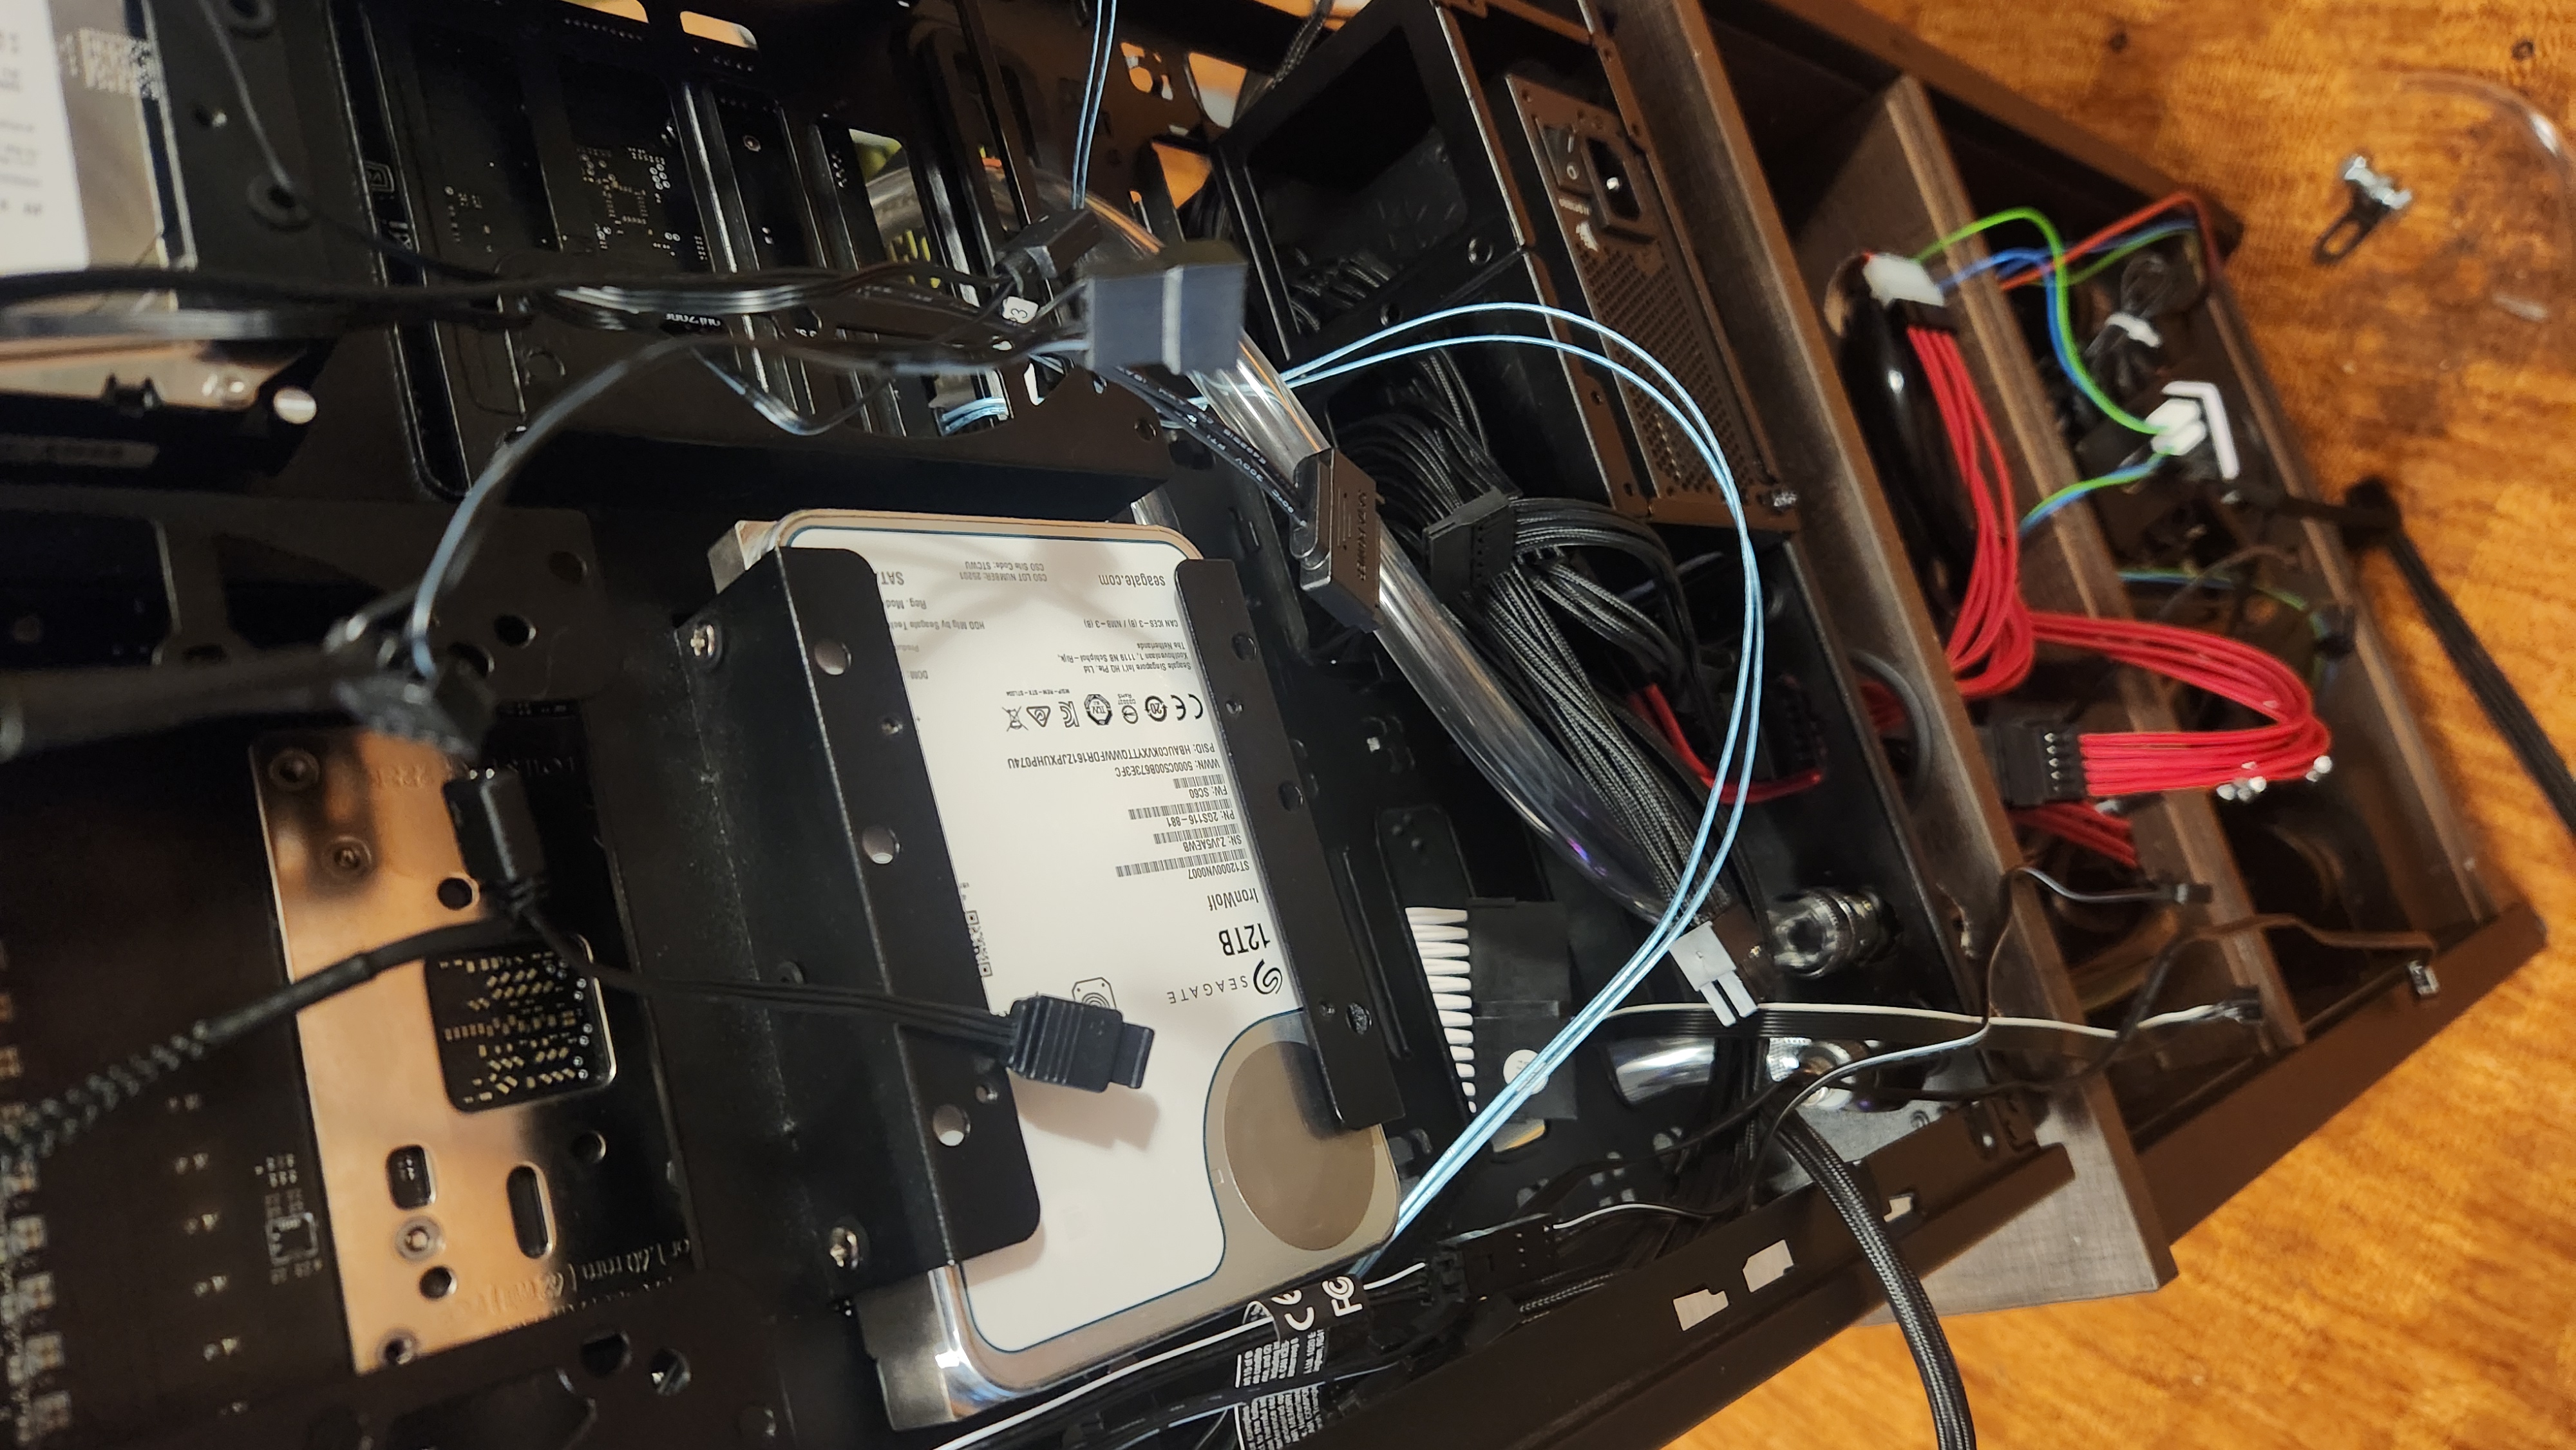
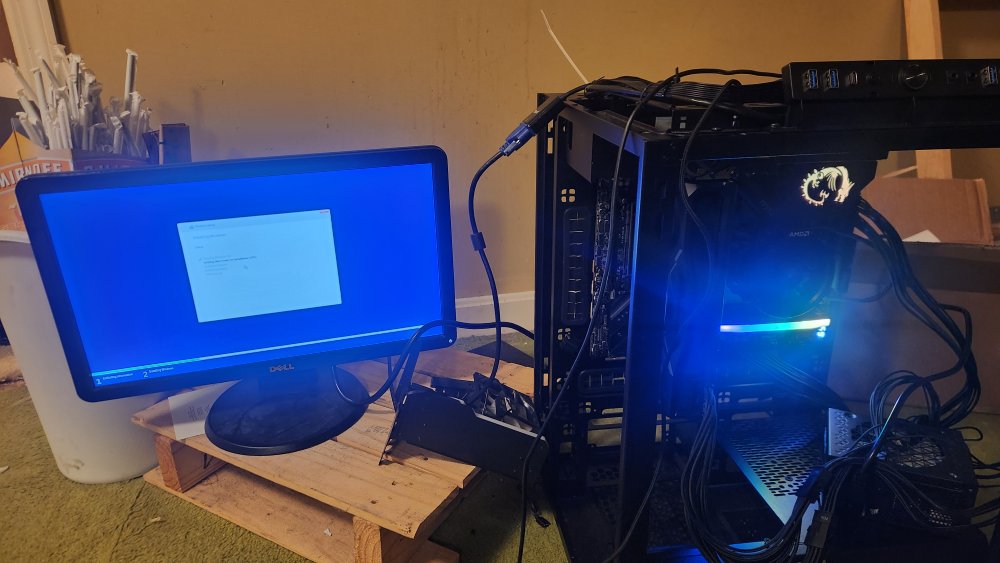
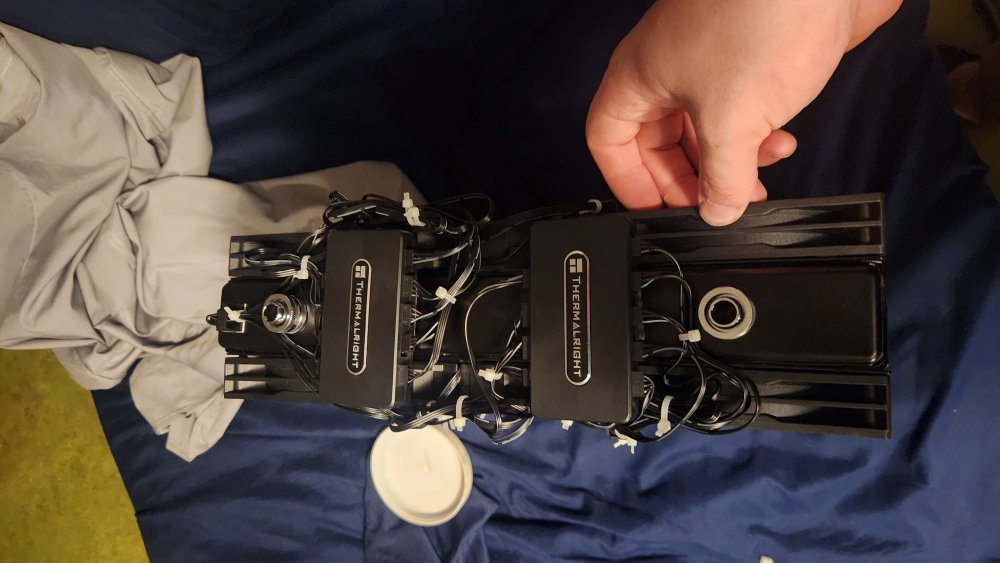
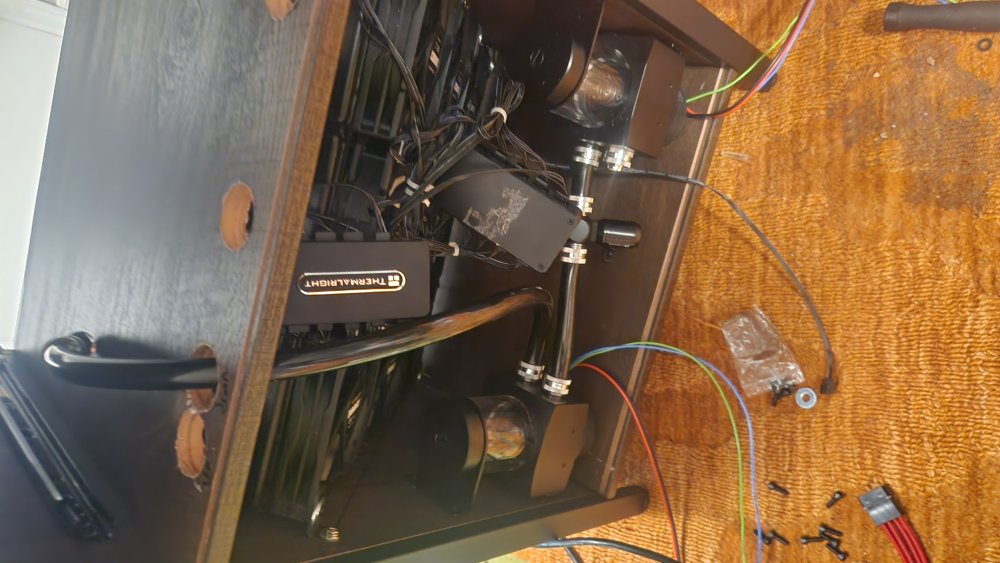
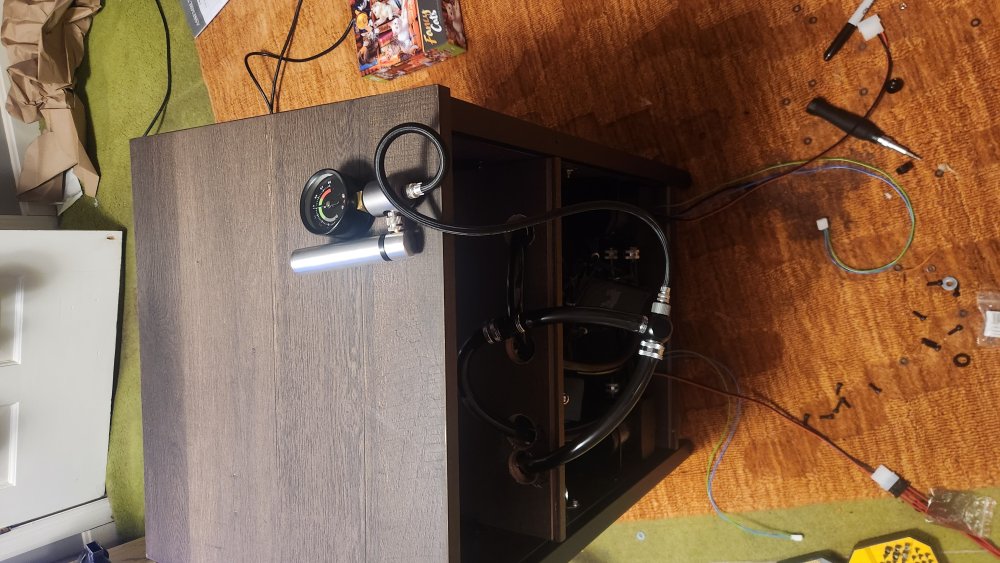
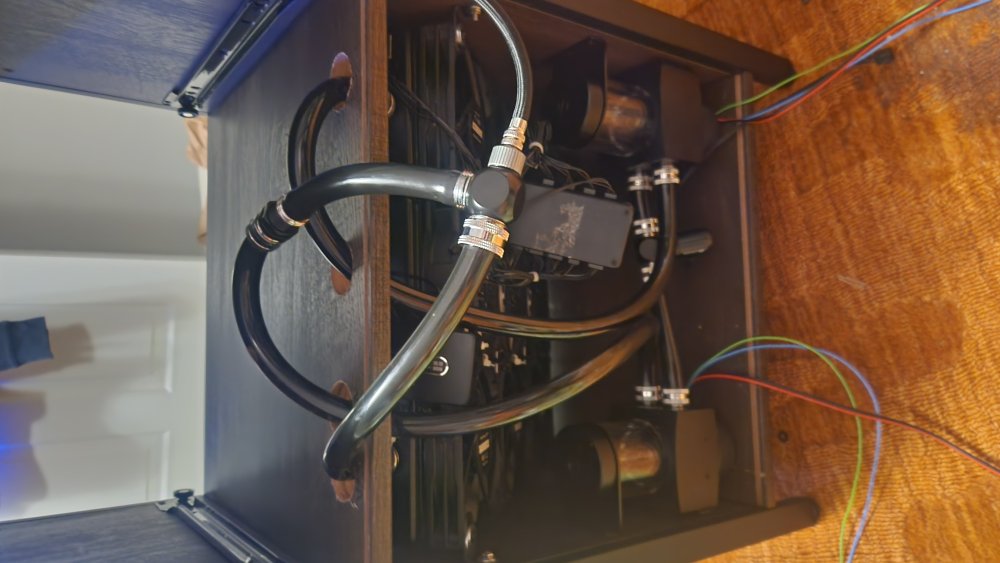
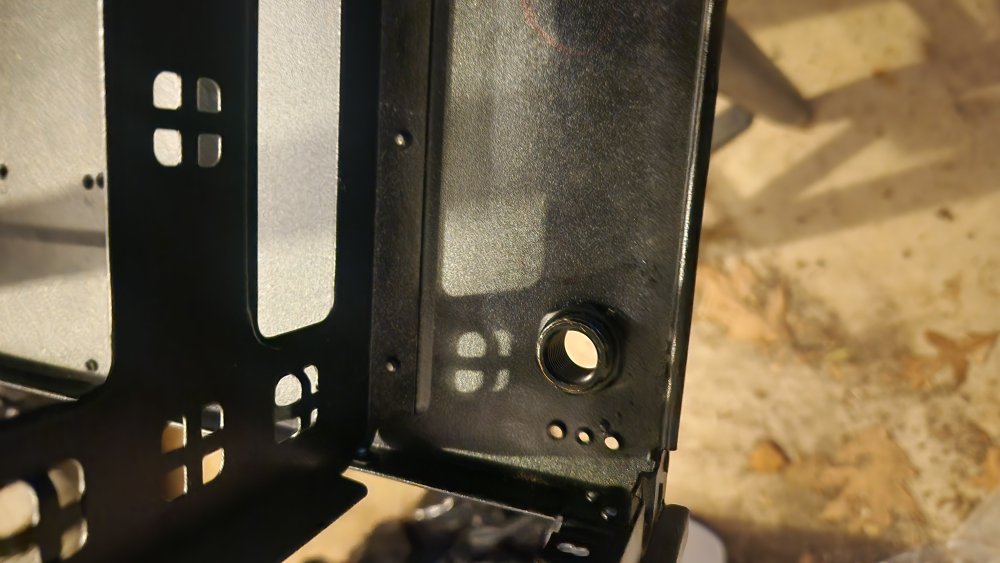
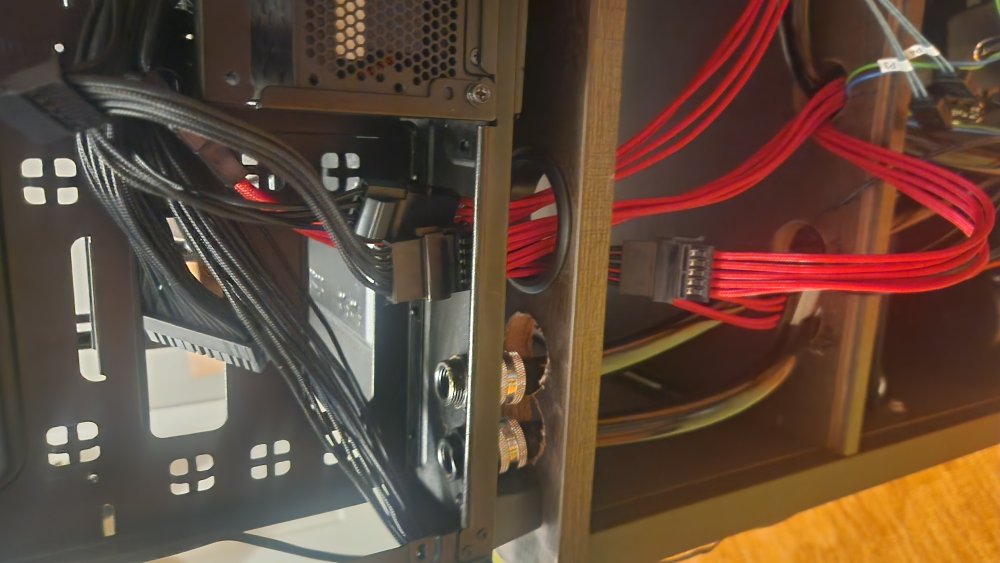
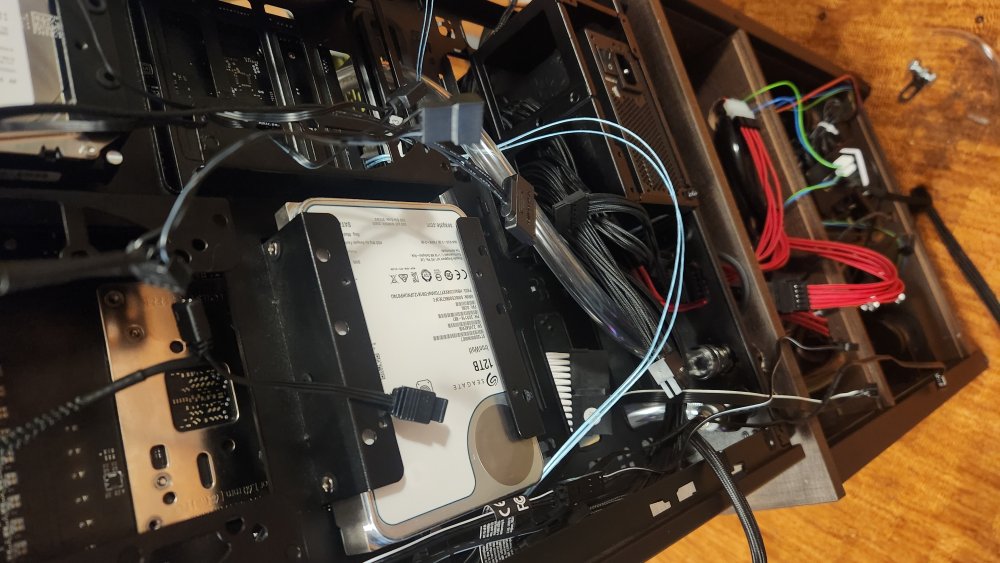
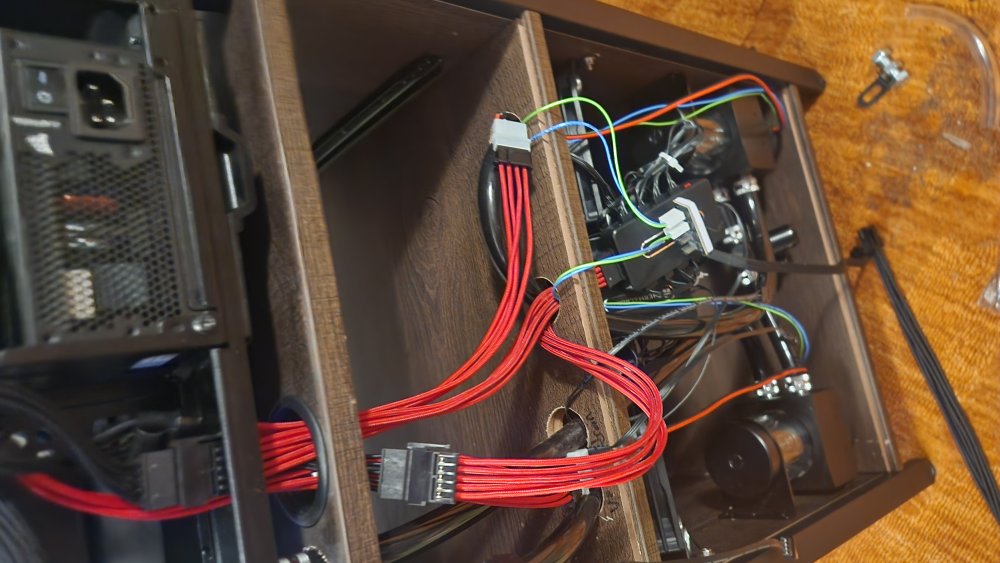
Hello everyone! Build log on the tower 5k, the now named watercooled pc project! Took me quite a while to upload this due to my break, but it is finally here, with log #02 coming close behind. The tower 5k is operational, and was made operation October 1st, 2025. It took a couple of days drilling and mounting and figuring things out, in this post I'll show all the progress photos I have and explain why I designed it a specific way. Here is a picture from June 29th, where I tested the system to make sure I had to return nothing before return windows closed. Ended up having to update the bios, which given the motherboard is high end and features a bios flash button was actually quite the breeze. Here is the 1080mm radiator, loaded up with all EIGHTEEN 120mm fans, including two SATA powered fan hubs. These are currently controlled by the motherboard but that will soon probably change. Will expand on that later. I am especially proud of the cable management. Dated July 25th. Here is a quick layout of where the 6 hardline fittings will be, included is the NVME waterblock which is removed from further versions. It will be installed in the final version, but right now I felt it put too much stress on the plastic NVME lock given the softline tubing would be hanging from it, as opposed to the hardline tubing which will hold itself up. Dated August 1st. Here is the table's started construction! I used dual pump instead of triple pump because I would rather have a spare, also for ease of building the loop. Both the pumps and radiator can be uninstalled if the need ever arises. Also featured is the drain port. Common waterlooping rules dictate that your pumps should be at the lowest point of the loop, because if they run without water they will be damaged, and the lowest point will seldom have air, and never enough to have your pumps running dry. A similar mindset exists with the drain port, since draining from the bottom of the loop works much better than the middle. Dated September 7th. Here I'm using an EKWB loop tester in order to make sure it has no leaks, I figured testing it in parts would be easier than doing it as a whole. You can also see where I had drilled holes for the loop to feed through the drawer compartment and towards the top of the table. Dated September 8th. Here are the holes drilled into the bottom of the tower 500, the leftmost hole is for the cables, the middle (which has a passthrough fitting placed onto it) is the return for the water, and the right hole is for the incoming water. Dated September 23rd. Here is preliminary testing, seeing if the cables fit and what their layout should be. Note the intake and exhaust coolant ports are in place and hooked up. In retrospect I also should have physically attached the case to the table in some way, I have concerns when I move of something being damaged from being pulled. Also notable is the Corsair 1000W SFX PSU. I ended up using the SFX power supply since it was not as long and would give me more space for the softline tubes in the future. The notable drawback is the cables are quite short, but I made that up with SATA and MOLEX extensions(which most pumps use), as well as the PCIE and motherboard Lian Li strimer kit. Dated September 25th. Finally , the loop is near completion! The tubing is in place, and it comes up from the pumps to the CPU, then to the GPU, then to the radiator and back through the pumps. loop order does not particularly matter, as tested by JayzTwoCents, Linus, and others. If memory serves this is when I decided against waterlooping the NVME until I switch the softline out with hardline. At this point I just wanted a desk setup, as my other pc is hooked up to my TV, more on that later. Dated September 28th. 20250929_001837.mp4 Here is my first testing of the loop, please ignore my heavy breathing I couldn't find my inhaler and had no replacement. But the loop worked with a temporary pump. Next was to finish everything. Dated September 29th. Here it is, the tower 5k working and running! Far from complete but a good basis. --------------------------------------------------------------------------------------------------------------------------------------------------------------------------------------------------------------------------- Build log aside, she still needs a good bit of work, namely the hardline tubing. I also really regret not buying all the RAM at once. We have all seen the RAM prices, especially for corsair kits, and for a project that has already lived up to the name '5K' I have little interest in spending a couple hundred dollars on more RAM. My current plan is to get RGB RAM with no memory, since that's $35 and I still have 48GB of RAM. Speaking of, here are the final specs! Hardware--------------- 9800X3D CPU 7900XT GPU* 2X24GB RGB Corsair Vengeance RAM MSI X670e Carbon Wi-fi Corsair MP700 Gen5 1TB NVME** Kingston NV3 Gen4 2TB NVME*** Seagate BarraCuda 8 TB 5400RPM HDD**** Seagate (Recertified) 12TB IronWolf HDD***** Corsair SF1000 platinum PSU *I plan to try to snag a 9070XT (a tiny bit less powerful than the 5080) before the prices start to skyrocket for VRAM. The only reason I did not use a 9070XT in the original construction is because there were no waterblocks for it yet. **This is the boot NVME, my pc boots up so fast it can be hard to access BIOS. *** This NVME stores games with long loading times like black ops, GTA, Mass effect, Security Breach, etc. **** This is for miscellaneous files like pictures or programs. ***** This 12tb HDD is for games so I have my ENTIRE steam library at my fingertips, which is actually pretty nice. Waterloop parts--------------- Corsair Hydro X Series XC7 (CPU waterblock)* Bykski GPU waterblock Corsair Hydro X Series XM2 (NVME waterblock) 2x Alphacool core D5/VPP pumps** Alphacool NeXXos 1080mm Nova (the 18 fan radiator) Corsair XR7 240 radiator*** XSPC Softline chrome fittings 7/16th-/-5/8ths sotfline black/clear tubing Corsair Hydro X Series XF Ball valve Thermaltake P1000 white coolant *I am considering replacing this with a different CPU block, we shall see. **I have a third spare in case one fails ***This has yet to be installed, I received it for Christmas, more later Miscellaneous parts--------------- ThermalTake Tower 500 EATX case Lian Li Strimer Plus V2 24 Pin (PW24-PV2) LIAN LI Strimer Plus V2 8 Pin (PW8-PV2) 4x AsiaHorse COSMIQ 120mm fans (2 forward. 2 reverse) 14x Darkrock 120mm fans 6s Okinos ARGB 120mm fans 2x Thermalright Integrated Fan Hub EZDIY-FAB Vertical GPU Mount Airgoo 16-Port Signal RGB controller AsiaHorse 12VHPWR Cable Extension Kit* *This was used for the EPS connection since the SFX PSU didn't have the cable length External parts--------------- CyberPower CP1500AVRLCD3 Uninterruptible power supply SANSUI 27 Inch WQHD 2560 x 1440 IPS* 2x KTC 27 Inch WQHD 2560 x 1440 100Hz IPS** Yxk Portable Monitor 15.6 Inch 1080P*** G.SKILL WigiDash PC Command Panel 2x WALI Single Monitor Mount (for the KTC monitors) Powered USB Hub, atolla 7-Port USB 3.0 hub Corsair MM700 RGB Mouse pad Amazon Basics USB-Powered Computer Speakers**** CORSAIR K70 CORE RGB keyboard Redragon M908 Impact RGB mouse ManbaOne Wireless Xbox controller TONOR USB Podcast Microphone***** HyperX Cloud Alpha Wireless USB Foot Pedal PC 3 Key *Main monitor, games are played here **Side monitors ***Bottom discord monitor ****they suck, but I never use speakers. *****Microphone courtesy of Halo --------------------------------------------------------------------------------------------------------------------------------------------------------------------------------------------------------------------------- This project has been months in the making, and I'm glad to have such a good final product, complete setup pictures will come tomorrow with the new radiator. I will say watercooling is crazy for temperatures, my 9800X3D has never gone above 54C, and my GPU basically never goes above 40, no matter how hard I push it. I have done no overclocking, nor do I need to if I'm honest, the only game I have struggled with was beamng drive, which is of course a simulator. I am considering a dual GPU setup using the steam lossless scaling. I have to do more research, but what I have now is the most powerful PC on the server! My near future plans also include a Aqua Computer Quadro Lüftersteuerung, which is a small controller for fans and PC thermal sensors, my current notable problem is noise, and I hope this will be able to lower the 18 radiator fans, especially once the 240mm is in, since that will lighten the cooling load. Also obviously I still plan to do hardline tubing, but who knows when that will happen. Next update will be the 240mm radiator, followed by the aqua computer controller and false RAM most likely. The current cost is sitting over $5,000, closer to $6k once you factor in everything else. I will maintain what I said in the last post, DO NOT WATERCOOL. I only did it because I have always longed for a looped build, but it added many points of failure, a lot of frustration, and frankly, around $1500 to the budget.


-
 MILKANDOREOS reacted to a post in a topic:
Financial Failures - Life Status, Short/Medium-Term Future of Chaotic United
MILKANDOREOS reacted to a post in a topic:
Financial Failures - Life Status, Short/Medium-Term Future of Chaotic United
-
MILKANDOREOS reacted to a post in a topic:
Financial Failures - Life Status, Short/Medium-Term Future of Chaotic United
-
.thumb.jpeg.69981997b13d38aa4be7f363158c3680.jpeg) We support you halo, you've built a strong community that will thrive.
We support you halo, you've built a strong community that will thrive. -
I should have all the parts by this time next week, depending on when TitanRig ships my fittings and pumps. Very exciting.
-
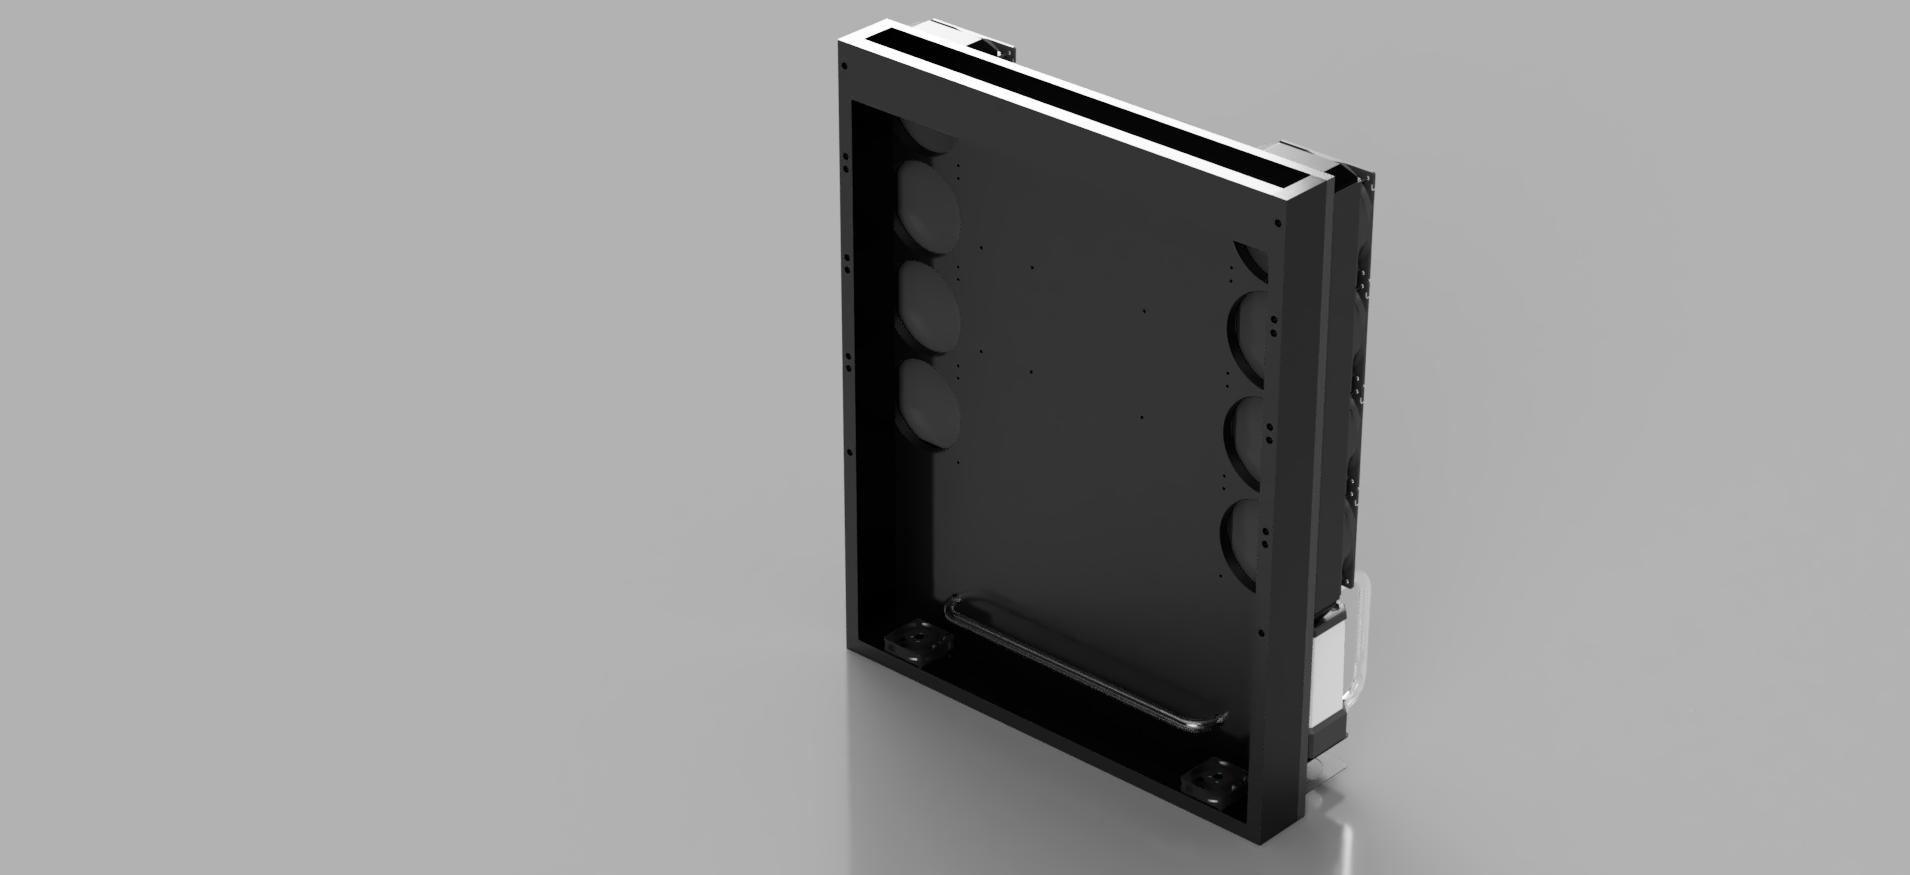
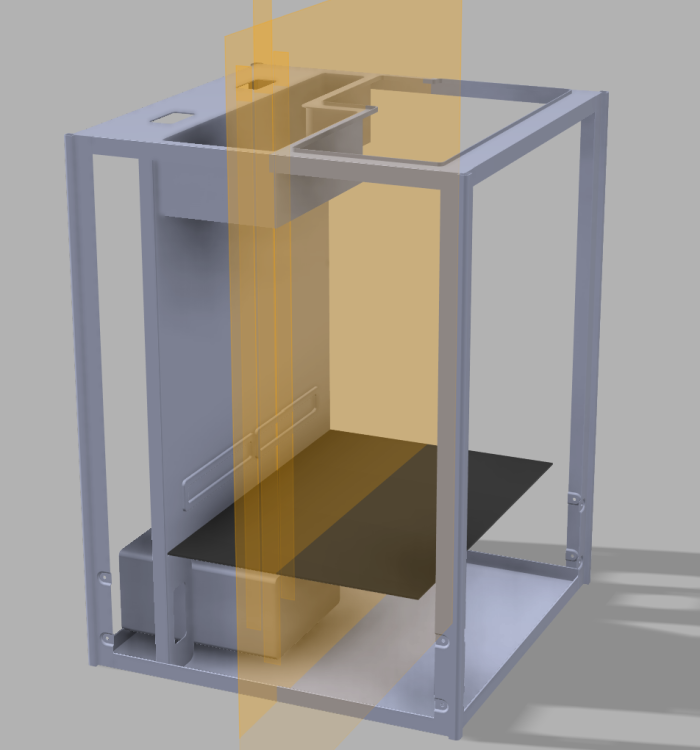
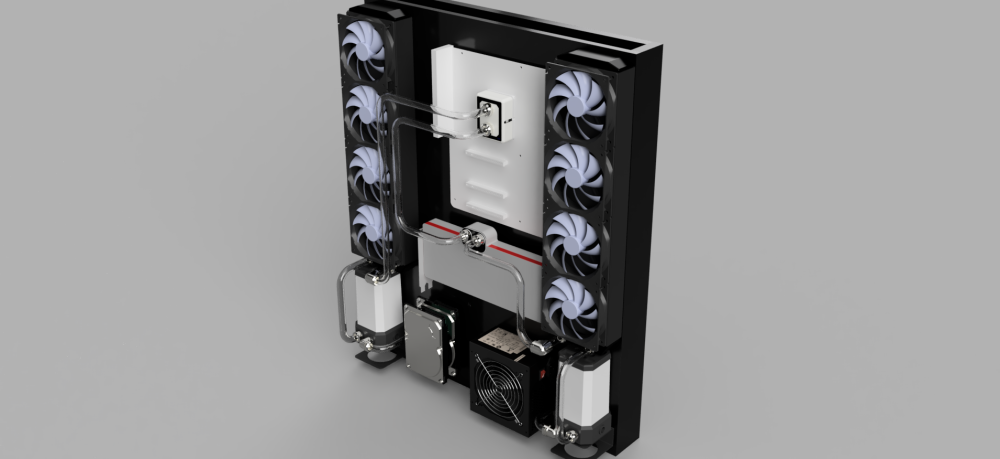
Wow this feels familiar. Hello all this is Milk/Sarilland/Sam. As many know I have a bit of an obsession with computers, and having one that is both awesome and unique, exemplified by my choice of the Thermaltake tower 500 for my previous builds. Finally that has culminated in this project. Currently un-named and borne out of necessity. This project origins predate the previous log for the now defunct sleeper pc. It's origins lie with the wall PC. The wall PC was my decision to enter into watercooling, something I always wanted to get into. I was scared though, both by the price and the inherent danger of running liquid next to expensive components. Onto the topic, you can find many wall PCs, they have existed for some time, and it is mostly just the pc parts laid flat against the wall. Included are the renders of the planned wall PC, which got to the point of having a frame assembled out of wood. Due to real life circumstances I'm moving to a different room (which is much larger) but does not have the space for such a PC. So on the spot, the wall PC died. I was left wondering what to replace the pc with. I was looking into an asus tuf fishtank pc and distro plate- the problem remains cooling. Until it struck me and I immediately set upon the idea detailed here. Here is the plan: I will use the tower 500. It is a beautiful case, however it will not easily or majestically fit the radiator needed to support the components. I was inspired by this video: In which the tubes rise up from the plate to cool the components and return to the hidden depths. My solution is built on this idea but more elegant and sly. The tower will only have 6 fans (4 visible and 2 in the rear to maintain positive pressure), the minimal needed to cool the RAM and VRM. (could probably get away with two just exhaust on the top). The liquid will be pumped through the loop and- to the table the case is sitting on. Which will be mounted with a modest Nexxos XT45. with it's full 18 fan (all 120mm, this radiator is absurd and I fucking love it) compliment. Kind of overkill but that is already the case when water-cooling. I'd imagine on idle the fans may not even need to kick on. Here is the current parts list: ThermalTake Tower 500 Ryzen 9800X3D MSI X670e Carbon Wi-Fi 96GB (4x24) DDR5 RGB Vengeance Ram RX 7900XT gen5 MP700 Corsair NVME (1TB) (most likely more drives) TBD on the PSU 2x Alphacool core D5/VPP pumps (with an extra one on hand in case a pump fails, or all 3 if 2 aren't powerful enough (they should be)) Alphacool NeXXos 1080mm Nova Bykski GPU waterblock Corsair XC7 CPU waterblock Corsair NVME waterblock (Yes I am waterblocking the NVME) the intake fans may also be fitted with a 240mm radiator if I am so inclined. absurd amount of cooling. Original plans had quick disconnects between the case and the fittings, but they have a lot of resistance and I didn't see them being useful enough when I'd probably want to drain the loop for such things regardless. This PC will be an absolute beast and will look beautiful while doing it. Now to discuss previously mentioned sleeper PC. The card I planned to use (6750XT) was sold to a friend as her 1650 fuckin died from GPU sag. I still plan to build a second pc around my current parts, most likely with a 7700XT or 9060XT 16GB. Much like the pc, the project itself is in a deep slumber, and if my other projects are anything to take examples of- Hello 1:6 Stuart tank it will remain there for a LONG time. Why is this project any different? For one: cost. This project has proven to be EXORBANTANTLY expensive. Side note: Do NOT water-cool, it added well over $1,000 to the budget, and while it is effective seldom is it worth the price. Other projects have been expensive, however as of today. all parts needed have been ordered. So this is truly a "hey I got everything, let's wait for it to get here" I'll do a full spread once I get everything shipped in. Construction will not begin until mid July most likely, as I need to do a lot of cleaning and moving, as well as helping my bestie with her PC. I hope to post updates and I would love to hear names for this PC. I'm currently thinking "the Tower 1080" in reference to the case and radiator used. The next update will most likely be a full view of all the parts.

-
Also quick update with some sloppy edits of fan placements and also airflow (the PSU will act as exhaust, may replace the internal fan with noctua or bequiet)


-
 MILKANDOREOS reacted to a post in a topic:
Sleeper PC Build log #00
MILKANDOREOS reacted to a post in a topic:
Sleeper PC Build log #00
-
Quick update: the seller on ebay got back to me and I have successfully returned the motherboard. That is all for now, I do expect to get some money here soon so I may buy the motherboard and CPU to start building. Will also do more research on the power supply, but can use the one I have in the second pc for now.
-
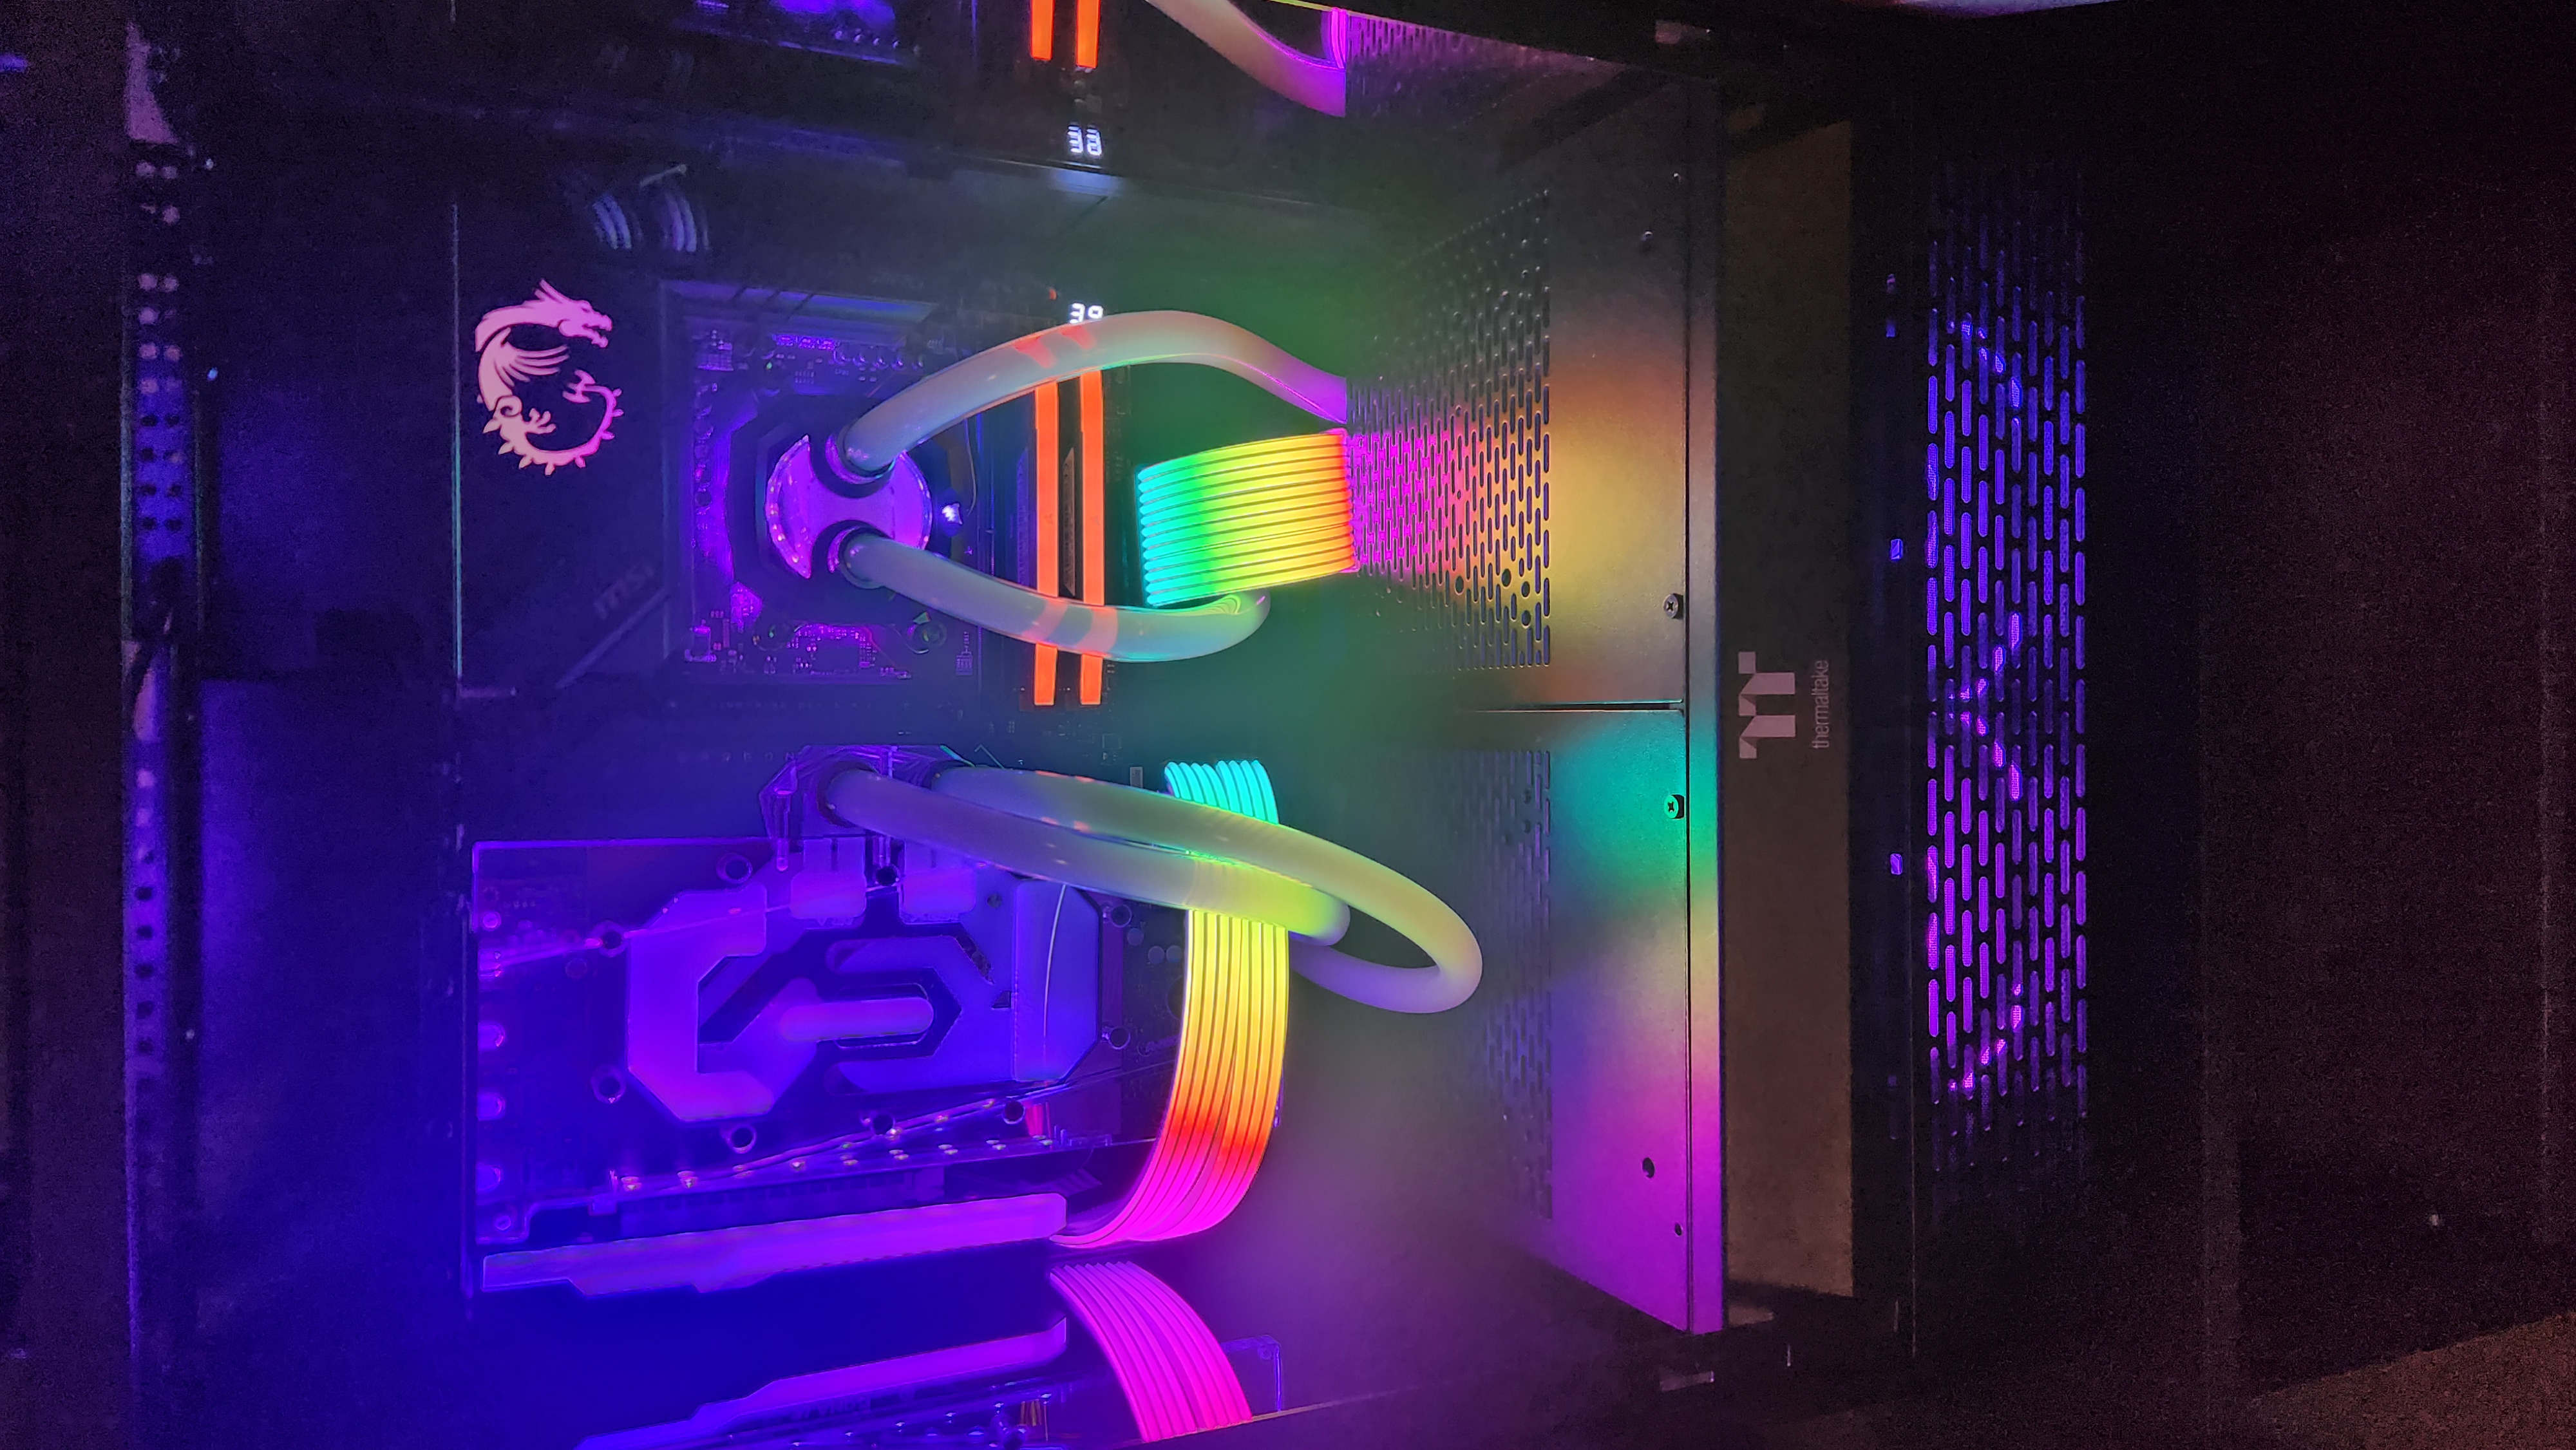
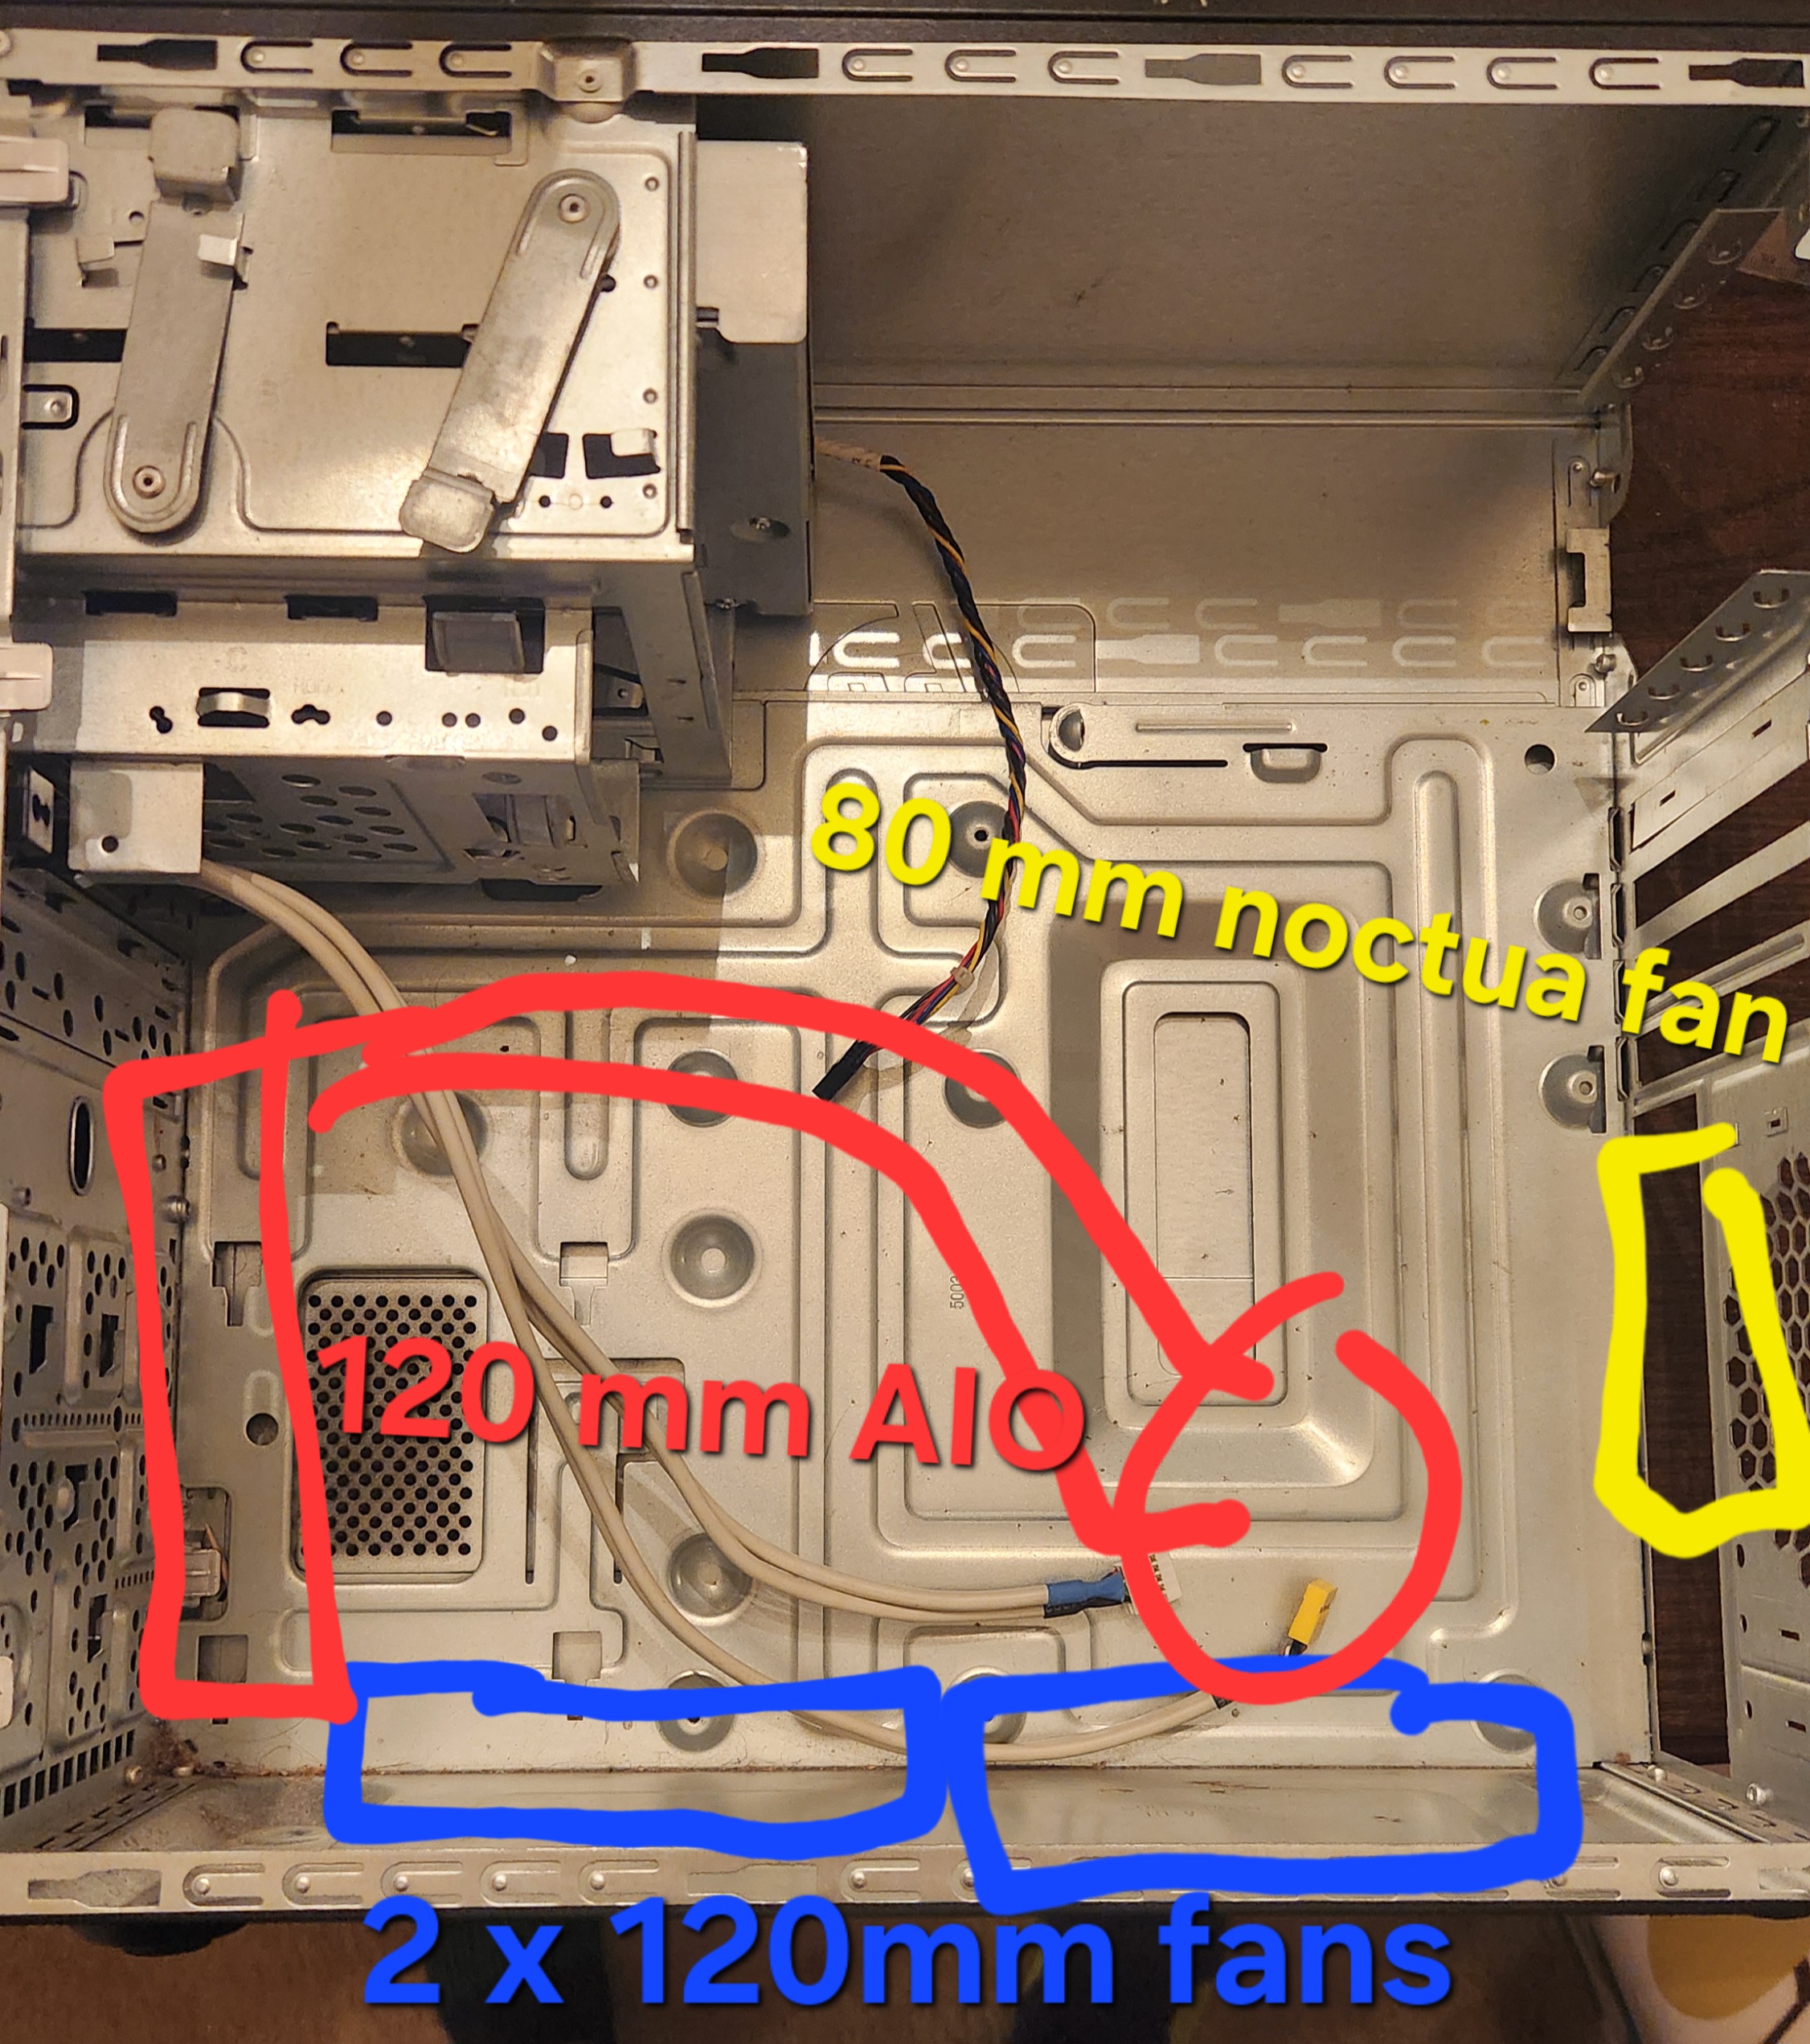
Hello all! This is Sam/Milkandoreos/Sarilland/ I have too many names. So I have my main pc with a ryzen 7 5800x and an rx 6750XT. (https://pcpartpicker.com/list/4fvcxg) However I do have a second PC with an RX 580 and ryzen 5 1600, which is meant to be sold to my friend. So when that happens I want a second PC, both as a backup and to use with my 50" television. So I was originally looking at ITX cases when I realized I wanted an optical drive. Now I could buy a case with a 5.25" bay, but why do that when I already have 3 old PC cases. Thus, a sleeper PC. Specifically I will be using an old HP pavilion desktop. This was originally my brothers but I did use it for a while before upgrading to a Dell Inspiron for a year or so, getting my first job, and evolving into a PC nerd and building my first PC. I do have my old PC case but it's a slim and I don't wanna deal with that. Plus this is much bigger. Budget is a pretty big concern right now, I'm meant to be saving for a trip early this year so this project will probably be a while in the making. Worth it though! I have a basic idea for a lot of the specifics, for example; I plan to use AM4 as opposed to AM5 for it's cost, this will always be secondary to my main gaming PC, and thus will be less powerful, so this could inherit my ryzen 7 5800x and 6750xt, along with the RAM when I upgrade her to am5 and better parts. Future proofing is cool and honestly I don't play modern games that much, I stick to indie and older titles because I seldom will spend $60 on a game. AM4 also costs way less, as does DDR4. I made a flash purchase of an ASUS PRIME A320M-F, before then realizing it had no RGB and no Pump headers, but it was $51, so if I can't cancel the order it won't be the end of the world. If I can't I would love to get some sort of ARGB 5v controller. Another note is that I plan for the inside to be white while the outside is black, it works better with RGB and nicely contrasts the old black exterior with the new white interior. If I can cancel the order here are the current technical specs: MSI B550M PRO-VDH WiFi ProSeries TEAMGROUP T-Force Delta RGB DDR4 16GB (2x8GB) 3200MHz AMD Ryzen 5 5500 6-Core, 12-Thread RX 580 8GB (god I love this card) and a 650-750 PSU, fully modular given the size constraints. The current plan is to have 2 or 3 120mm intake fans, currently I plan on going with an 'infinity mirror' design for what I can, so I'm looking at the asiahorse cosmiq (1) as I have them in my main build in black and love em, they also have a reverse so they look pretty. If you didn't know or couldn't tell; I prioritize aesthetics. However, with the exhaust fan that definitely isn't the case as I plan to use a noctua (spin on that thang) 80mm grey fan (2), as it's near impossible to find white ARGB 80mm fans and this thing is gonna have it's work cut out for it, given it and the PSU will be the ONLY exhaust fans. The CPU should stay nice and cool though, as the current plan is to use a 120mm AIO. (3) The addition that will make many people cringe is the NVME coolers I plan to use, which are infinity mirror RGB (4) I have one in my main pc and I like it, so why not get another? Another possible addition is RGB cables, but given this is a one chamber case that may just be too much, the lian li definitely wouldn't fit, especially if I keep the optical drive cages. Cable management will be an uphill battle, most likely will require a lot of 3d printing but thankfully I am a CADD god. https://www.amazon.com/dp/B0CXST23P2/ref=twister_B0CGLMBQMN?_encoding=UTF8&psc=1 https://www.amazon.com/gp/product/B00KF7MVI2/ref=ewc_pr_img_3?smid=A1Z5H6ZGWCMTNX&psc=1 https://www.amazon.com/dp/B0C23HZX8Y/?coliid=IC72XJ3J9K73E&colid=1DF6CU1BDKFVJ&psc=1&ref https://www.amazon.com/dp/B0C7RJG7Z5/?coliid=I2CT59N0O2OYVH&colid=1DF6CU1BDKFVJ&ref Quick ideas to be thrown out in log 00: AM4 Micro ATX motherboards are going to be $200+ in white, and when that's twice the cost of the GPU that makes no sense, so I'll be using a black, but that doesn't go great with the aesthetics, according to a few other people, motherboard heatsinks CAN be painted (https://linustechtips.com/topic/388578-is-it-safe-to-paint-your-motherboard-heatsinks/) so I'd get some good white paint for that and the case. I'm also inspired by the NZXT motherboard (https://www.amazon.com/NZXT-Z790-Motherboard-N7-Z79XT-B1-connectivity/dp/B0BG18N3FX/ref) which makes everything look really clean! So I plan to paint the heatsinks white and maybe 3d print or otherwise create some contraption that covers up most of the black motherboard, if I 3d print it I can form factor it to most of the parts like the GPU and CPU cooler, so that will be hype. That's the end of log 00.
-
You would actually say this in public? Bro it's 2024 smh /j
-
Mods for age of rebirth 2
MILKANDOREOS replied to TheHumanMachine_YT's topic in Minecraft Modded: Age of Rebirth
Other suggestions: Jenny mod Mob talker mod -
MILKANDOREOS reacted to a blog entry:
4/6/2024 Minecraft Update
-
-
 AwakenedRage reacted to a status update:
Im lonely *dab*
AwakenedRage reacted to a status update:
Im lonely *dab*
-
Yes
-
 MILKANDOREOS reacted to a status update:
Fuck cancer. Rest easy technoblade 💔
MILKANDOREOS reacted to a status update:
Fuck cancer. Rest easy technoblade 💔
-
MILKANDOREOS reacted to a post in a topic:
is the server dead?
-


.jpg.685ccfa5f263b764d5eae8ba55d4fb5c.jpg)
.jpg.b64fdf0b584497a4a690bcd1a05422cb.jpg)